Creating Accessible Data Tables
Microsoft Office
In Microsoft Office products (such as Word, win the example below), after you create a table, you will need to define the first row as being a header row.
To define the header:
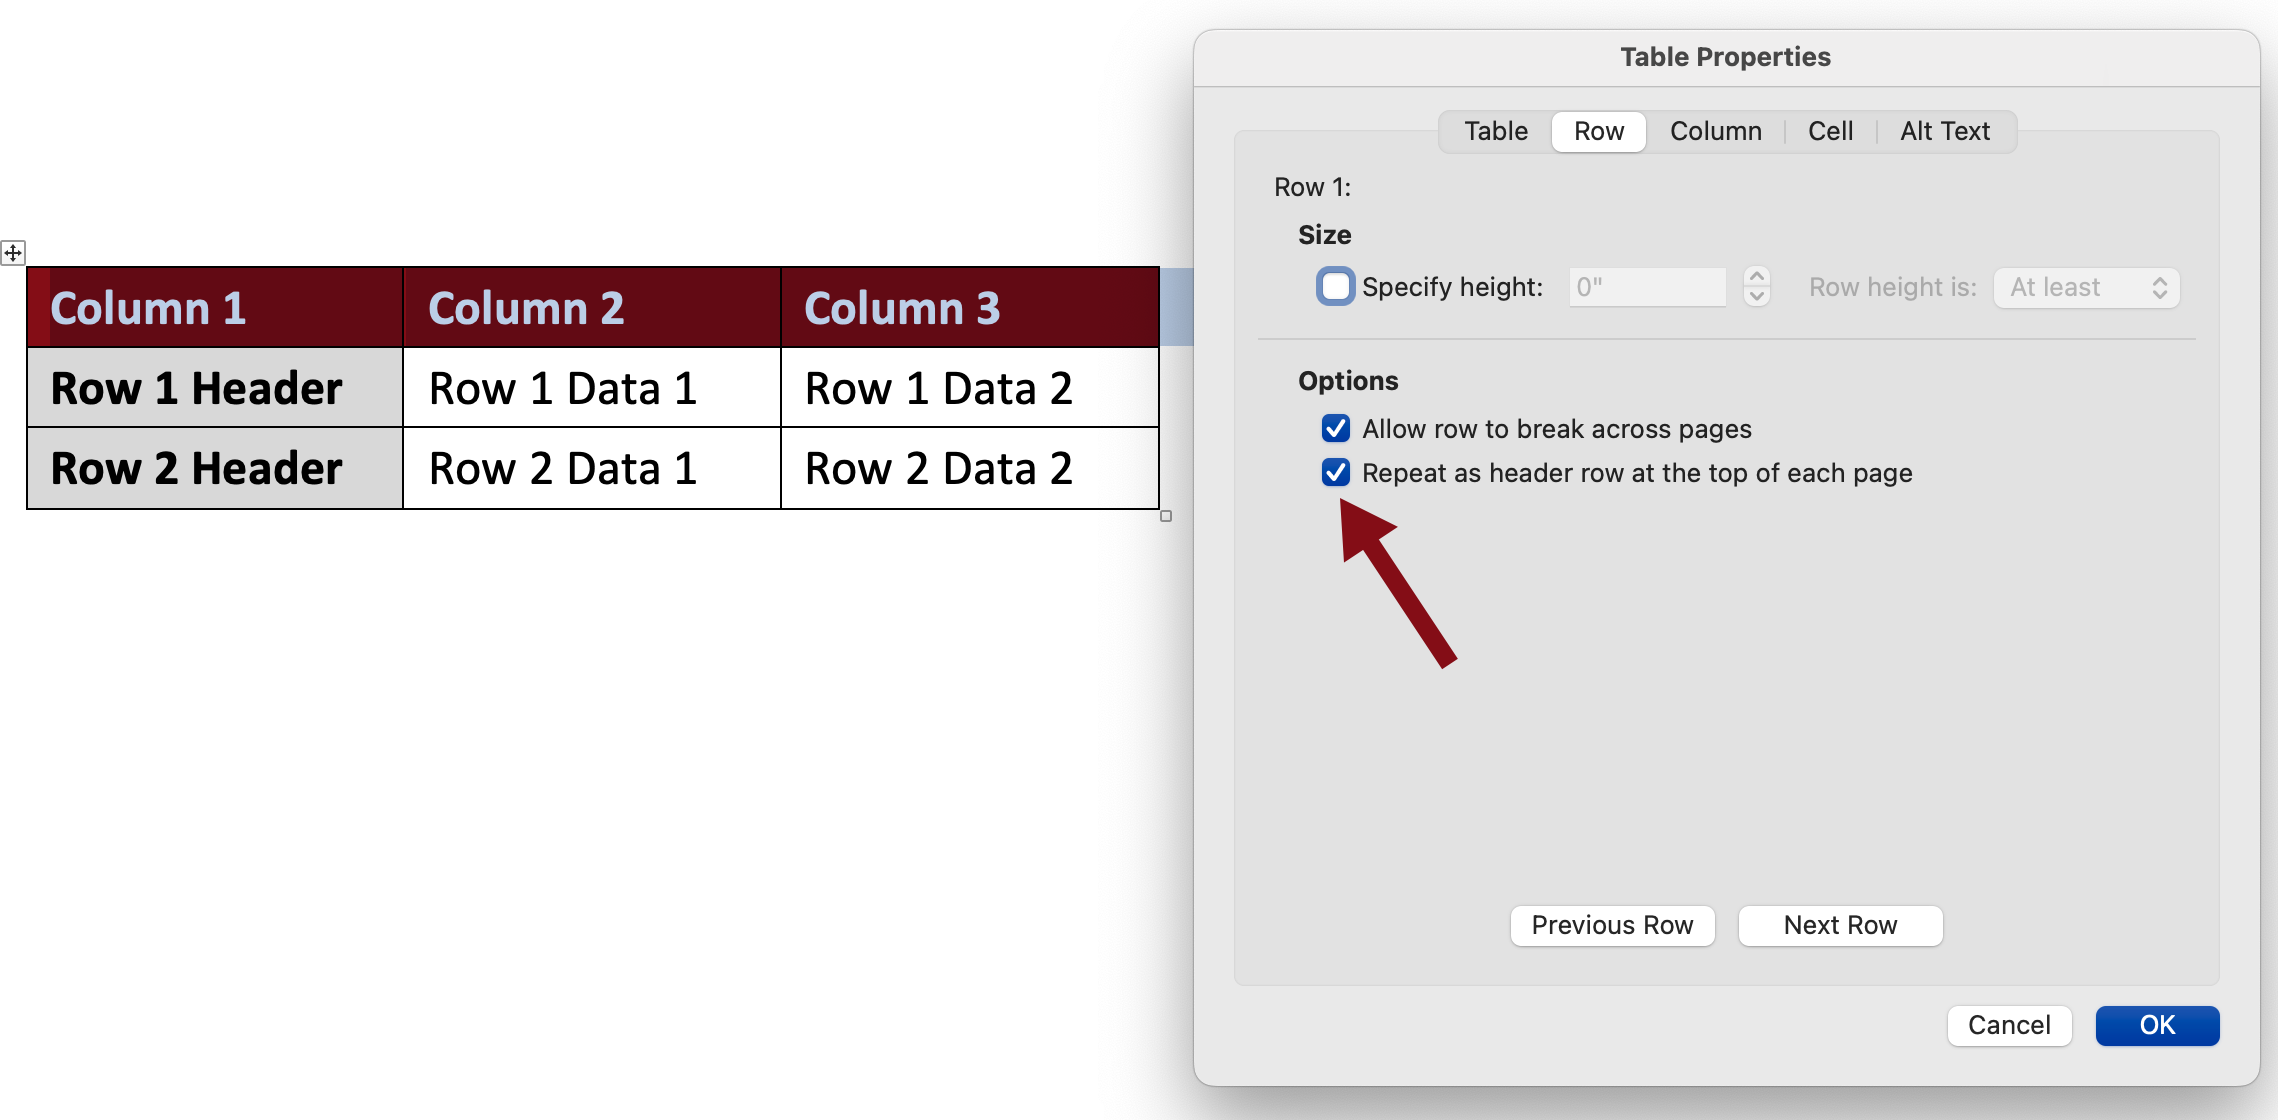
- Open the table properties dialog by using the right-click function or click shift-F10 on the table and choose "Table Properties."
- Choose the Row tab, and click "Next Row" until you are focused on row 1.
- Check the "repeat as header row at the top of each page" box.
Only the first row can be specified as the column headers, and Microsoft products will assume that the first column is the row headers — you cannot change this setting. Keep this in mind when designing your tables, as this simple layout is the only accessible layout you can create with these tools.
In addition to the table structure, there also needs to be something that functions as the caption for the table or the table 'title.' Assigning a title ensures a screen reader user will be able to navigate different tables on a page.
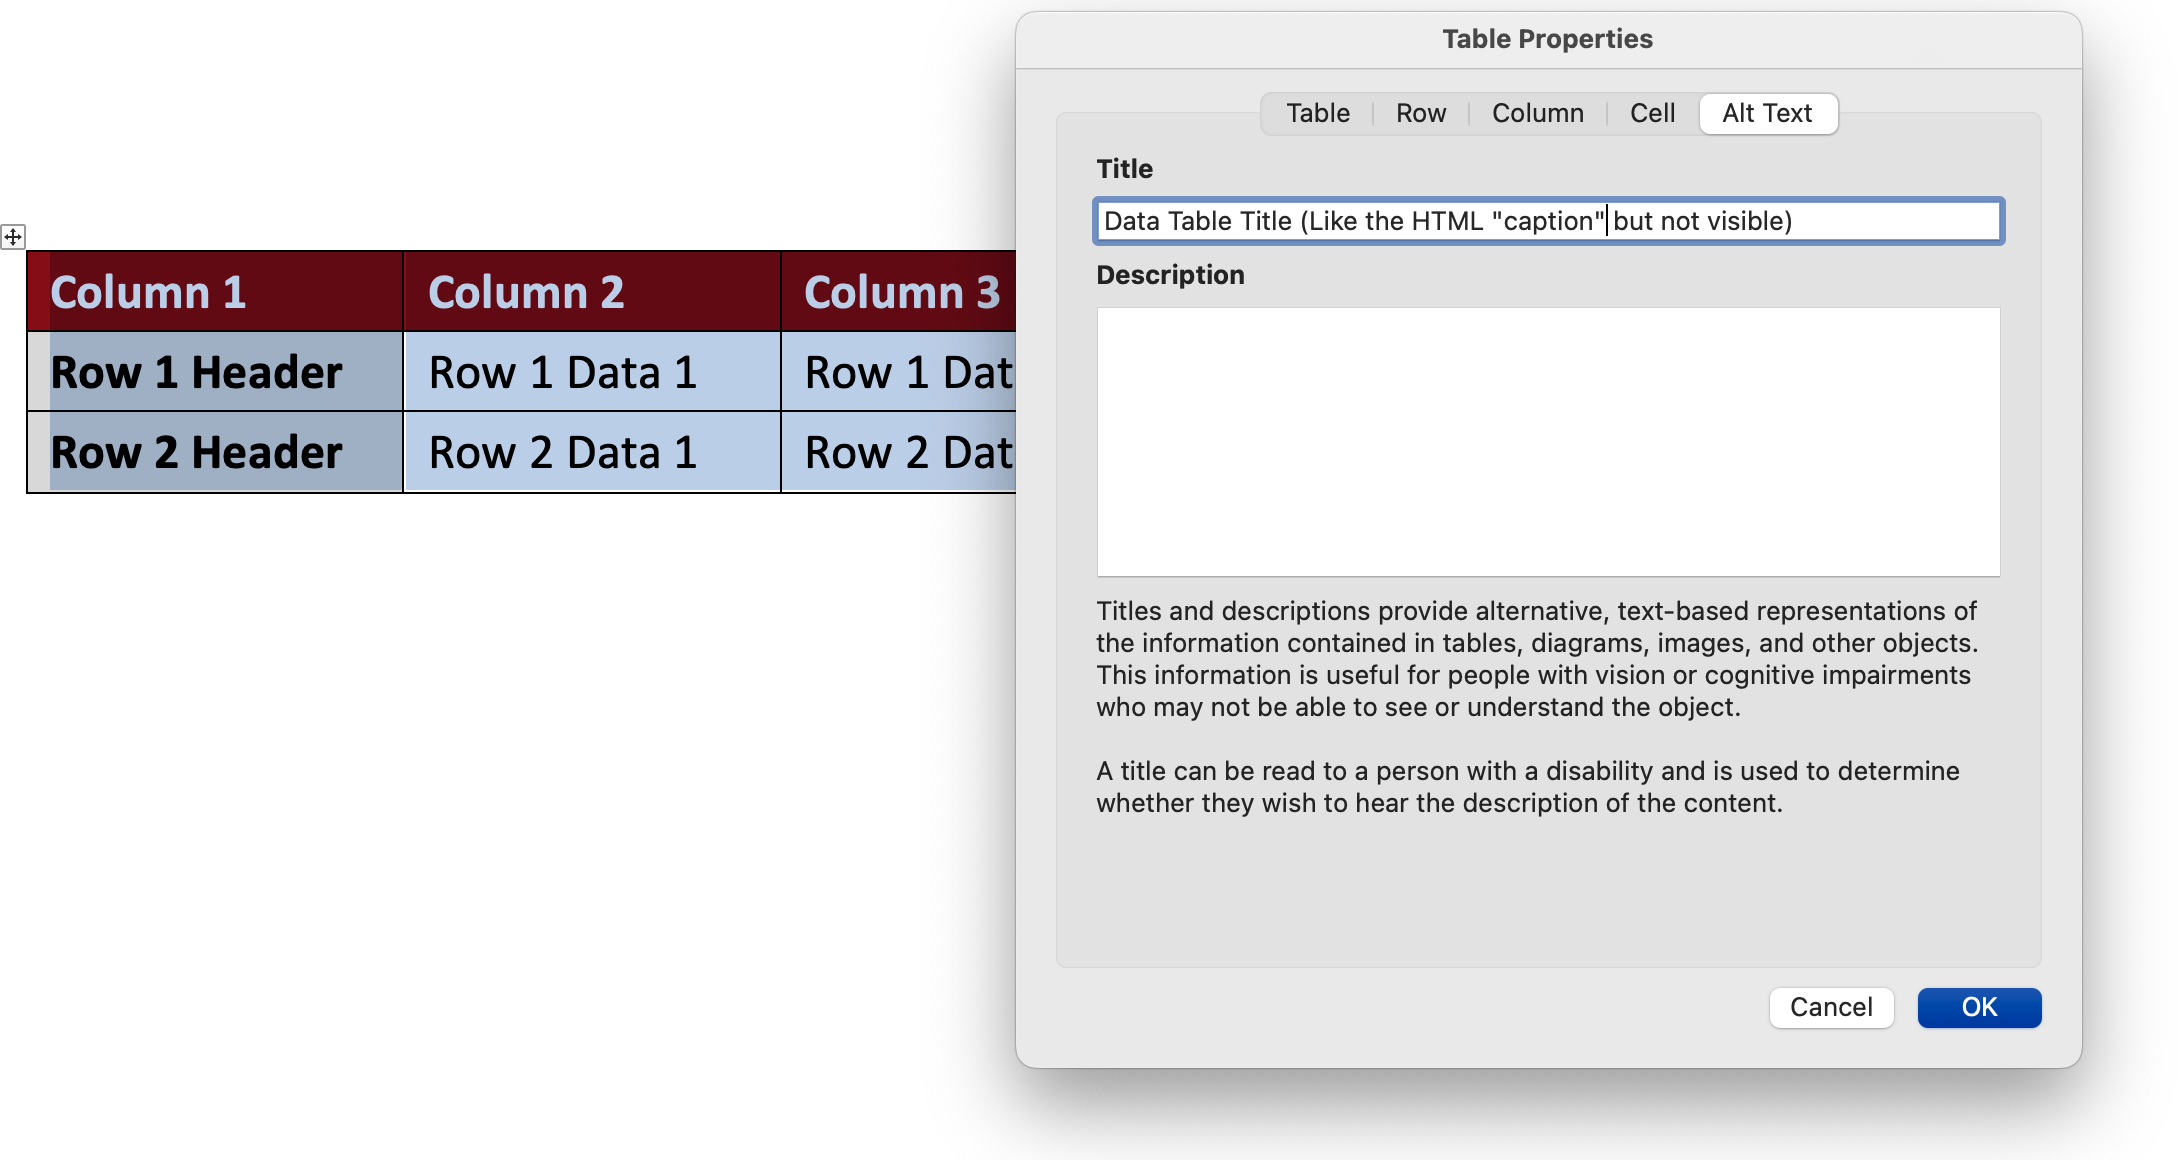
To title your table:
- Open the table properties dialog by using the right-click function or click shift-F10 on the table and choose "Table Properties."
- Choose the row Alt Text tab.
- Type in your title in the Title text box.
- Click "OK."
HTML
In HTML, there are several methods for creating the table that provide greater flexibility to how the tables are constructed. For example, the row header. The simplest model looks like the following. Note that the THEAD section contains TH with a scope="col" (for column) and the first cell of each row has a TH with scope="row". There is also a caption which defines the name of the table. While there are a few variations on how exactly you achieve this with your code, these are all the parts that must be present to create an accessible table.
<table>
   <caption>Table Header</caption>
   <thead>
      <tr>
         <th scope="col">Column 1</th>
         <th scope="col">Column 2</th>
         <th scope="col">Column 3</th>
      </tr>
   </thead>
   <tbody>
      <tr>
         <th scope="row">Row 1 Header</th>
         <td>Row 1 Data 1</td>
         <td>Row 2 Data 2</td>
      </tr>
      <tr>
         <th scope="row">Row 1 Header</th>
         <td>Row 1 Data 1</td>
         <td>Row 2 Data 2</td>
      </tr>
   </tbody>
</table>
Breaking this down, there is a THEAD section that contains the column headers, which are TH with a scope="col". Then there is a TBODY section that contains all the data. In each row, there is a TH with a scope="row", which in this case is in the first column, but could be in any column as long as there is one per row. There is also a CAPTION element that creates a title for the table and is what is used by screen readers to identify the different tables on a page.
This is the basic structure that all tables should follow, although there are some variations of this structure that will still be accessible.