Tables in Microsoft Office
Creating tables
In Microsoft Office products, after you create a table, you will need to define the first row as being a header row. In Microsoft Word, tables should be used for data and not layout purposes. An accessible table includes:
- At least one header (row and/or column).
- An Alt Text description summarizing the table.
Header
To define the header:
- Open the table properties dialog by using the right-click function or click shift-F10 on the table and choose "Table Properties."
- Choose the Row tab, and click "Next Row" until you are focused on row 1.
- Check the "repeat as header row at the top of each page" box.

Only the first row can be specified as the column headers — you cannot change this setting. Keep this in mind when designing your tables, as this simple layout is the only accessible layout you can create with these tools.
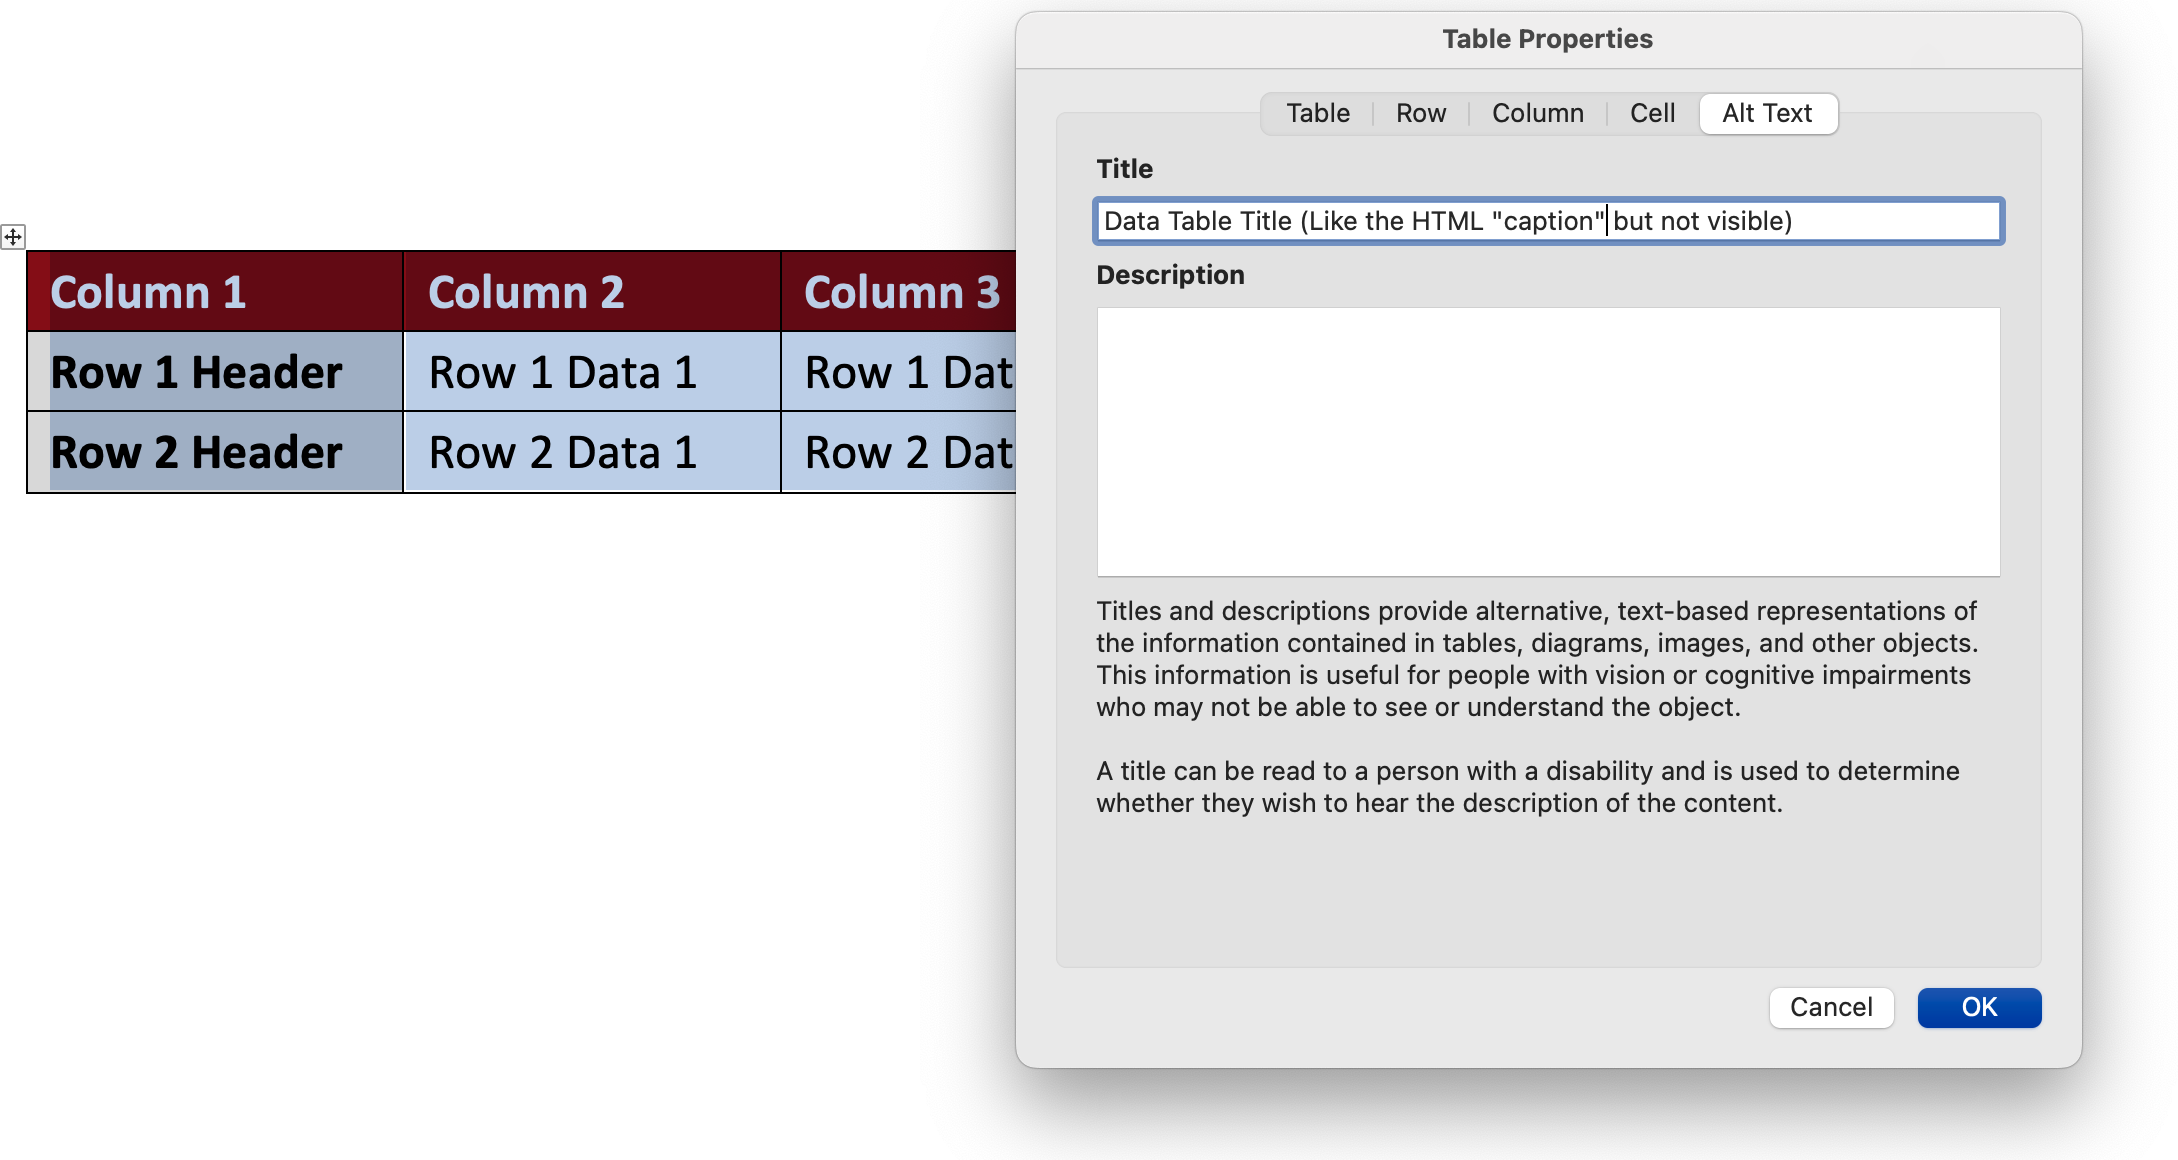
In addition to the table structure, there also needs to be something that functions as the caption for the table or the table 'title.' Assigning a title ensures a screen reader user will be able to navigate different tables on a page.
Title
To title your table:
- Open the table properties dialog by using the right-click function or click shift-F10 on the table and choose "Table Properties."
- Choose the row Alt Text tab.
- Type in your title in the Title text box.
- Click "OK."
Last modified