Captioning in YouTube
To ensure video accessibility for deaf and hard-of-hearing audiences, accurate captioning is essential.
While YouTube's auto-generated captions provides a baseline, they can contain errors and lack punctuation. Manually editing these captions for accuracy is necessary. Beyond improving accessibility, corrected captions can be downloaded to create a transcript or be used on other platforms. YouTube also supports uploading professionally created caption files for a higher standard of quality.
How To Add Captioning In YouTube
Adding a YouTube Video
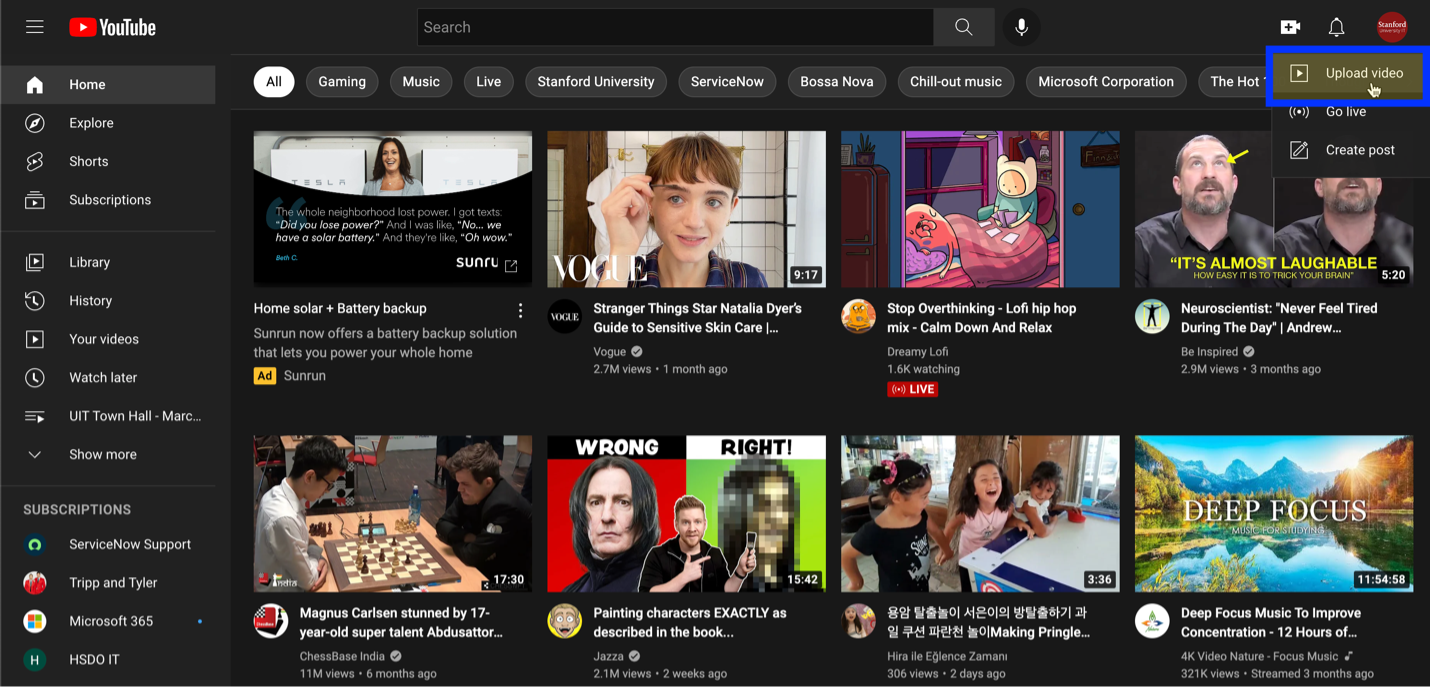
Select the plus sign and choose upload video. You’ll probably want to set the visibility to unlisted or private. The auto generated captioning will take up to 24 hours to be created.
Editing YouTube Captioning
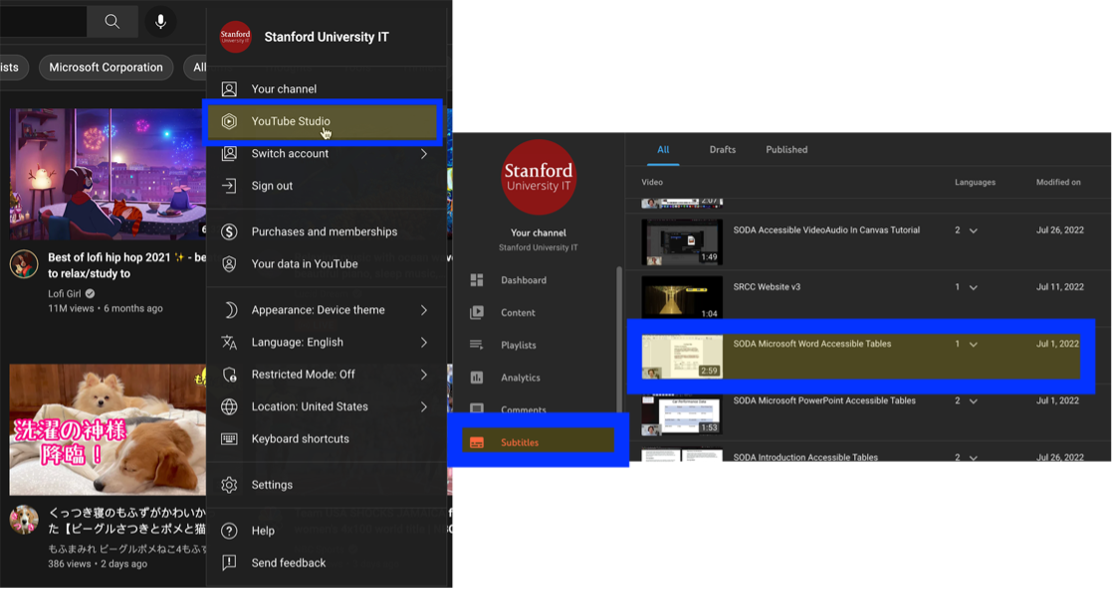
In YouTube select your profile and choose YouTube Studio. Select subtitles, and the desired video which the auto generated captioning needs to be edited.
YouTube Editing Auto Generated Captioning
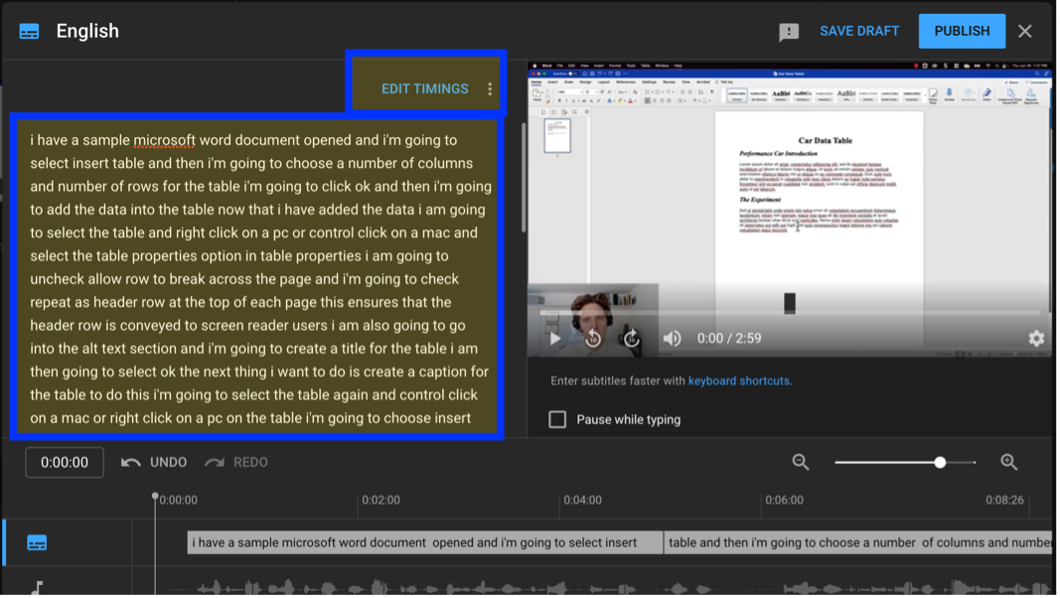
Select the duplicate and edit button next to the English (Automatic) subtitles. It may not be available if the video was recently uploaded.

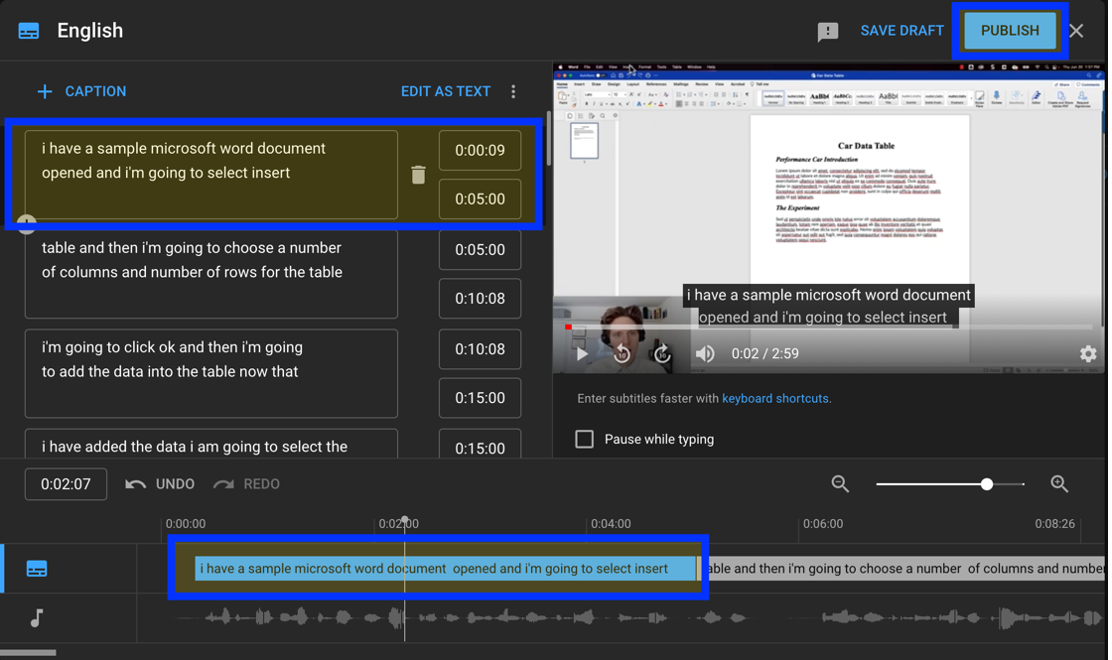
The transcript should probably be edited first. It is important to add punctuation and correct any errors. After that is complete select the edit timings button to edit the individual captions.
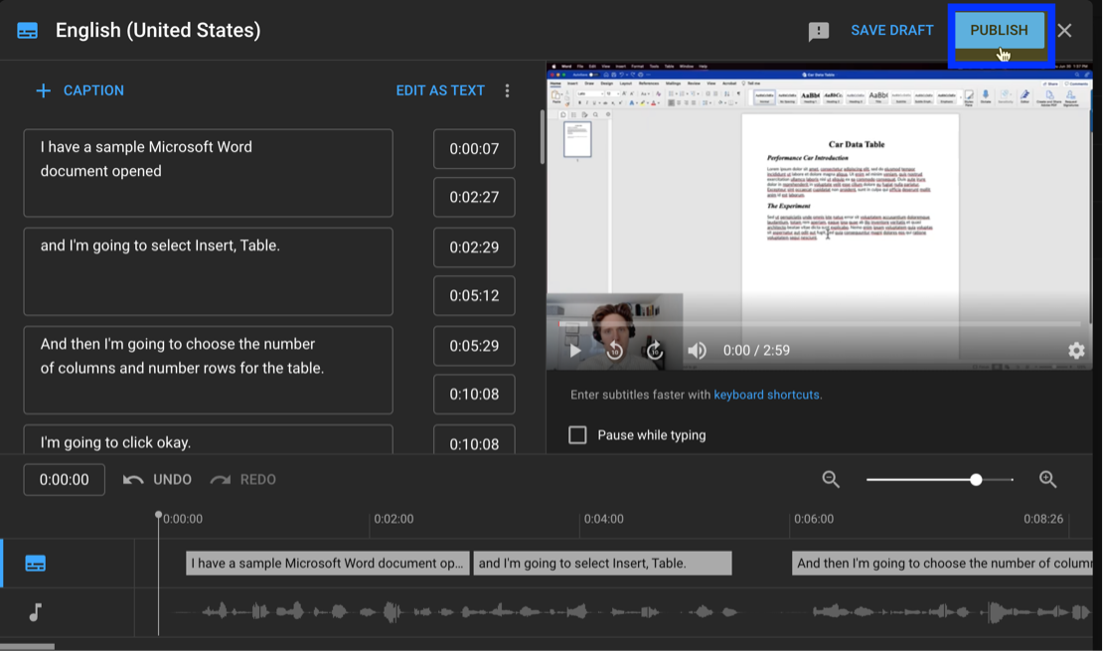
Each individual caption can be edited and how long the caption is displayed on the screen can be changed. The timing can also be adjusted by selecting an individual caption in the timeline and dragging on it to shorten or lengthen its display time. Select publish to save your changes.
There should be a new subtitles option that is listed as published. This means the edited subtitles will now be available to anyone who watches the video.

YouTube Download Edited Subtitles
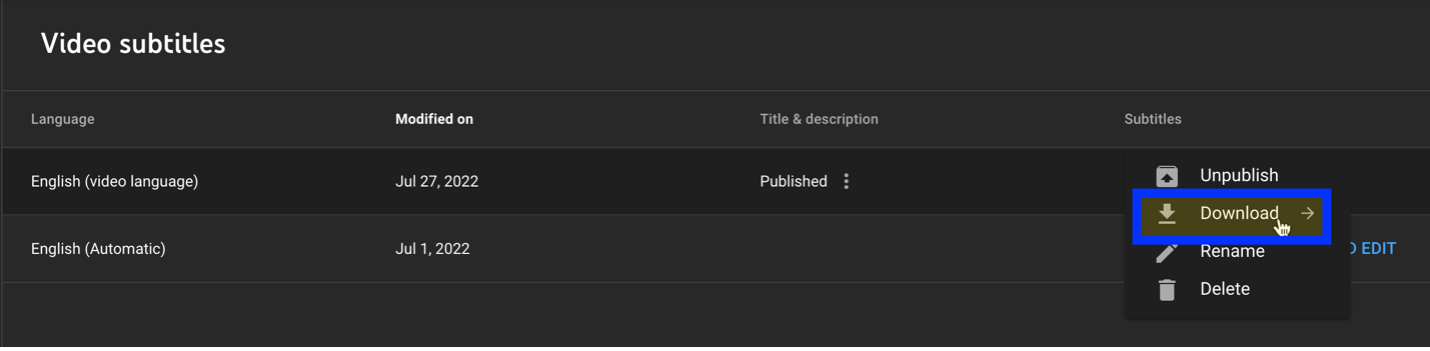
To download the subtitles to use in a different video platform select the three dots and choose the download option. SRT is the most common subtitles file type.
YouTube Upload Subtitles
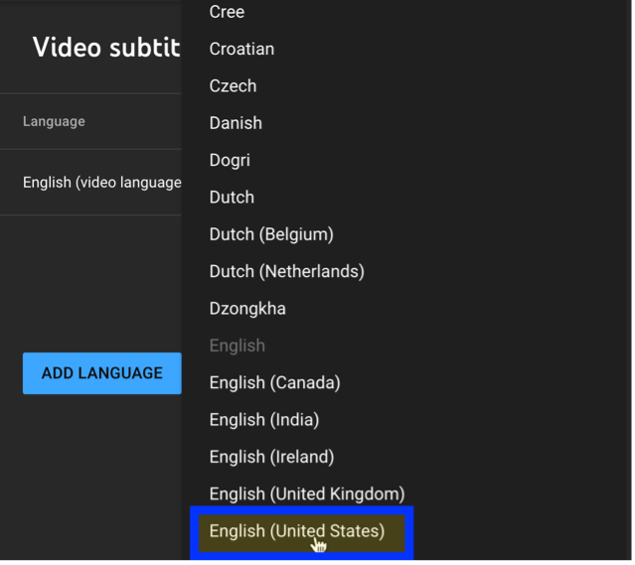
In the subtitles page for the desired video select the add a language button and choose the desired language for the subtitles.
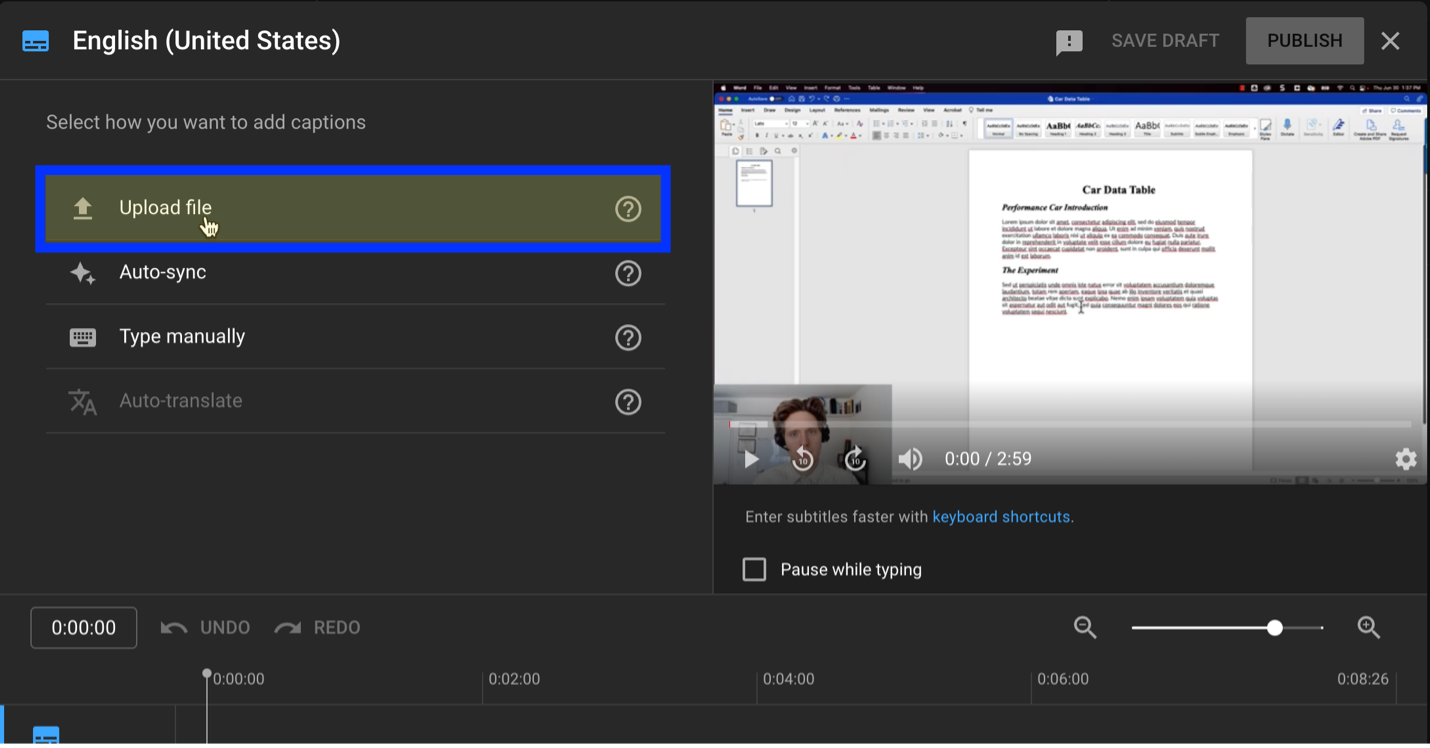
Select the add button next to the new subtitles item you’ve created. Then select the add button and the subtitles file on your computer.

Then select the upload file button and choose with timing if you are uploading an SRT or similar subtitles file. You’ll then locate the subtitles file on your computer.
Then select the publish button and the added subtitles will become the default subtitles for the selected video.