Ad Hoc Endpoint Compliance Reports
You can create your ad hoc reports using all of the tables and columns in the device registry.
Using the ad hoc analysis tool
- Go to bi.stanford.edu.
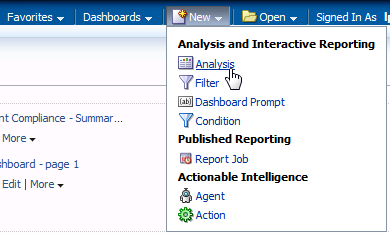
- To create a new query, click New > Analysis from the menu bar at the top. Click Open to access an analysis you have previously saved.

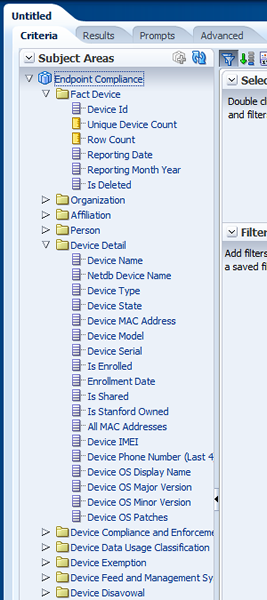
- When prompted to select a subject area, click Endpoint Compliance.
- The folders displayed on the left represent the tables available. Expand one or more of these folders to view the available columns.
- Double-click the columns to add them to the query.
- Once added, you can drag and drop columns to reorder them.
- To add search criteria, click the menu icon to the right of the column name and click Filter.

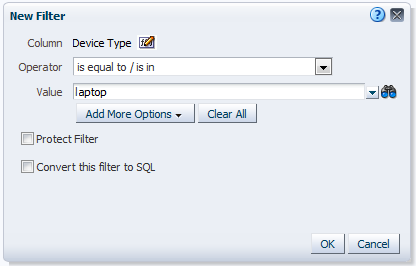
- A New Filter dialog box displays. Enter your filter criteria, by either typing in a value, using the down arrow to display the list of values, or clicking the Search icon. Click OK.

- Your search criteria now appears in the Filters section of the screen. Hover your cursor over the filter name to access the controls to edit, copy, paste, or delete the filter.

- When you are finished creating your analysis, save it by clicking the Save Analysis
 or Save As
  icon in the upper-right corner of the window. Save the analysis in My Folders.
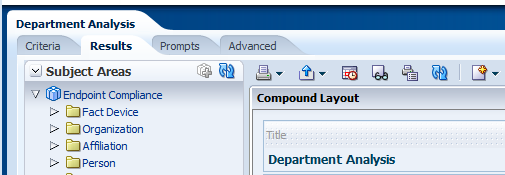
 - To run your report, click the Results tab in the upper-left area of the window.

Tips for using the Endpoint Compliance data
-
The unique key to a device is an internal Device Id, which is found only in the Fact Device folder. Always include this column on your analysis so that each row is unique by device.
-
If the analysis you create includes feeds from multiple days, include a selection for Reporting Date from the Fact Device folder (usually today's date).

Last modified
