Jabber Basics: iOS
Familiarizing yourself with some of the Jabber basics will help you better understand some of the terminology in the feature instructions and get the most out of the tool.
Navigating the Jabber Hub
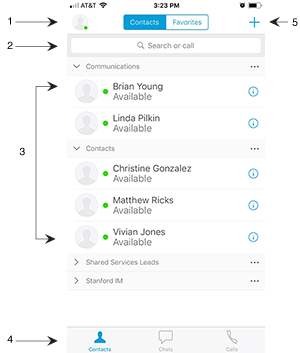
- Status message
- Search bar
- Contacts
- Chats
- Chat rooms
- Recent calls
- Phone controls
- Custom groups
Managing contacts
Contacts and contact lists let you easily organize and access contact information in your Jabber hub for those colleagues you communicate with often.
ADDING A NEW CONTACT
To add a new contact to your Jabber hub:
- Tap
 .
. - Tap
 .
. - Tap Add Contacts.
- In the search field of the Add Contacts window, type the name of the Stanford person you want to add as a contact.
Search results will appear. (It is best to type the name as completely as possible.)
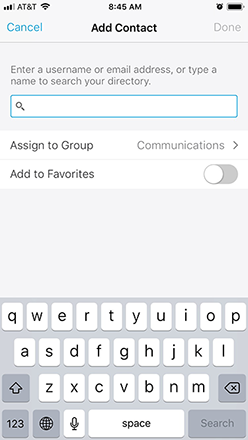
- Tap the name of the person you want to add as a contact.
- Tap the Assign to Group menu, select the personal group to which you’d like to add the contact. When done, tap < Add Contact to return to the Add Contacts window.
See Creating a New Contact Group (below) for information on creating personal contact groups. - Tap Done.
The new contact appears in your Jabber hub (if they are currently logged in) under the appropriate contact group.
CREATING A NEW CONTACT GROUP
You can create customized contact list groups (e.g., My team, Project A team) under which you can organize your contacts. Contacts can appear in multiple contact list groups.
To create a new contact list group:
- Tap .
- Tap .
- Tap Create Group.
- Type the name contact list group name you’d like in the Create a new group window.
- Tap Create.
The new contact list group appears in your Jabber hub under Contacts.
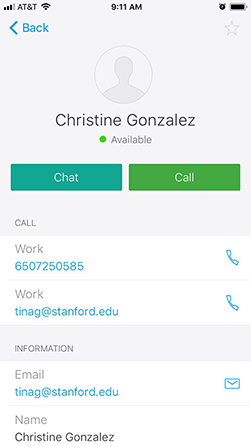
VIEW A CONTACT’S PROFILE
- Tap in the Jabber hub.
- Tap
 next to the name of the person for whom you want to display a profile.
The contact’s status window opens. The profile shows the contact’s email address, phone number, and availability status. Tap the buttons to call or chat with the contact.
Managing presence
Presence lets your colleagues know when your are, and are not, available. Your colleagues can see your status through your status message in their Jabber hub.
MANUALLY CHANGING YOUR STATUS MESSAGE
By default, your status message is set to Available. To change your status message:
- Tap
 .
.
The Jabber settings navigation drawer appears.
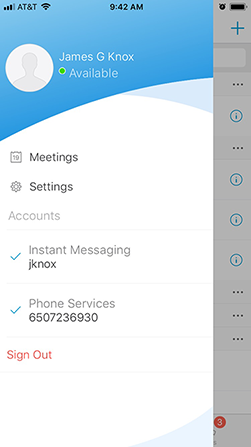
- Tap again on the navigation drawer.
- Tap to select among the available options.
Your status is changed to that option.
ADDING A CUSTOM STATUS MESSAGE
You can add other status messages to the default list. To add a custom status message:
- Tap .
The Jabber settings navigation drawer appears.
- Tap again on the navigation drawer.
- Tap Add Custom Status.
- Type the custom status you’d like and tap the default color status setting you’d like to associate with it.
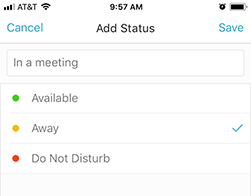
- Tap Save.
The new custom status becomes your current status and is available in the future as a default option in the My Status options.