How to Install the BigFix Client for Windows
Download and install the BigFix client
- Download and run the BigFix client installer.
Note: You must install the BigFix client software while logged in to your PC with an account that has administrator privileges. If you are installing on Windows 7, you will be prompted for administrative approval before the installation can continue.
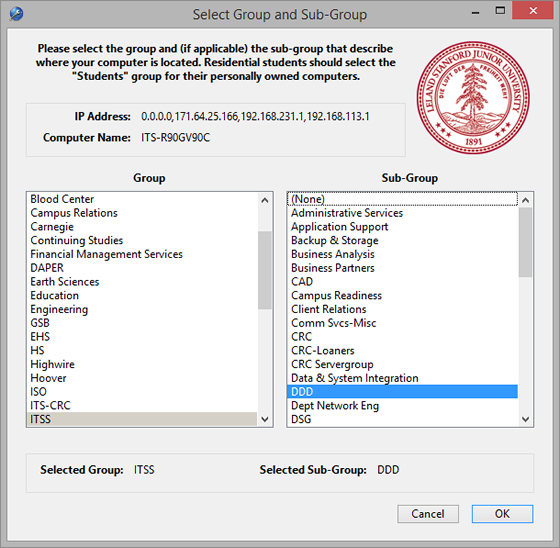
- Select the Group and Sub-Group that describe where your computer is located and then click OK. Students should select SU Group: Students. If no Group is appropriate, select Other; if no Sub-Group is appropriate, select None.
Note: Your Group and Sub-Group selection determines which BigFix administrators will be responsible for distributing operating system patches to your computer, so it is important that this information is correct.
- When BigFix has finished installing, click OK.
Verify the BigFix client installation (optional)
After installing the BigFix client on your PC, you will see no obvious sign that anything has happened. BigFix will be running as a service. If you want to verify the installation:
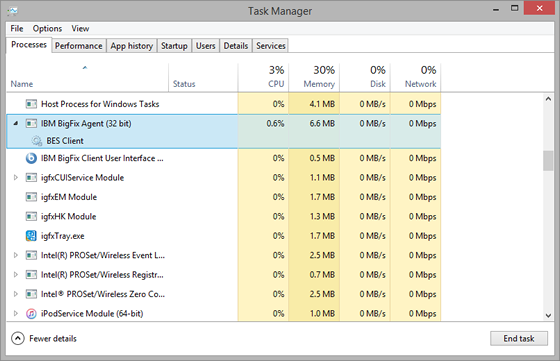
- Open the Windows Task Manager by pressing CTRL + ALT + DELETE and clicking the Task Manager button.
- Click the Processes tab and look for IBM BigFix Agent and BESClient.exe in the list of processes.
Note: If you are using Windows 7, click Show processes from all users.
Last modified