How to Install the BigFix Client for Mac
Download and install the BigFix client
- Download the BigFix client for Mac.
- Double-click the BigFix_Mac.pkg icon in the disk image window. (If you downloaded the the installer using a browser other than Safari, double-click the downloaded .dmg file to open the disk image window.)
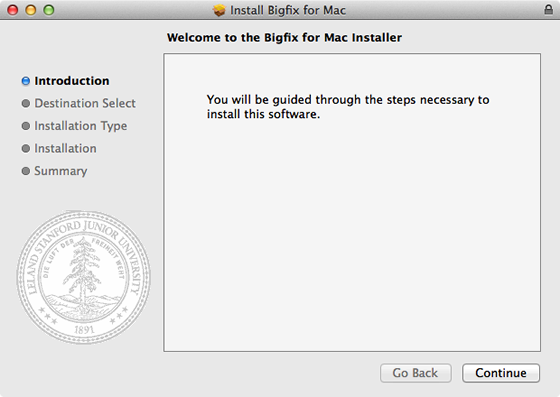
- When the Welcome screen appears, click Continue.
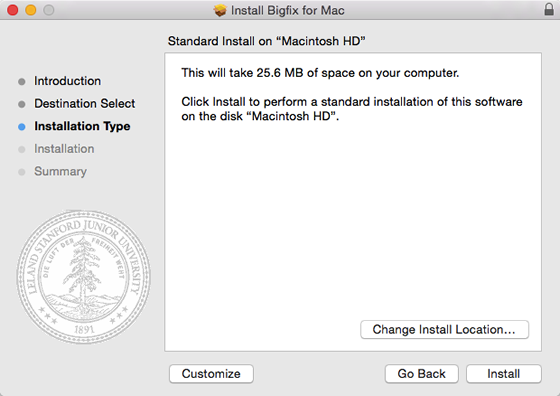
- Click Install.
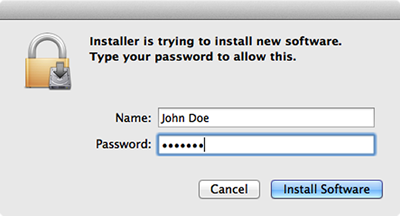
- When prompted, enter your administrator account information for the computer and click OK.
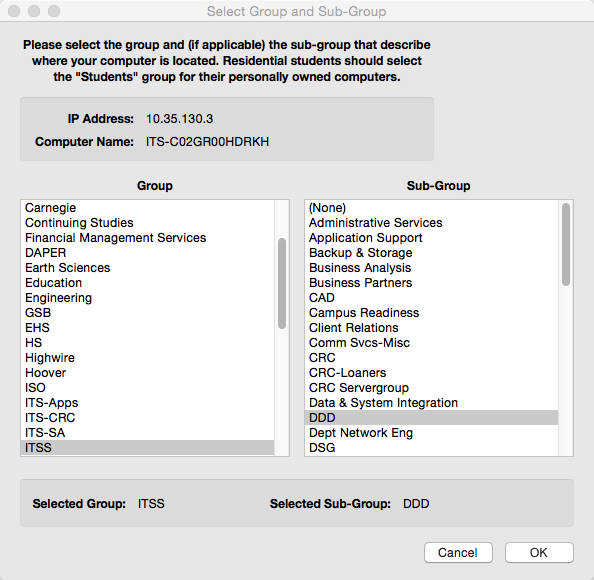
- Select the Group and Sub-Group for your computer location and then click OK. Students should select SU Group: Students. If your group is not listed, select Other. If your Sub-Group is not listed, select None.
Note: The Group and Sub-Group selections determine which BigFix administrators will have the responsibility for distributing operating system patches to the computer. Please ensure that the Group and Sub-Group information is correct.
Note: If your network is not available, you will see the following alert instead of the Select Group and Sub-Group window. Click OK and try downloading and running the BigFix installer again.

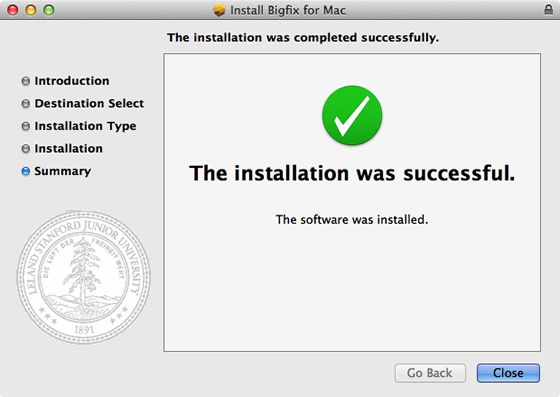
- After the has been successfully installed, click Close.
Verify the BigFix client installation (optional)
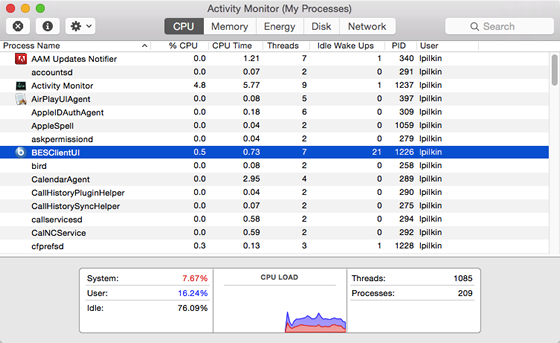
After installing the BigFix client on your Mac, you will see no obvious sign that anything has happened. BigFix will be running as a process. If you want to verify the installation:
- On your hard drive, navigate to Applications > Utilities > Activity Monitor.
- Look for BESClientUI in the list of processes.
- If you encounter problems or have a question, call 5-HELP or submit a Help ticket.
Last modified