Zoom Cloud Storage Best Practices
Manage Zoom cloud recordings to preserve storage space
Due to an unprecedented number of meetings, we’ve exceeded our allotted Zoom cloud storage space as of October 29, 2020.
We're asking all Zoom users to voluntarily manage their cloud recordings to help reduce usage. At this time, we will not delete or archive meetings stored in the cloud. However, we're in the process of developing a Zoom cloud recording retention policy for future use. Additional details will be communicated as they become available within the next few months.
Best-practice tips
To ensure Zoom is available to everyone at Stanford, please take the three steps shown in the infographic below to preserve cloud storage space. Step-by-step instructions for each are provided below.
IMPORTANT NOTE: Meeting recordings that contain PHI should remain the in Zoom cloud. Learn more about recommended storage options for recordings that contain High Risk Data by visiting Collaboration Tools for PHI and High Risk Data.

Managing Cloud Recordings in 3 Easy Steps
Step1: Download
DOWNLOAD cloud recordings to store locally, then move them to a different storage repository. Recordings that contain non-PHI High Risk data can be moved to Google Drive or OneDrive. Recordings that contain PHI should remain in the Zoom cloud. Learn more at uit.stanford.edu/collabtools/highrisk.
Step 2: Delete
Review your recordings and DELETE any that you no longer need. Be sure to delete recordings after you download them. Make a habit of doing this regularly.
Step 3: Disable
If your Zoom account is configured to record all meetings by default, DISABLE this setting. Instead, record only those meetings that you need to share later.
Download a cloud recording
To download a cloud recording in Zoom, follow these steps.
- Sign in to the Zoom Web Portal at stanford.zoom.us.
- In the left navigation bar, click Recording, then click Cloud Recordings.
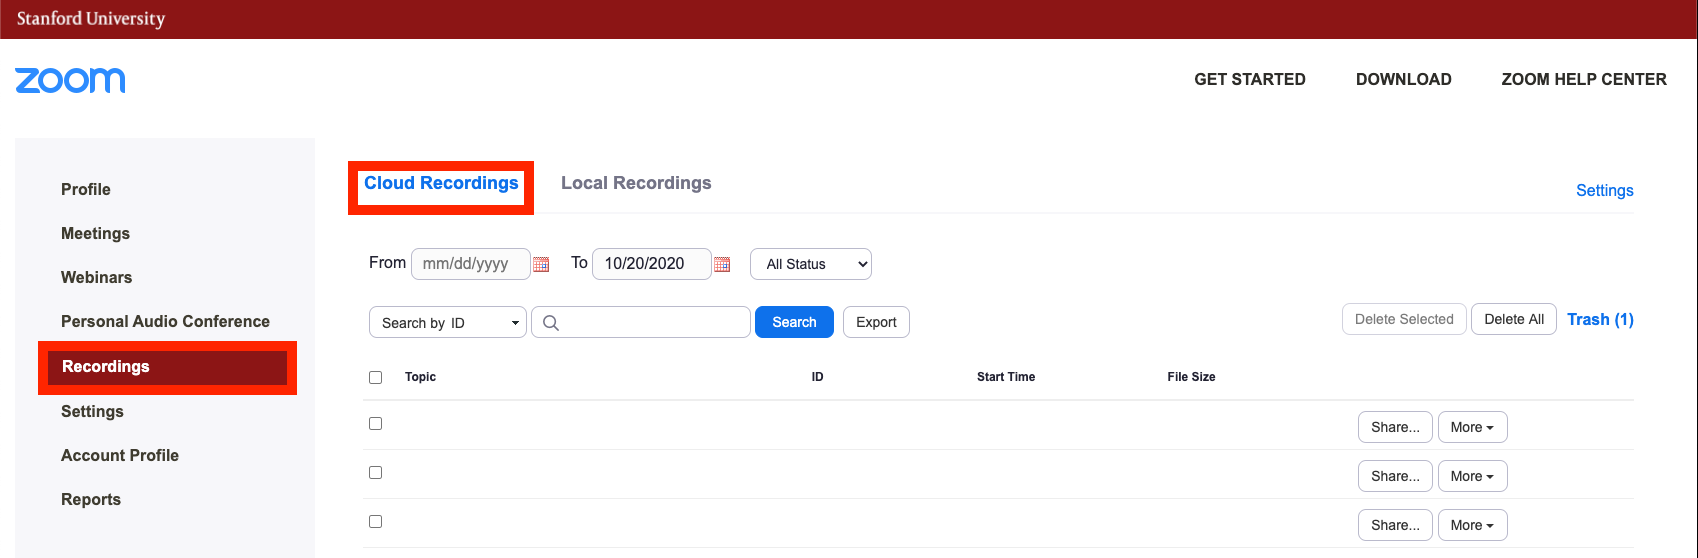
- To the right of each recording you want to download, click the dropdown menu titled More and then select the Download option. If an audio file (m4a) and a captioning file (vtt) is available for your recording, they will be downloaded as separate files.

- Log into the alternative platform of your choice and follow the instructions for uploading the MP4 file and the vtt captioning file of your recording.
Delete a cloud recording
To delete a cloud recording, follow these steps.
- Sign in to the Zoom Web Portal at stanford.zoom.us.
- In the left navigation bar, click Recording, then click Cloud Recordings.
- To the right of each recording you want to download, click the dropdown menu titled More and then select the Delete option.

-
Click Yes to confirm you want to delete the recording.
Note: You will be able to recover and retain any deleted files from the Zoom Trash folder for 30 days.

Disable automatic recording meeting setting
To review and adjust your recording setting, follow these steps.
- Sign in to the Zoom Web Portal at stanford.zoom.us.
- Click Settings on the left navigation bar.
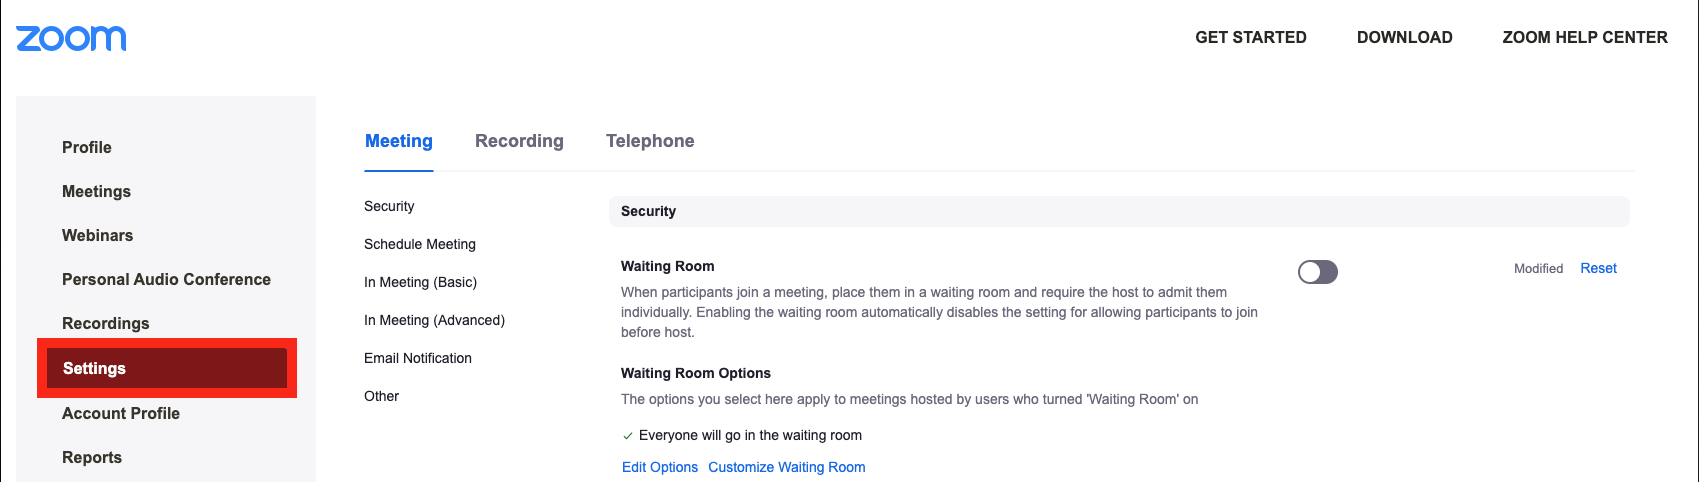
- Click Recording in the top navigation bar.
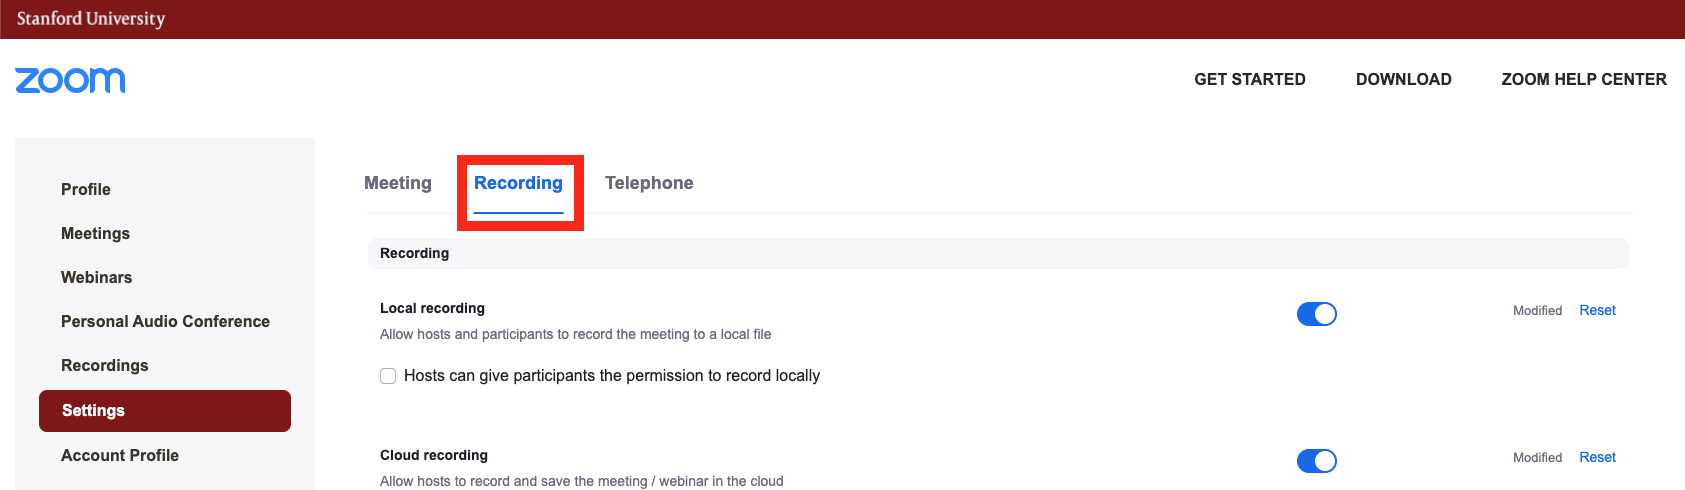
- Click the toggle to disable Automatic recording.
