Cisco Web Interface Instructions
Features
Many Cisco VoIP phone features* can be set up via the online interface. Instructions for each of these activities are included below.
- Change your phone PIN
- Set up and manage your Phone Contacts
- Set up Speed Dials
- Change Ring Settings
- Forward your calls
Logging in
To use the online interface, log in with your organization's credentials:
- University & Medical school: myphone.stanford.edu. Log in with your SUNet ID and password. (Note: Only available on the Stanford University network when off campus. Please log into Cisco AnyConnect VPN).
- Stanford Hospital: myshcphone.stanfordmed.org. Enter your SID under username and SID password.
- Lucile Packard Stanford Medicine Children's Health: myphone.lpch.org. Enter your computer login under username and computer password (Note: Only available from the LPCH network).
Unified Communications Self Care Portal Interface
After you log in, you will see the Unified Communications Self Care Portal.
The menu at the top of the page (right underneath Unified Communications Self Care Portal) includes links to:
- Phones — Use this page to view your phones or add an additional phone, change your phone settings, or forward calls.
- IM & Availability — Turn on status updates or the Do Not Disturb setting.
- General Settings — Change your Phone Services PIN.
Phones
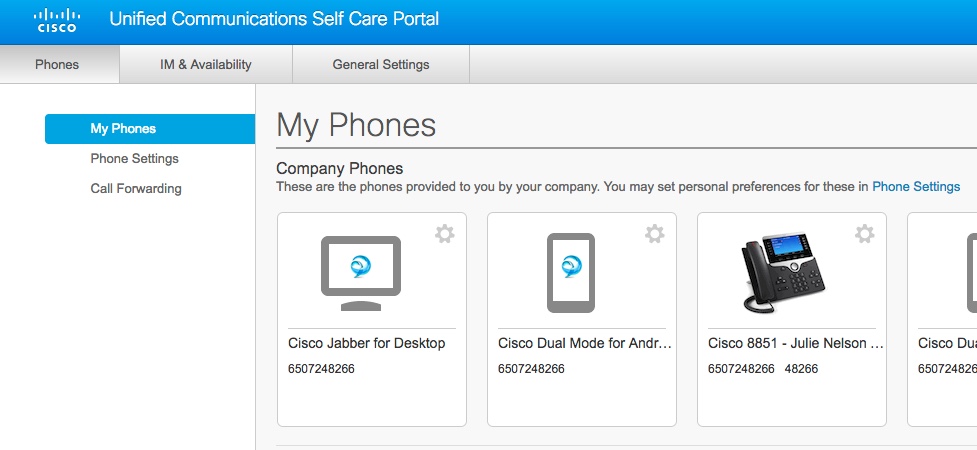
Company phones
To see what phones are registered in your name, click the Phones menu item and then click My Phones. Your registered phones will likely include a desk phone and could also include Jabber for your mobile device or desktop computer.

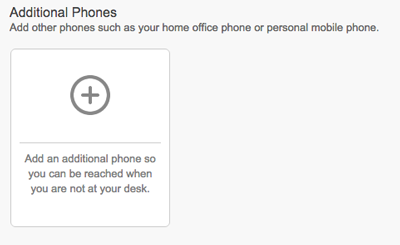
Additional phones
You can also add your home or mobile phones so that you can be reached when you are not at your desk.
- To add an additional phone, look for the section titled Additional Phones and then click the plus sign.
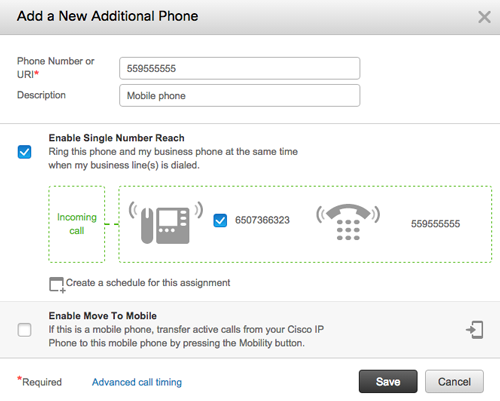
- Enter your phone number, a description for this phone, and whether you want to enable Single Number Reach and/or Move to Mobile. Click Save.
Speed dial numbers
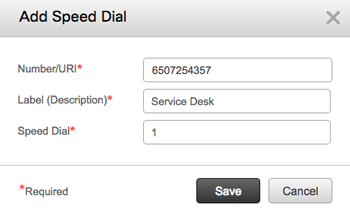
- To add a new speed dial number, click Phones > Phone settings > Speed Dial Numbers > Add New Speed Dial.
- Enter a phone number, label, and speed dial number and click Save.
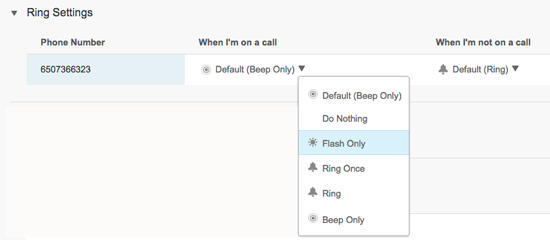
Ring settings
For each phone number listed in the Self Care Portal, you can change how you are notified of an incoming call. You can change these settings for when you are on a call and when you are not on a call.
To change the setting, click Phones > Phone Settings > Ring Settings. Click the default setting and then click the desired setting and click Save.
Call history
To log missed calls for each of your phones, click Phones > Phone Settings > Call History. Check the box under Log Missed Calls and then click Save. If you do not wish to log missed calls, uncheck the box and click Save.

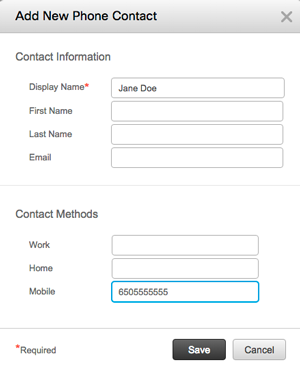
Phone contacts
You can add new contacts and search saved contacts by going to Phones > Phone Settings > Phone Contacts.
- Add a new contact by clicking Create New Contact.

- Enter the Display Name, phone number, and other information about the contact and then click Save.
You can search for phone contacts by entering a name in the search box. The results will narrow as you type.
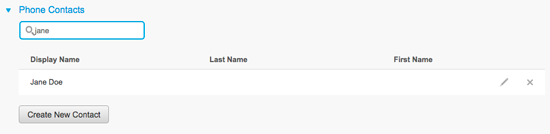
To edit a contact, click the pencil icon to the right of the contact's name. You may also delete the contact by clicking the X next to the contact's name.
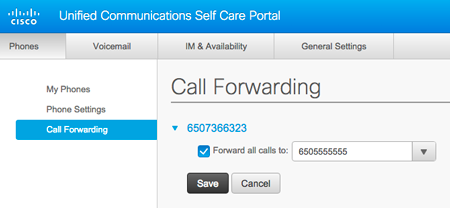
Call forwarding
To forward your calls, click Phones > Call Forwarding.
Select whether you want to forward calls to voicemail or to another phone number and then click Save.
*If the phone number is external to Stanford, please include "91" before the phone number.
IM & Availability
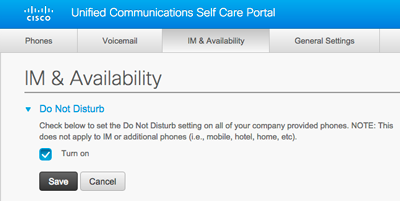
Do not disturb
The Do Not Disturb feature means that when others call you, you will only hear a single beep instead of a ringing tone. Select Turn on and then click Save if you want to turn on the Do Not Disturb feature for your Cisco desk phone.
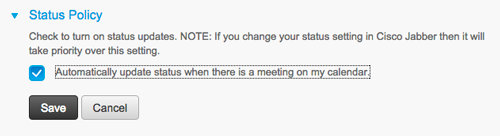
Status policy
Turning on status updates means your phones will update your status when you are in a meeting.To turn on status updates, select Automatically update status when there is a meeting on my calendar and then click Save.
General Settings
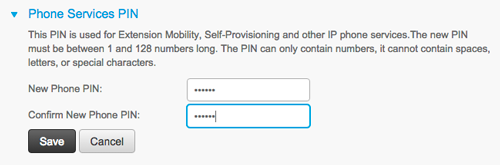
Phone PIN
The General Settings menu item gives you the option of setting a new phone services PIN.
The PIN is used to log into your phone, or you can log in to any other Cisco phone with your username and PIN. Once logged in, the new phone will auto-configure with your extension.
To set a new PIN, type in a new PIN, re-enter the same PIN to confirm, and then click Save.
*Some features may not be available to all subscribers