Adobe Acrobat Pro (Adobe DC) Installation Instructions
Once you have placed an order in the Stanford Software Licensing Webstore, you will receive all download information and instructions under "Your Account."
You will also receive a message that your subscription is active, and you will see the software's expiration date. Click "Install." You will then be directed to the Adobe site.
For NEW ACROBAT INSTALLATION, follow the below instruction.
If users are RENEWING the license and already have an Adobe account, please follow the Sign in Instruction here. See below for the Sign in instructions. No installation is required.
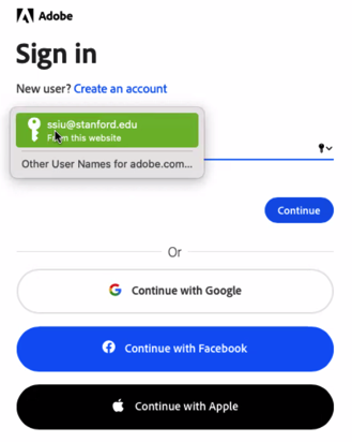
- When prompted to sign in by Adobe, use your email address – sunetID@stanford.edu—Do not use an alias email address. Adobe portal uses your sunetID@stanford.edu to associate your license to the Stanford University Licensing program.

Do not click on" Continue with Google, Facebook, or Apple." Click Continue.


- On the next page, click "download" for your machine.


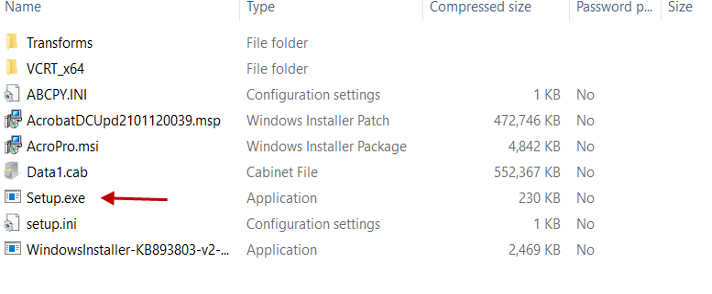
- Find the location of your installer file. Click on the installer. Adobe will start to download. For Windows, look to Setup.exe for PC or .DMG installer for MAC.

- Once you click on installers, the software starts the installation process.


- After the installation is complete, the Acrobat DC software will automatically open. You will then be able to use it.
Sign In Instruction for Users who already have an Adobe Account
- Sign out of all adobe apps, including Adobe Reading, Creative Clouds, etc.
- DO NOT use Chrome. Use Safari or Firefox - Go to <www.Adobe.com>
- Sign in at the top right-hand corner.
- Enter email <sunetID@stanford.edu>, click "Continue." Do not use an alias email address.

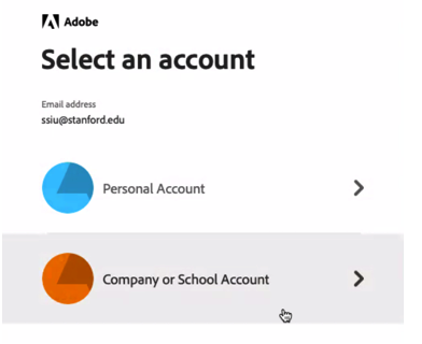
- If the "Select an Account" window pop up, click "Company or School Account." If the window doesn't pop up, ignore it. Do not click on" Continue with Google, Facebook, or Apple."
- You will be routed through the Stanford authentication process. Select "Company or School Account."

- After logging in, click on the small blue-circle headshot on the top right corner and click "View Account." You will be directed to a welcome page.
- Click "View all apps and services."

- You'll be directed to the "Included in your plan" page. Click "Access your apps and services."

You'll then see the Adobe Acrobat DC application.
Last modified
