Important: The Jamf Enrollment application has a bug that prevents the profile pane window in Settings from opening. Development for the Jamf Enrollment application has been discontinued and this service page will be taken down soon. Please see macOS Web Enrollment instructions for enrolling macOS devices into Jamf or utilize the Stanford Device Registration (SDR) application to enroll in Jamf.
Requirements
- SUNet ID
- Stanford-owned Mac device or personally-owned Mac used for official Stanford work
- A supported version of macOS - Learn more
Install Jamf on your Mac
Enrolling in Jamf is almost automatic — the process requires just a few simple manual steps on your end. Here's how the Jamf enrollment works:
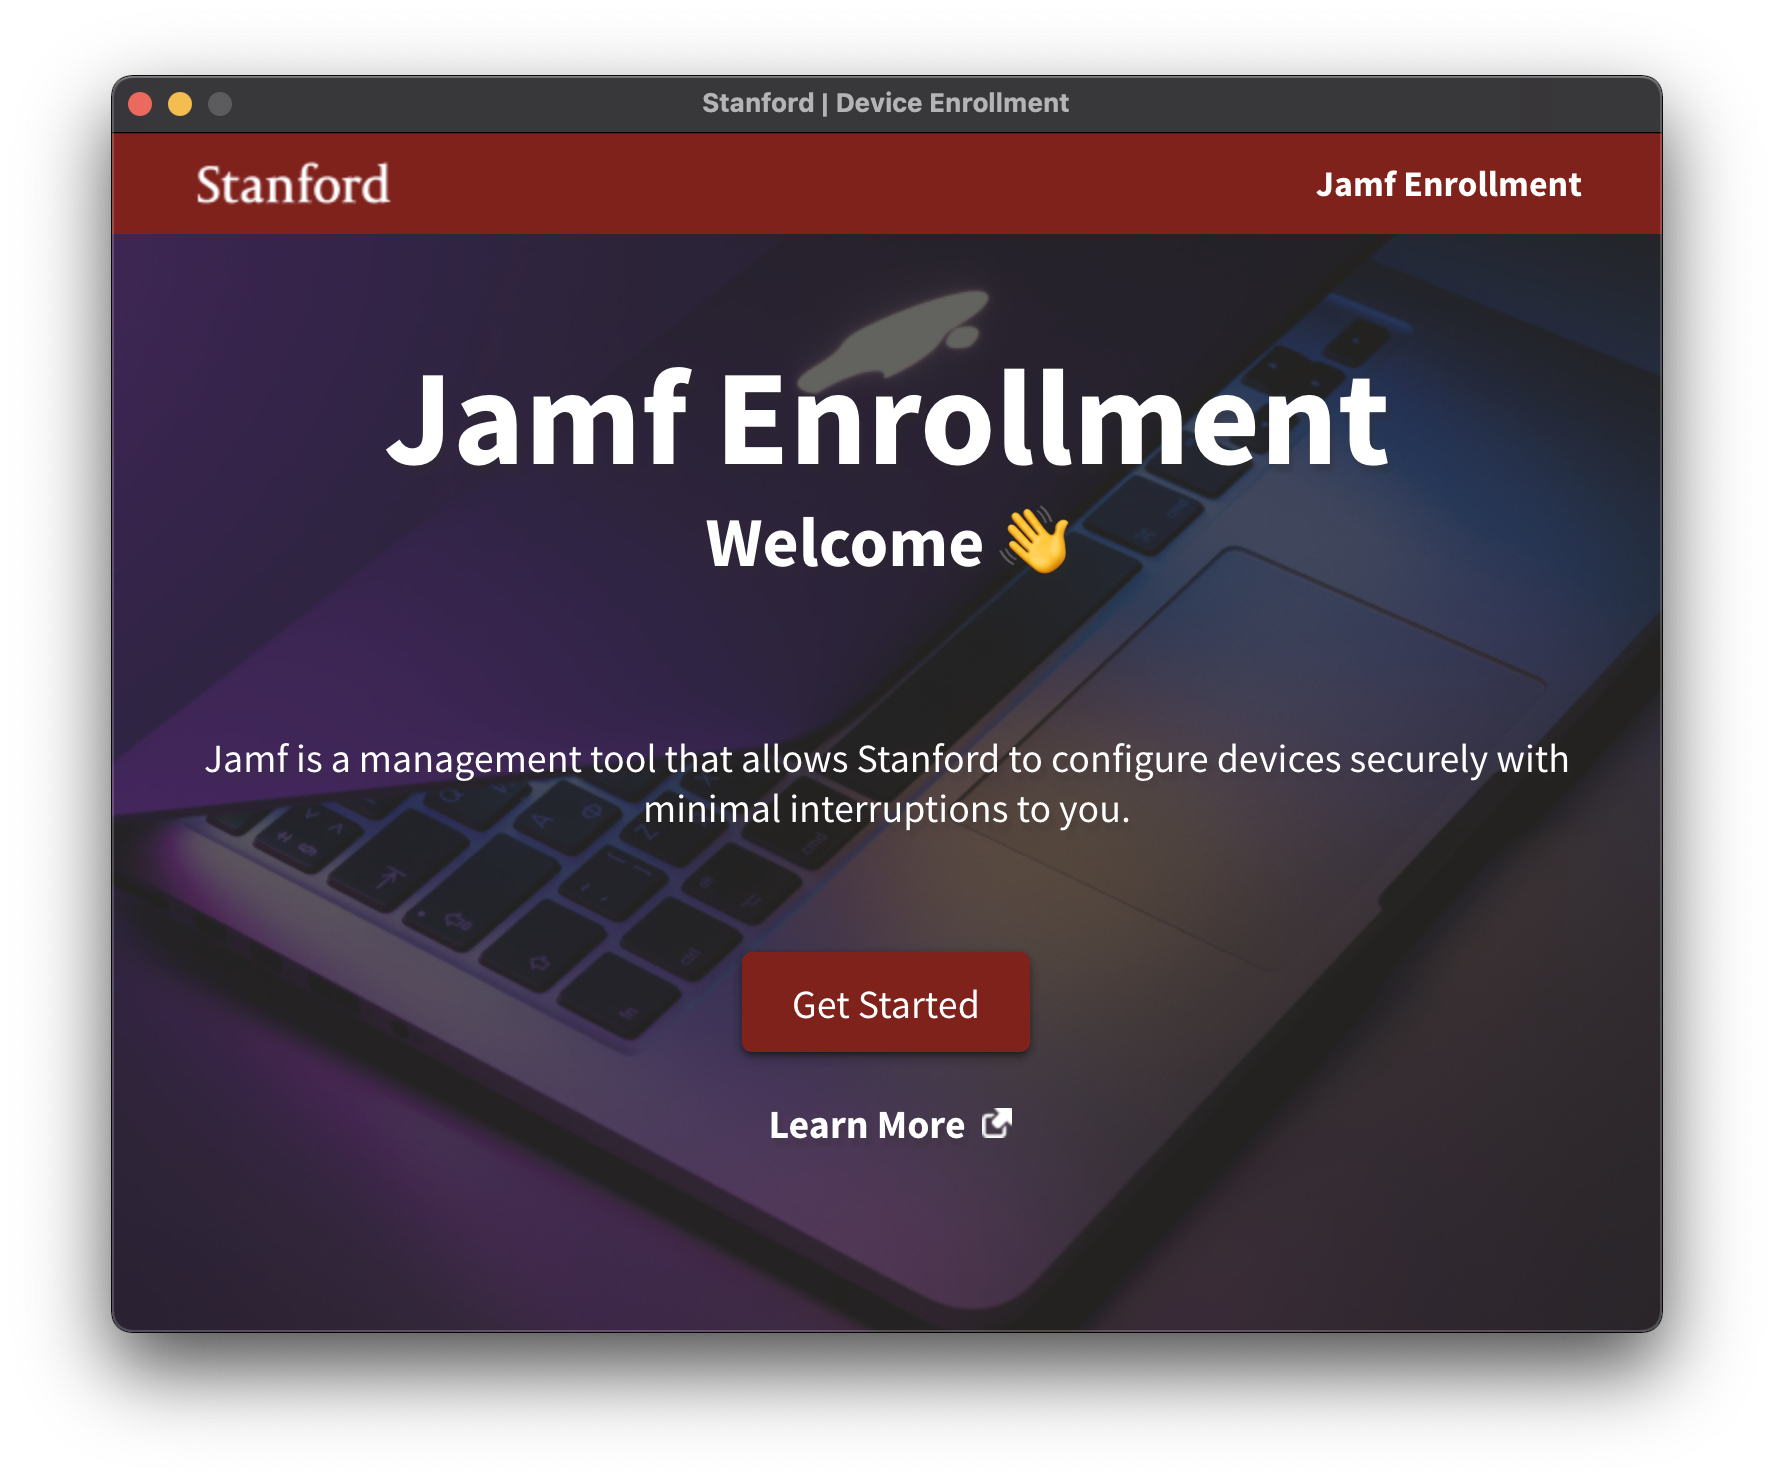
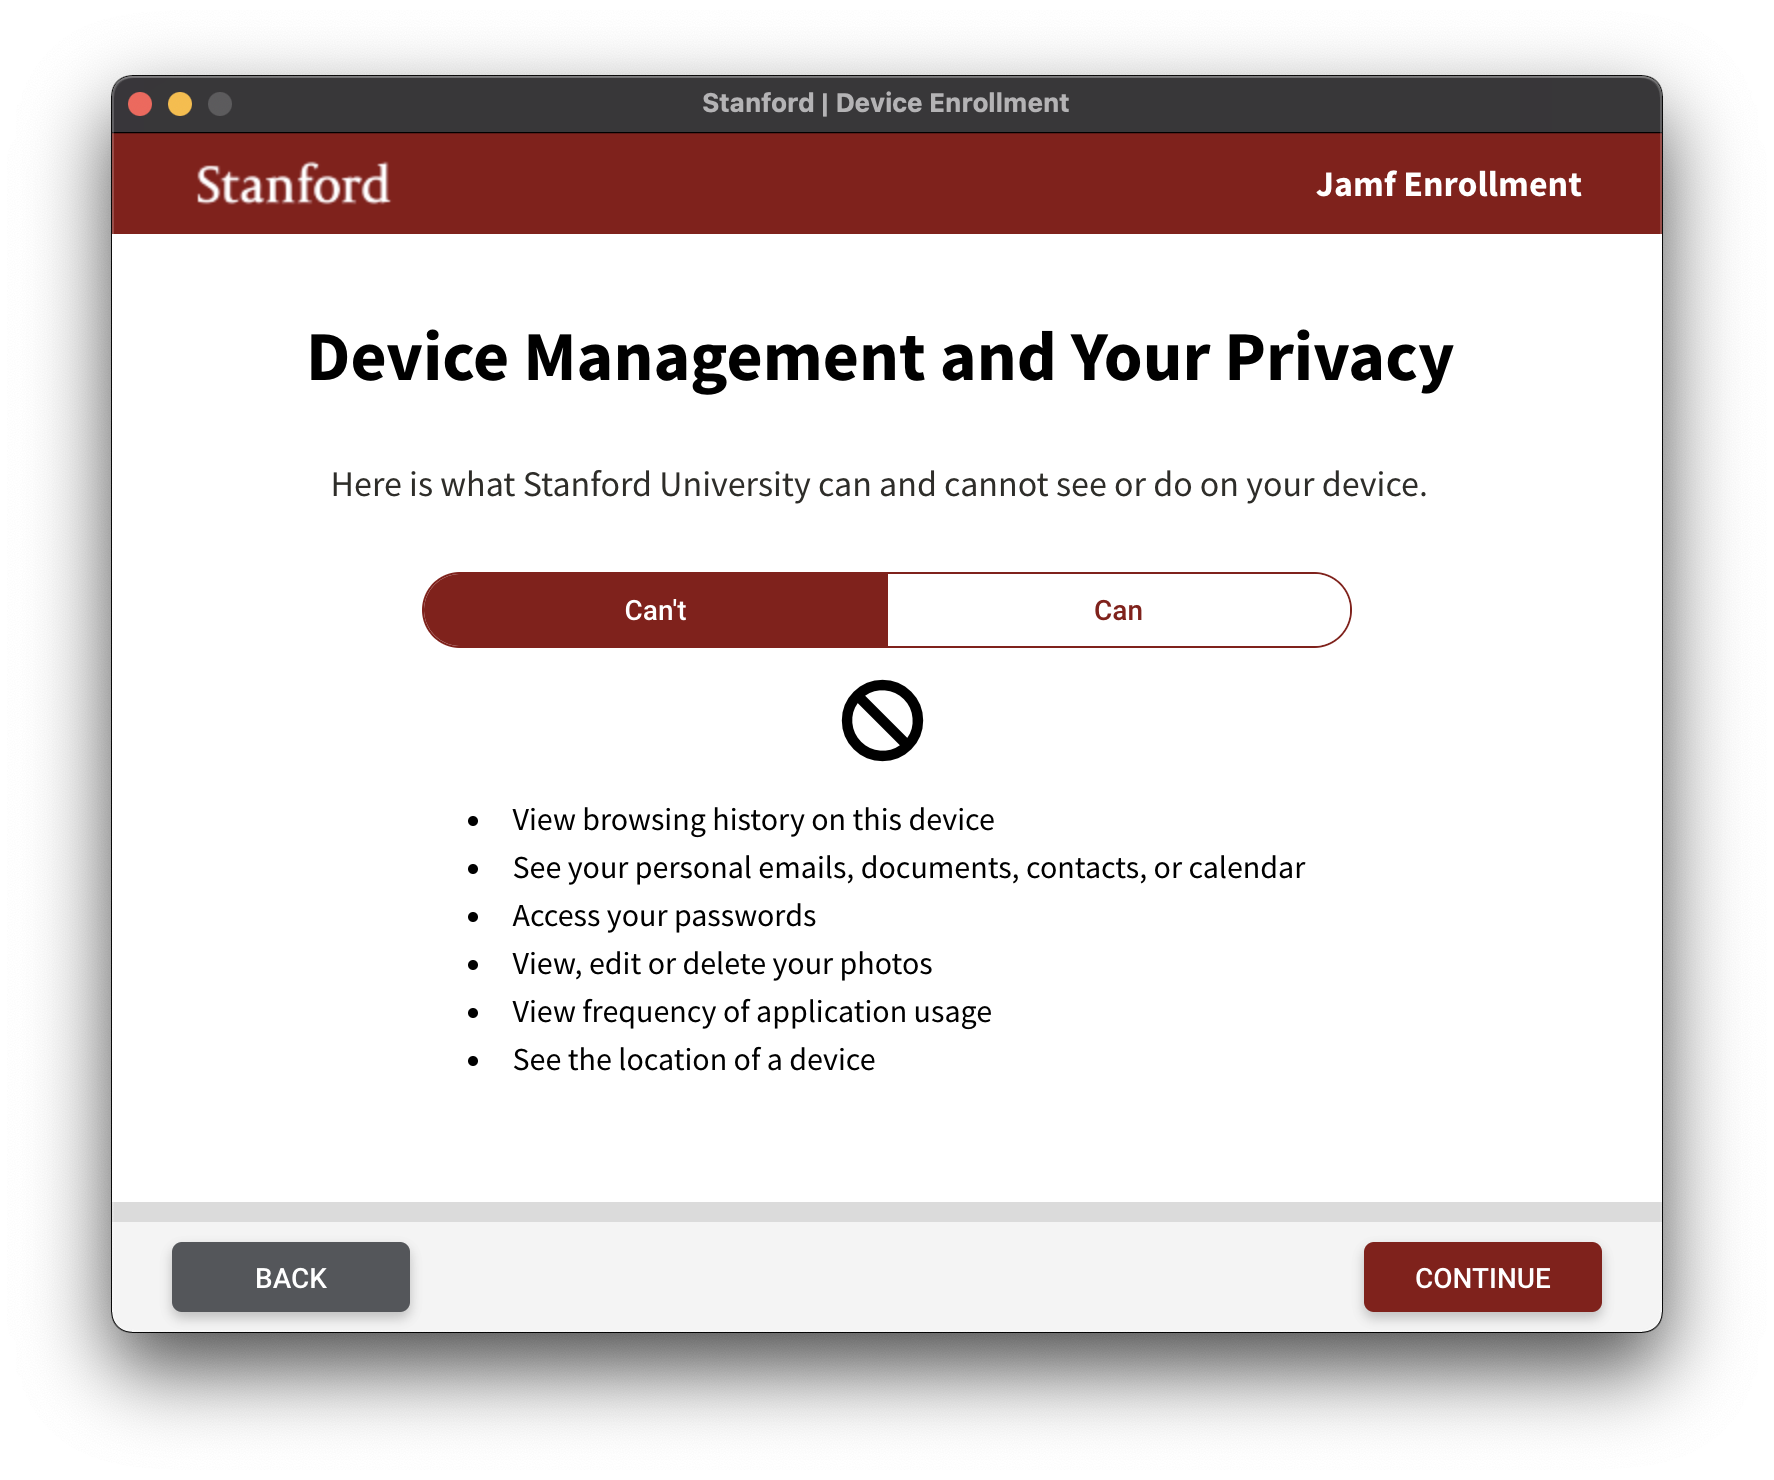
Screenshots for macOS Big Sur.
- When you see this screen, click Get Started.
- Toggle between Can't and Can to learn about device management and your privacy. Click Continue.
- Enter your SUNet ID and the corresponding password.
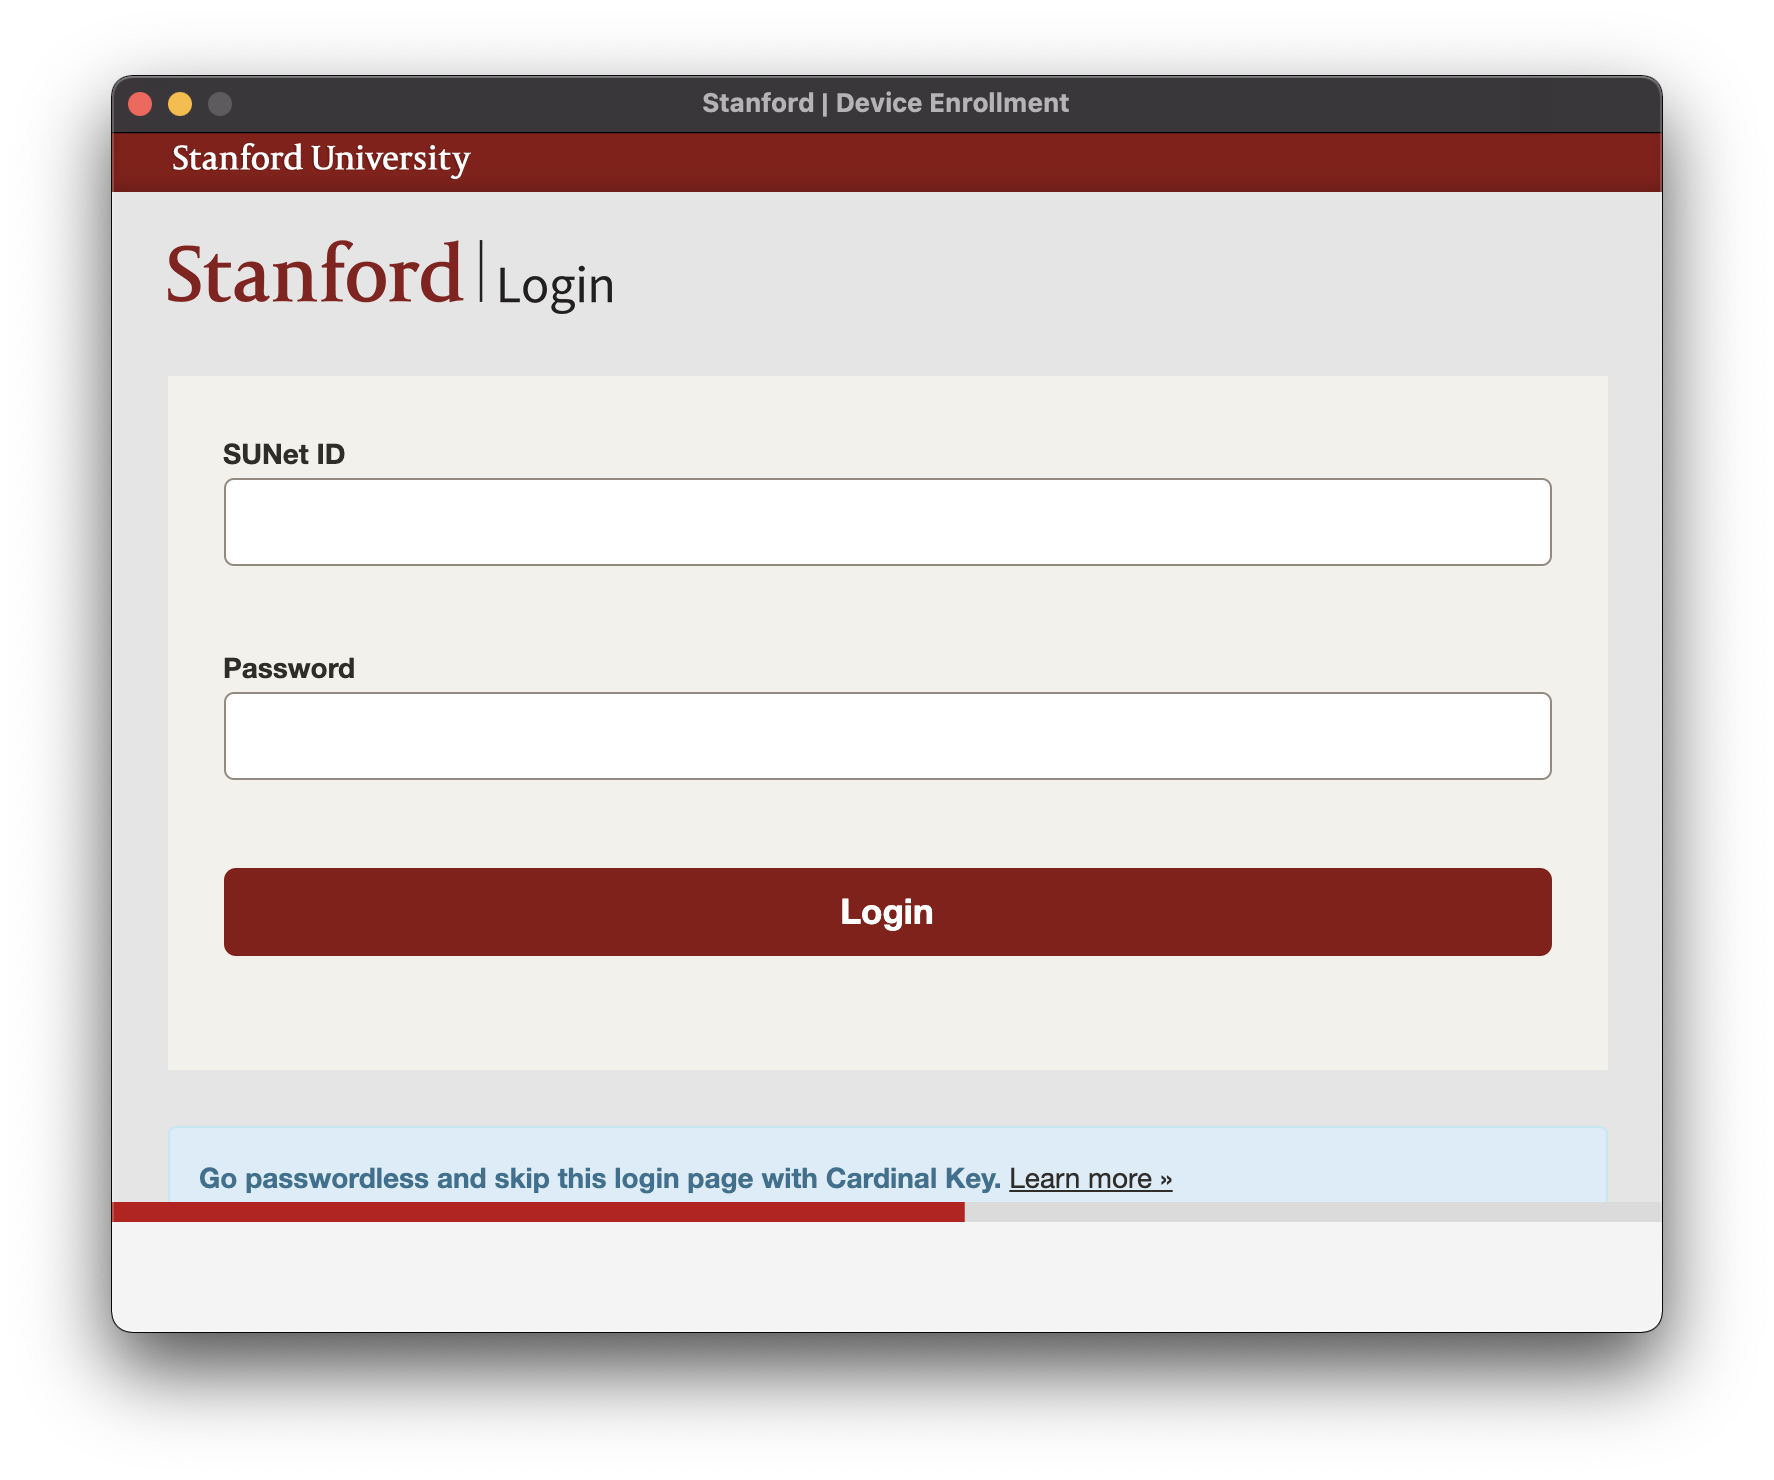
- Click Continue.
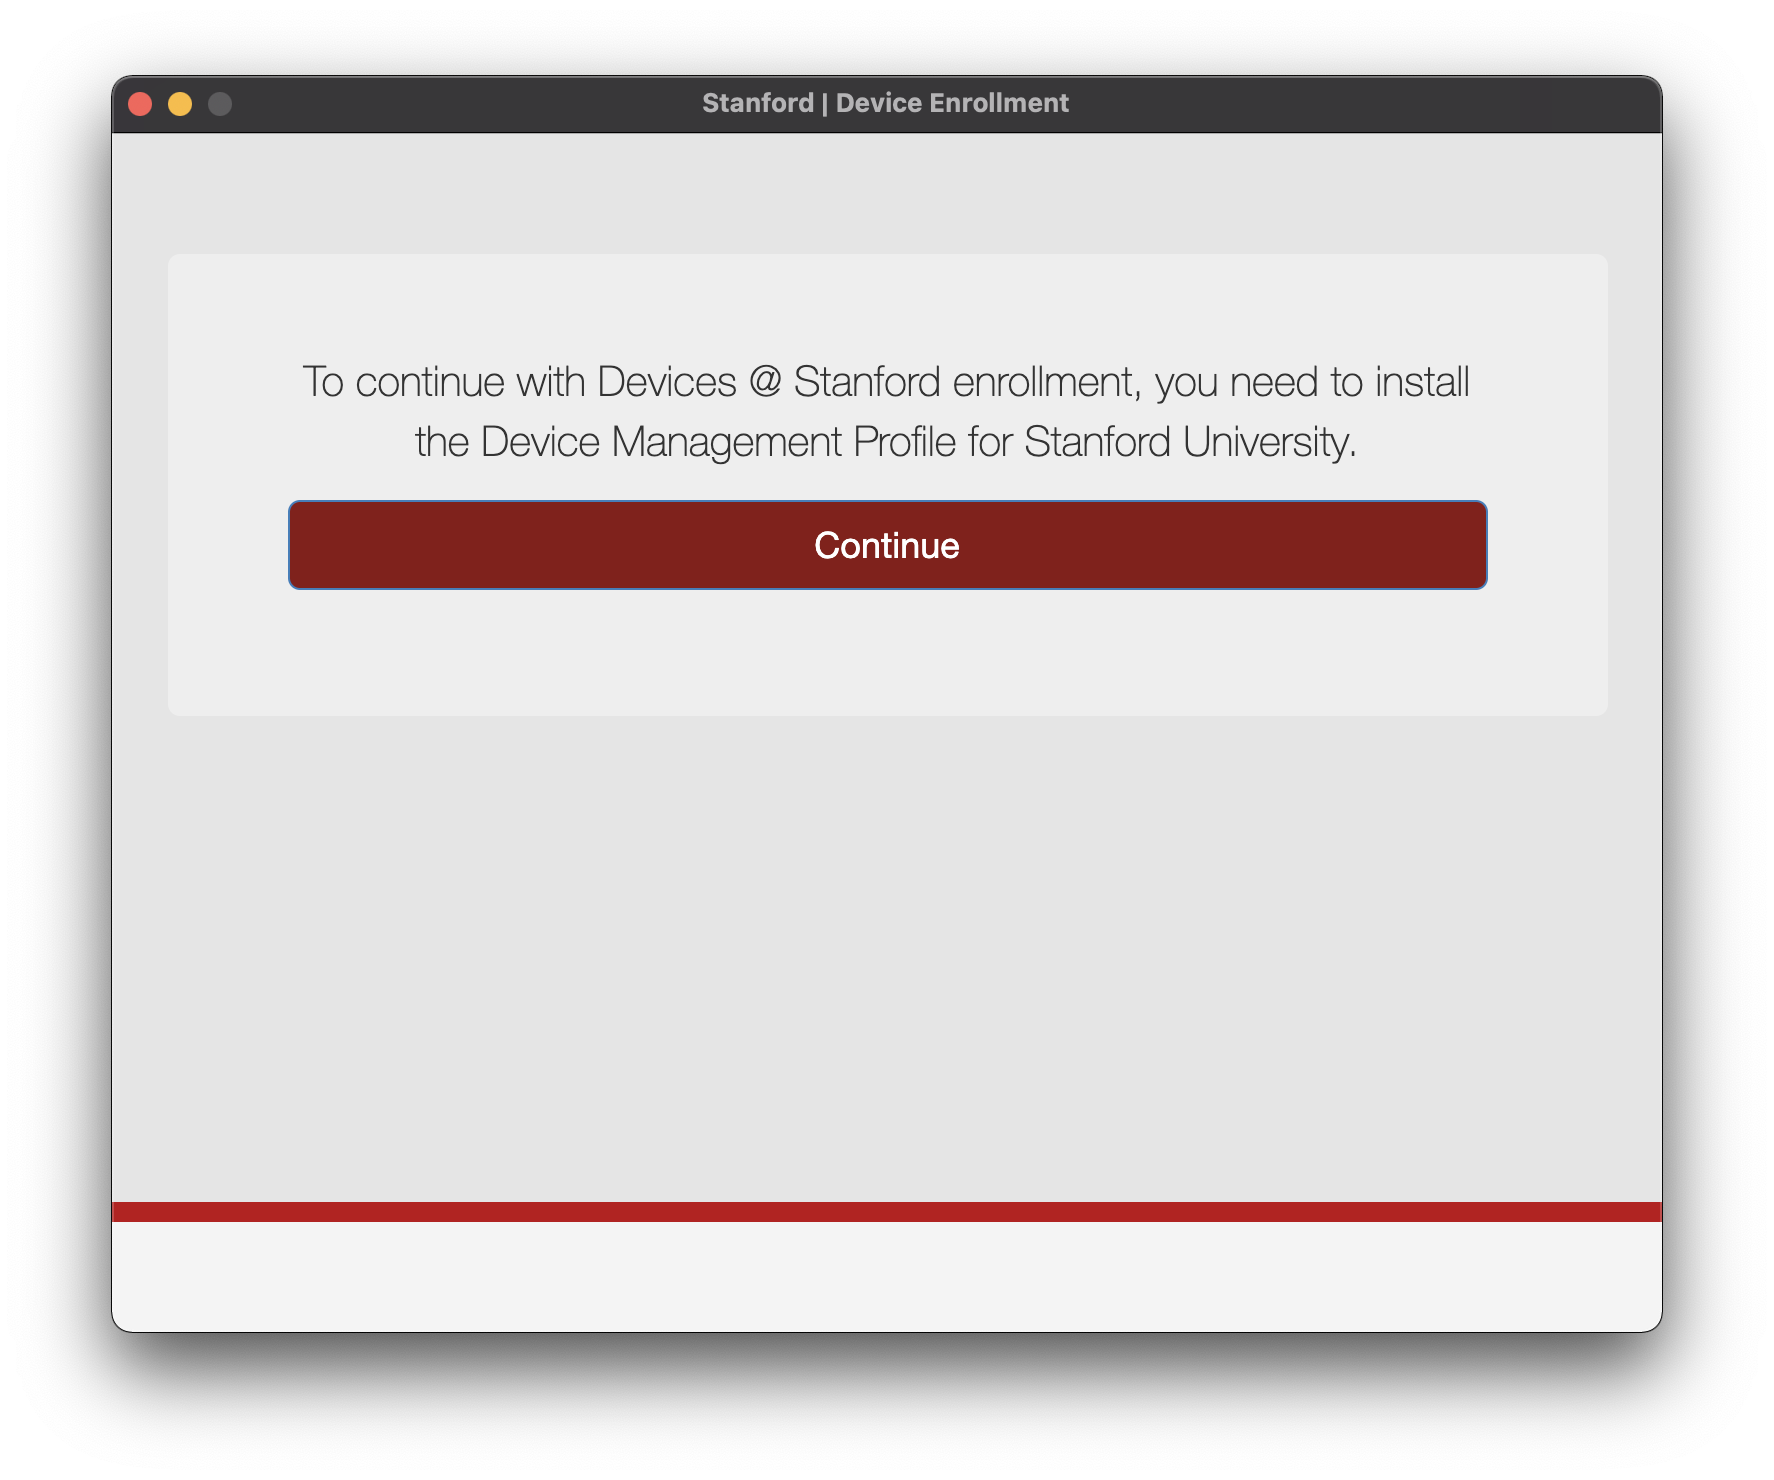
- To begin the installation, click Open Profiles and then click Install in the top right of the Profiles pane. To confirm the installation, click Install.
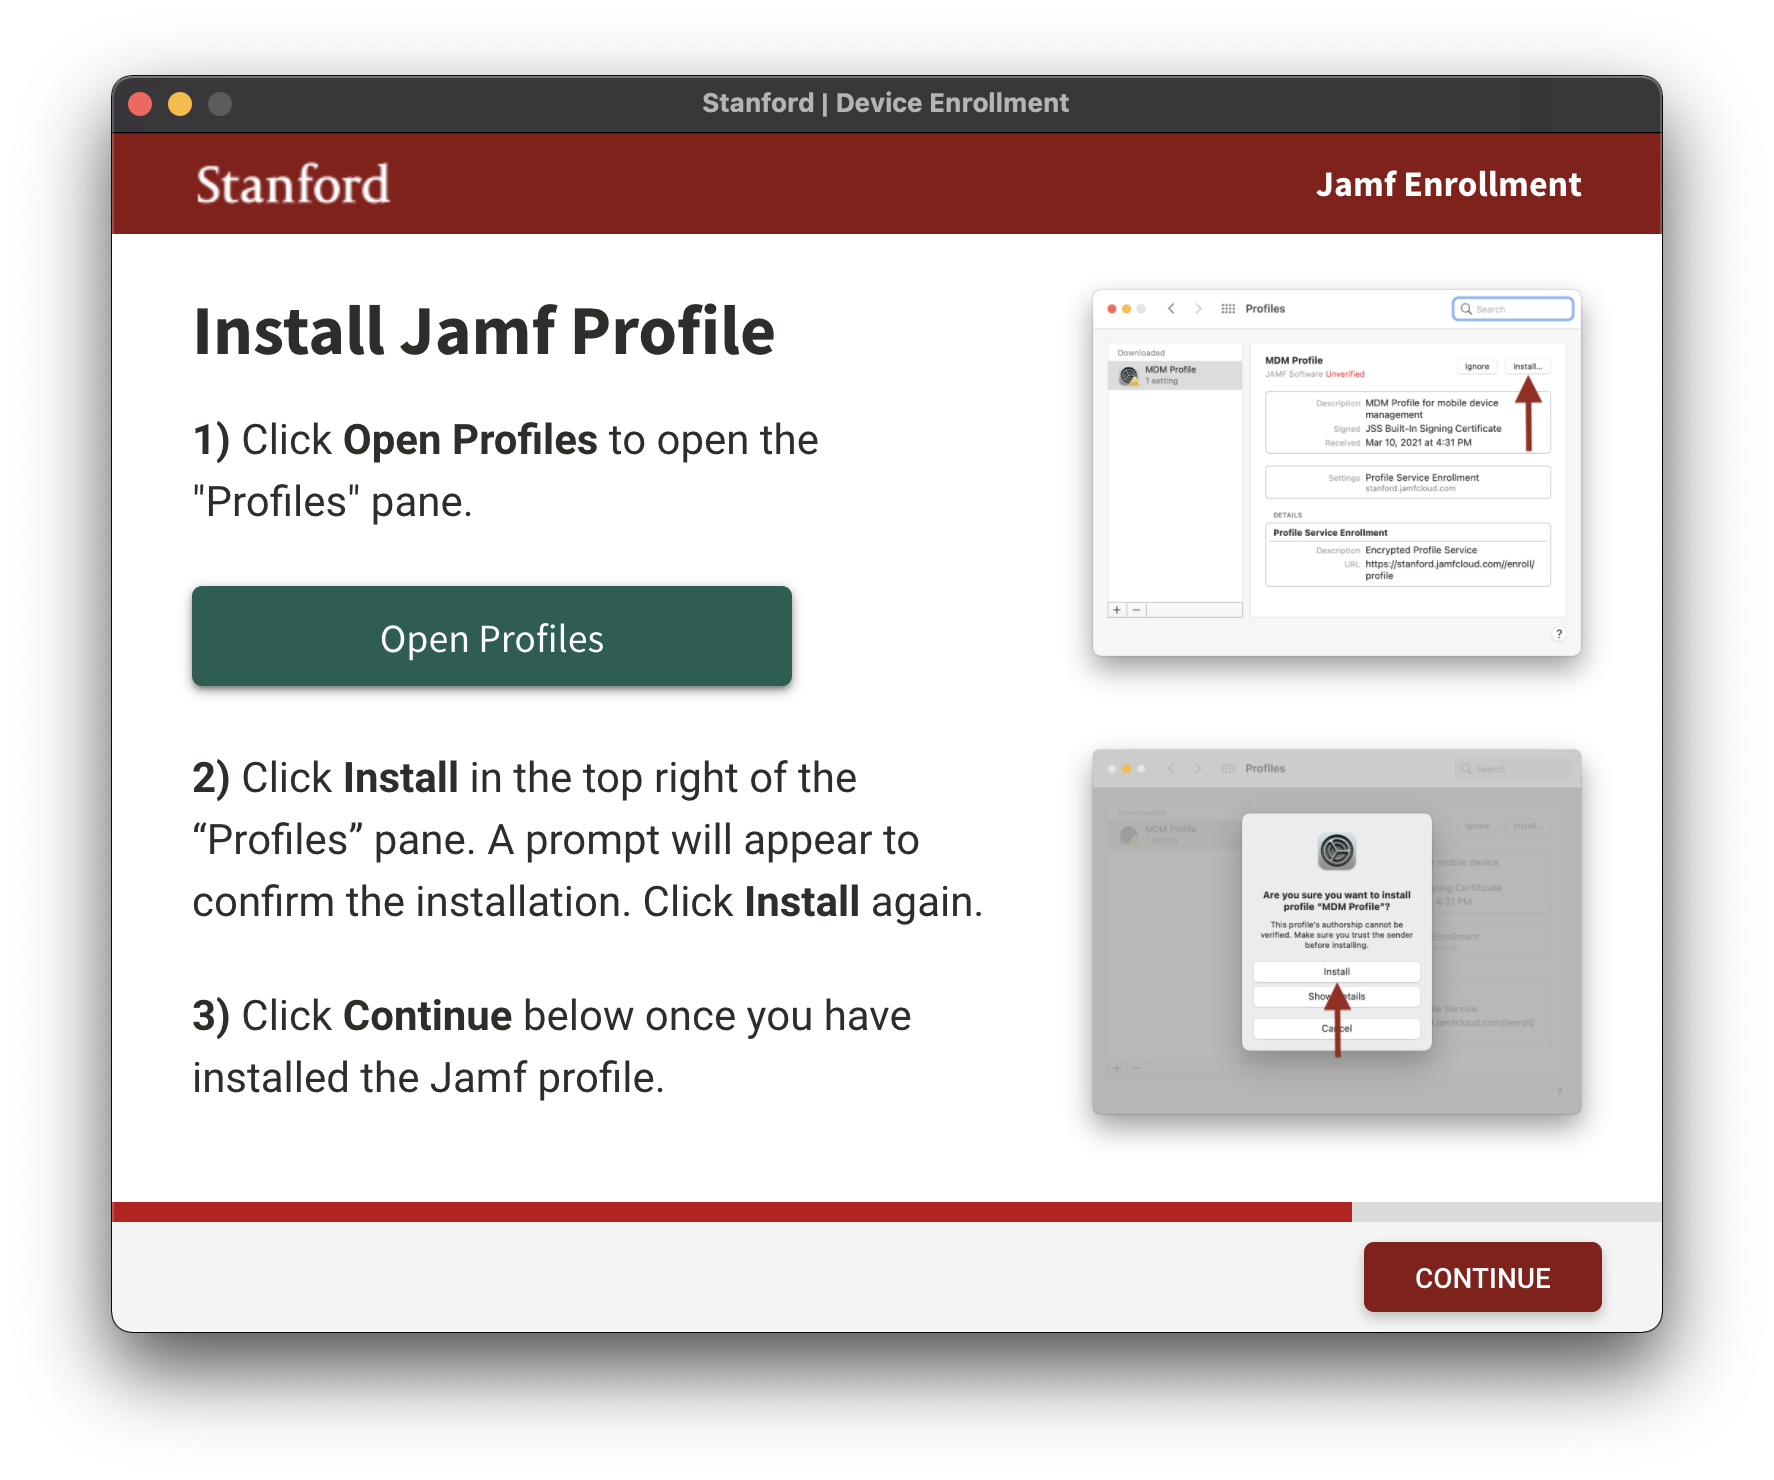
- You're finished! Click Close.

Troubleshooting Jamf Enrollment
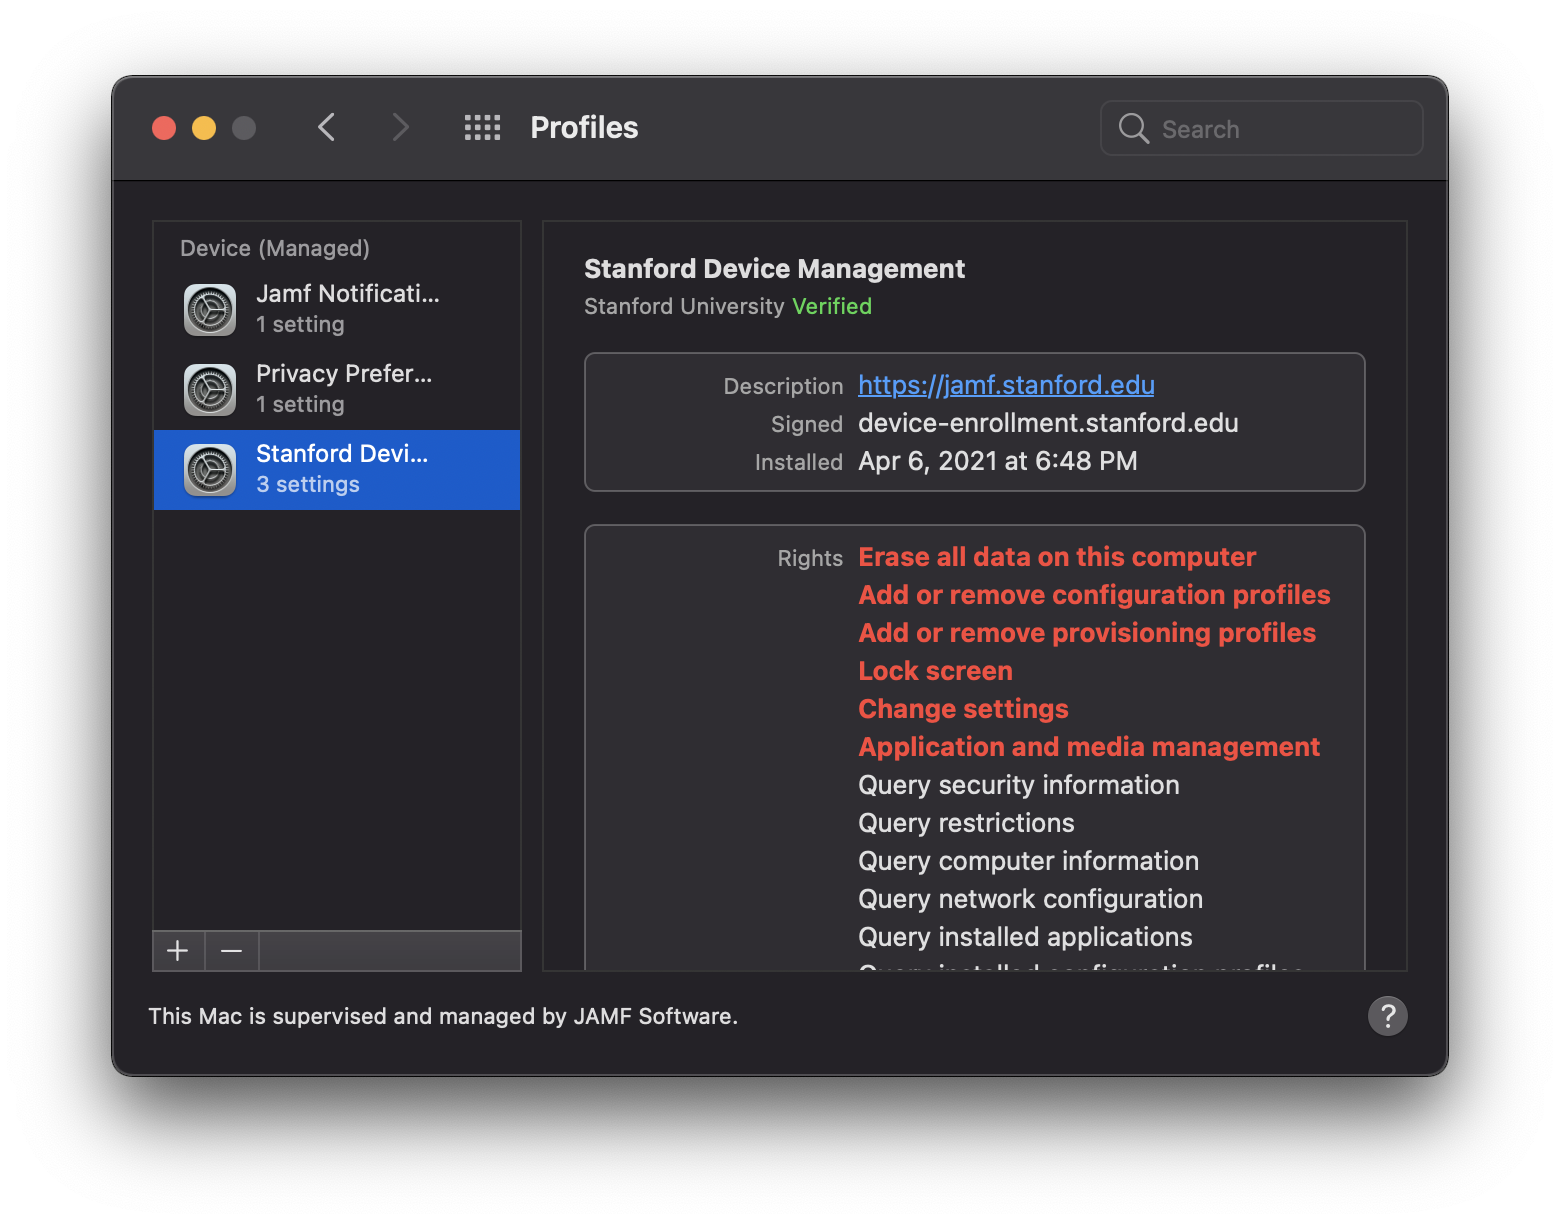
To confirm that your device is enrolled in Jamf, ensure you have installed the Stanford Device Management Device Profile (System Preferences > Profiles).
Screenshots for macOS Big Sur.
The Jamf Enrollment Installer attempts to verify this, and if it fails, you'll see a window like this:

Click Go Back to return to Step 5 above. Click Open Profiles and be sure to click the Install button for the Stanford Device Management Device Profile (from the Profiles pane of System Preferences)
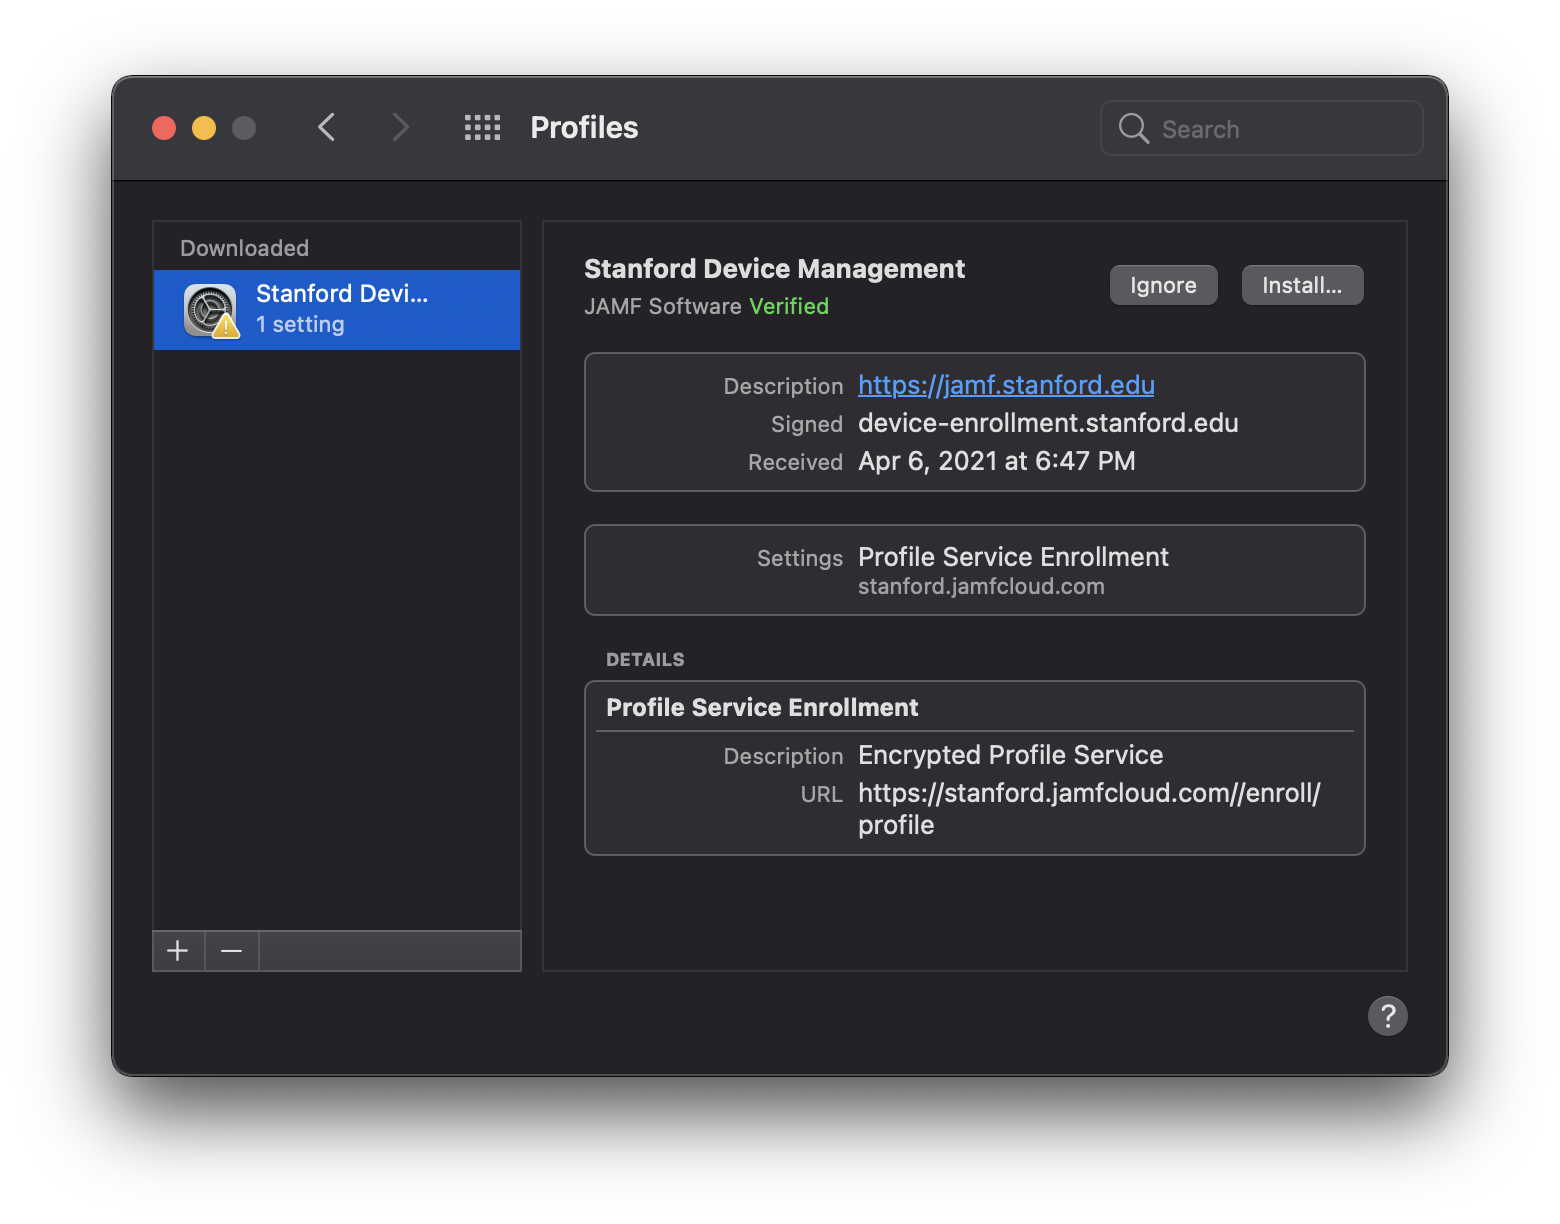
Click Install to confirm.

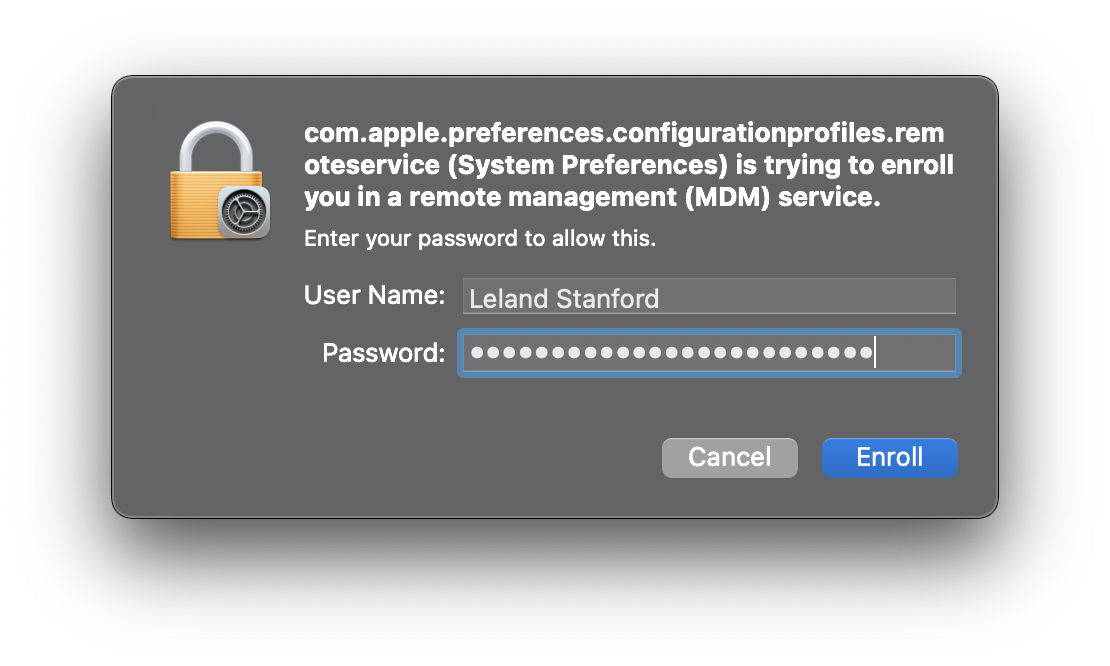
Enter your password and click Enroll.
Learn more about the broader plan to modernize Stanford devices
- Visit the Devices @ Stanford webpage
- Read the UIT news article: Healthy Devices @ Stanford