How to Configure Thunderbird for Microsoft 365 Using IMAP (Oauth2)
Thunderbird lacks Exchange support so it needs to be configured for IMAP. With IMAP you can only access your email, not your calendars, contacts, or tasks. To request access to IMAP, please submit a Help request.
Get Thunderbird
You can obtain a free download of Thunderbird from the Mozilla website. Follow the instructions on the site for installing Thunderbird. These instructions require Thunderbird version 78 or later.
Set up a new Thunderbird account
After installing Thunderbird you need to configure it for use with your @stanford mailbox.
- Launch Thunderbird and choose to create a new Email account.
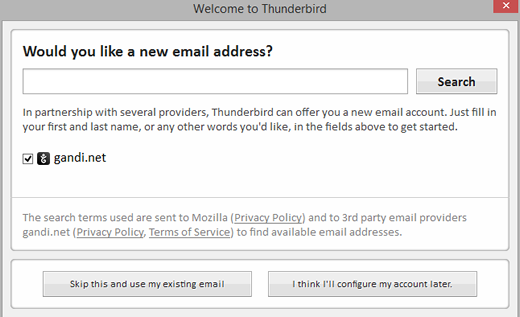
- When asked if you would like a new email address, click Skip this and use my existing email.
- Enter your name as you want it to appear in the From field in outgoing mail and your email address. Then, click Continue.
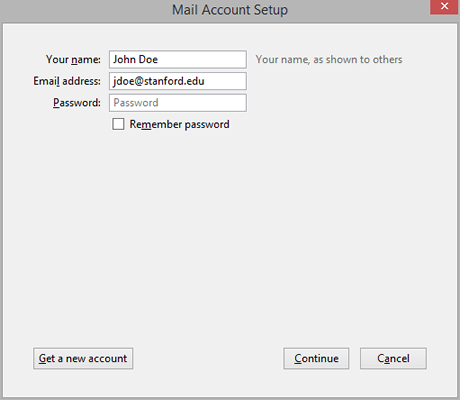
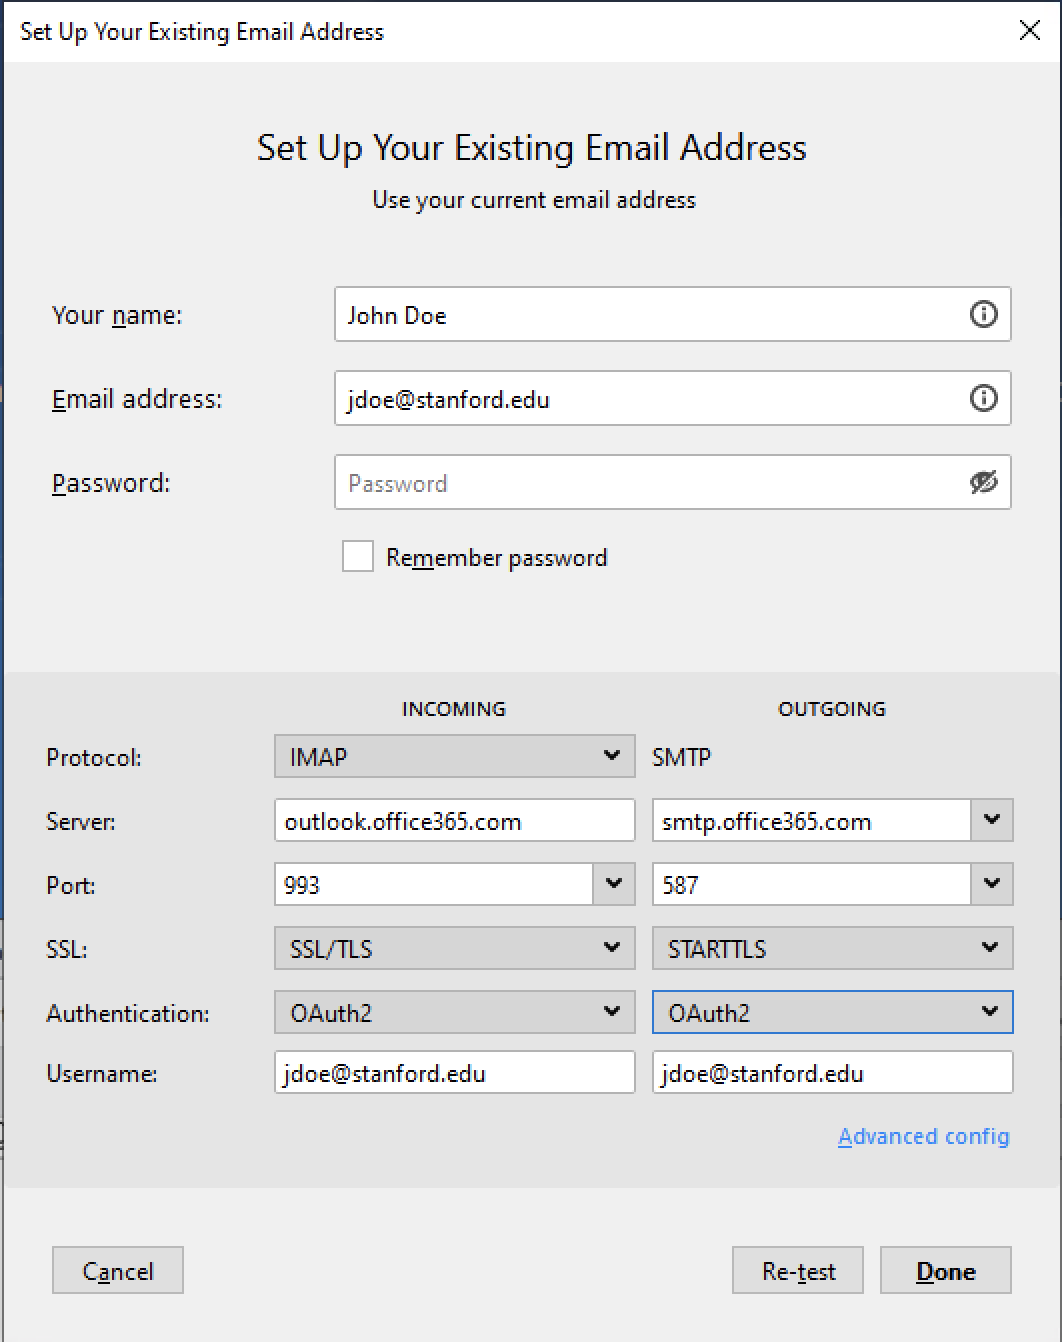
- Thunderbird will attempt to automatically configure your account settings. This will fail and a message saying "Thunderbird failed to find the settings for your email account" will display. Enter the following settings:
Incoming:- IMAP
- Server hostname: outlook.office365.com
- Port: 993
- SSL: SSL/TLS
- Authentication: Oauth2
- Server hostname: smtp.office365.com
- Port: 587
- SSL: STARTTLS
- Authentication: Oauth2
Note: If you do not have OAuth2 as an authentication choice you can click the Re-test button after filling in the server information.
- Click Done. The Thunderbird main window displays.
- You should be prompted to complete the normal web-based two-factor authentication process.
Additional account settings
We recommend that you configure your Thunderbird to move your deleted messages to the Deleted Items folder on the server (webmail). This setting allows you to recover deleted items. We also recommend keeping sent messages and drafts in the Sent Items and Drafts folders in webmail folders on the server. This will make it less confusing if you also use webmail or another email client to access your Microsoft 365 email.
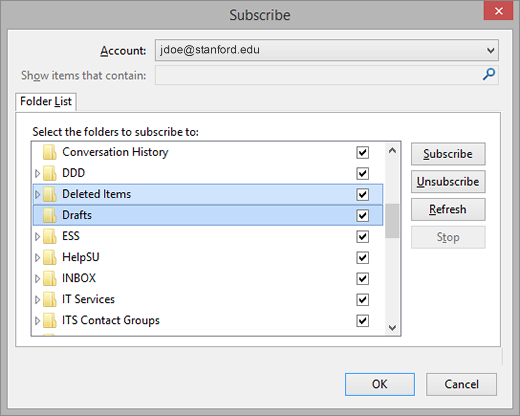
- Right-click your @stanford.edu account name and click Subscribe.
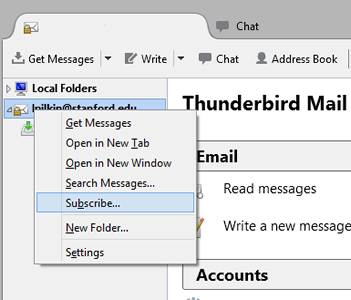
- Make sure the Deleted Items, Drafts, and Sent Items folders (and any other folders you want to access in Thunderbird) are selected and then click Subscribe.
Note: Do not subscribe to the Calendar folder.
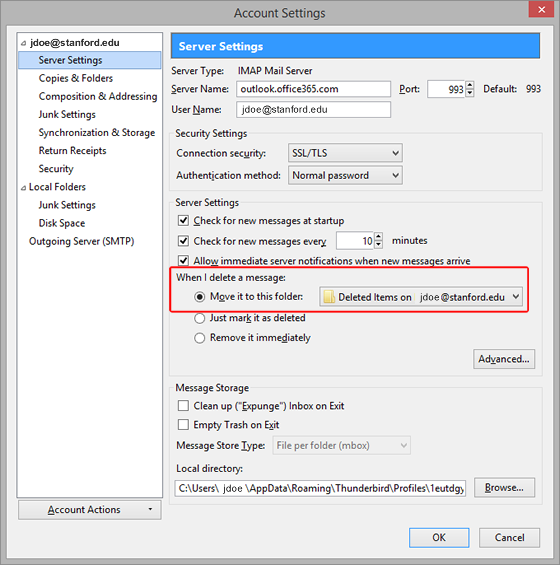
- Click your @stanford.edu account name to display the Thunderbird main window. Under Accounts, click View settings for this account.
- In the Accounts Settings window, click Server Settings in the left panel. In the Server Settings section of the window, When I delete a message, select Move it to this folder and then choose the Deleted Items folder on the server.
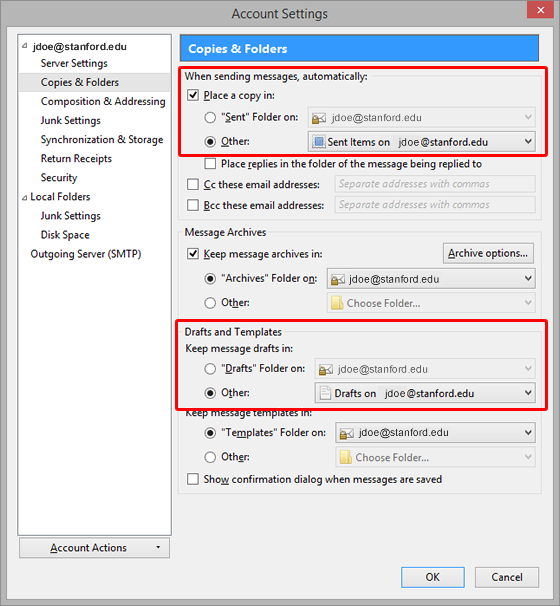
- Click Copies and Folders in the left panel and make the following changes:
- When sending messages automatically, place a copy in: select Other and choose the Sent Items folder on the server.
- Keep message drafts in: select Other and choose the Drafts folder on the server.
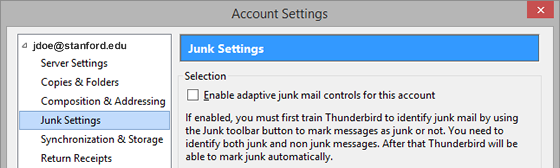
- Click Junk Settings in the left panel.
- Uncheck the box for Enable adaptive junk mail controls for this account.
Note: Server side junk/spam filtering is already enabled for Microsoft 365 accounts.
- Click OK to save your changes and close the Account Settings window.
Known issues
The following are known issues with Thunderbird:
- When sending mail, Thunderbird may hang on the step "Copying Mail to Sent folder."
- You may see an error message that says, "Error copying mail to Sent folder" with a prompt to retry.
To resolve these issues:
- In Thunderbird, go to the Tools menu and click Accounts Settings.
- In the left panel, click Server Settings.
- In the Server Settings section of the window, click the Advanced button.
- Change the Maximum number of server connections to cache to 1 and then click OK.
- Click OK to close the Account Settings window.