Configure Apple Mail for Microsoft 365
These instructions apply to Apple Mail running on macOS X 10.14+. Please note that macOS 10.14 is no longer supported by Stanford or Apple but will technically work with modern authentatication. Before upgrading, you may want to review system checks to ensure a smooth macOS upgrade.
Follow these instructions to configure the Mail app to connect to your email and calendar events on the Microsoft Exchange server.
IMPORTANT: After configuring Apple Mail, be sure to change the Trash setting to never permanently erase messages. Otherwise, you won't be able to restore deleted messages.
- Launch Mail. (Click the icon in the dock or go to the Applications folder to open it.)
- Add a mail account:
- If you have not previously configured an account in Mail you will be prompted to add an account. Click Exchange and then click Continue.
- Otherwise, go to the Mail menu and click Add Account > Exchange and then click Continue.
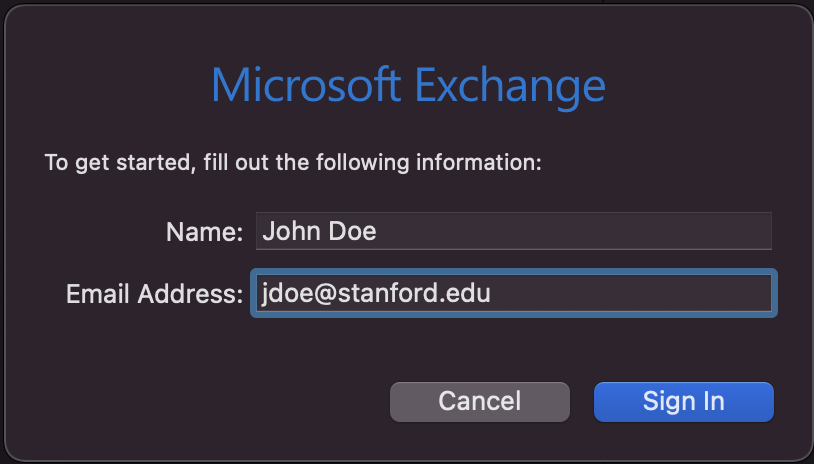
- Enter the following information and then click Sign In when done:
- Full Name: the name you want displayed on your outgoing mail
- Email Address: sunetid@stanford.edu (do not use an email alias)

- You will be prompted for a two-step authentication. Authenticate to continue.
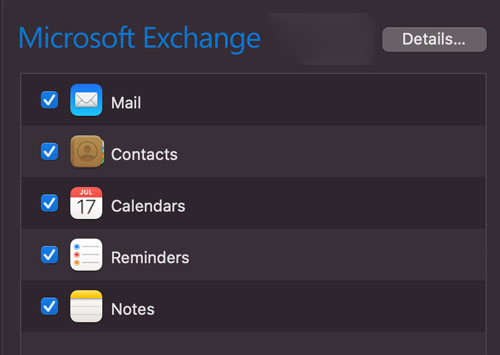
- Select the apps you want to use with this account and then click Done.

Recommended setting
Microsoft 365 accounts are not backed up. However, Outlook on the web and some desktop versions of Outlook let you recover deleted items that are no longer visible in the Deleted Items folder.
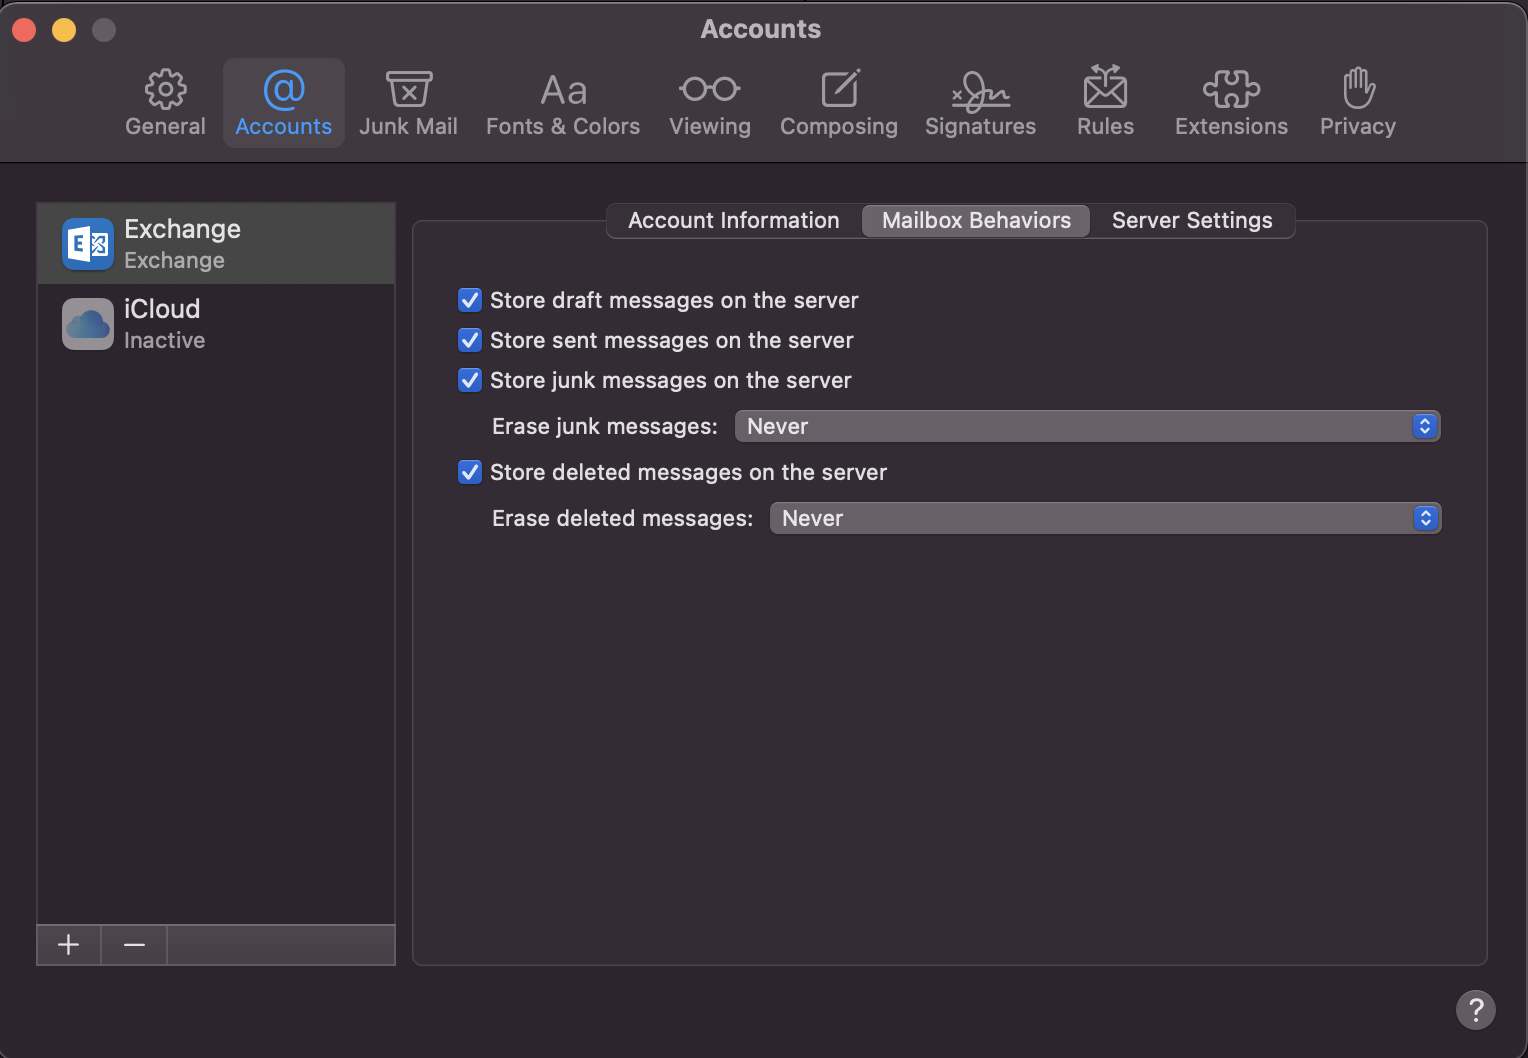
In Apple Mail you can set how long to keep messages in the Trash folder. Once a message is permanently erased in Apple Mail it cannot be recovered from the Deleted Items folder in Outlook on the web. We recommend setting Apple Mail to never permanently erase deleted messages.
- In the Mail menu, click Preferences.
- In the Accounts pane, click the Mailbox Behaviors tab.
- In the Trash section, choose the following settings:
- Store deleted messages on server: checked
- Permanently erase deleted messages: Never

