How to Manage a Waiting Room
A waiting room allows you to manage access to your meetings by sending participants to a virtual waiting room instead of joining the meeting directly. You'll see a list of who's trying to enter the meeting and will need to manually admit participants individually or all at once. If there's a name you don't recognize, you can choose not to let them join.
Best practices for Waiting Room Management
- If you use this option, it's important to pay attention to ensure no attendees are accidentally left in the Waiting Room for the whole meeting.
- For large meetings or classes, consider assigning an alternative host or co-host to the task of admitting participants from the waiting room. Navigate to the Zoom Help Center to learn more about Waiting Rooms.
Decide 'Who should go in the Waiting Room?'
Stanford Zoom offers you a choice of three options. When you pick an option, it will apply to all of your meetings that have a Waiting Room. Here's how to choose.
Who should go into the waiting room? |
What happens? |
Recommended when... |
|---|---|---|
| Everyone | Only you, as the host, enter the meeting directly. | You want all attendees to remain in the waiting room until you’re ready to admit them. |
| Users not in your account | Guests signed in with a Stanford University Zoom account will bypass the waiting room. | You want ALL people external to Stanford University to wait in the waiting room so you can approve them. |
| Users who are not in your account and not part of the allowed domains | Guests signed in with a Stanford University Zoom account or affiliated with one of the approved domains that you list will skip the waiting room will bypass the waiting room. | You want SOME people external to Stanford to wait in the waiting room so you can approve them. |
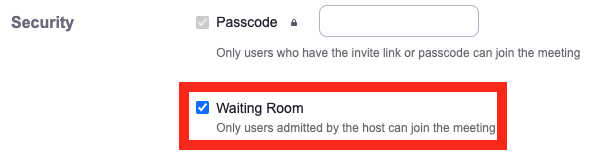
Enable Waiting Room for a specific meeting
To implement this security feature when scheduling a new meeting, follow these steps.
- Schedule a new Zoom meeting.
- Under "Security," check the box Waiting Room.
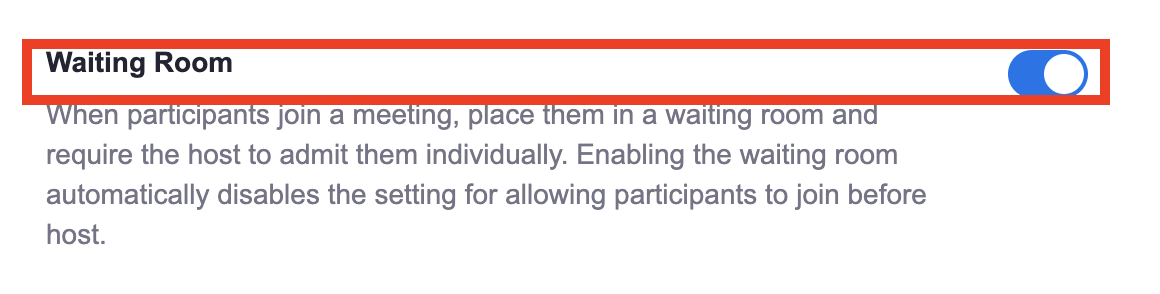
Turn Waiting Room on by default
To send participants to a Waiting Room by default, follow these steps.
- Sign in to the Zoom Web Portal at stanford.zoom.us to access your profile page.
- Click Settings on the left navigation bar and then select Security.
- Find the setting labeled Waiting Room and toggle the switch on.
- Save your meeting.
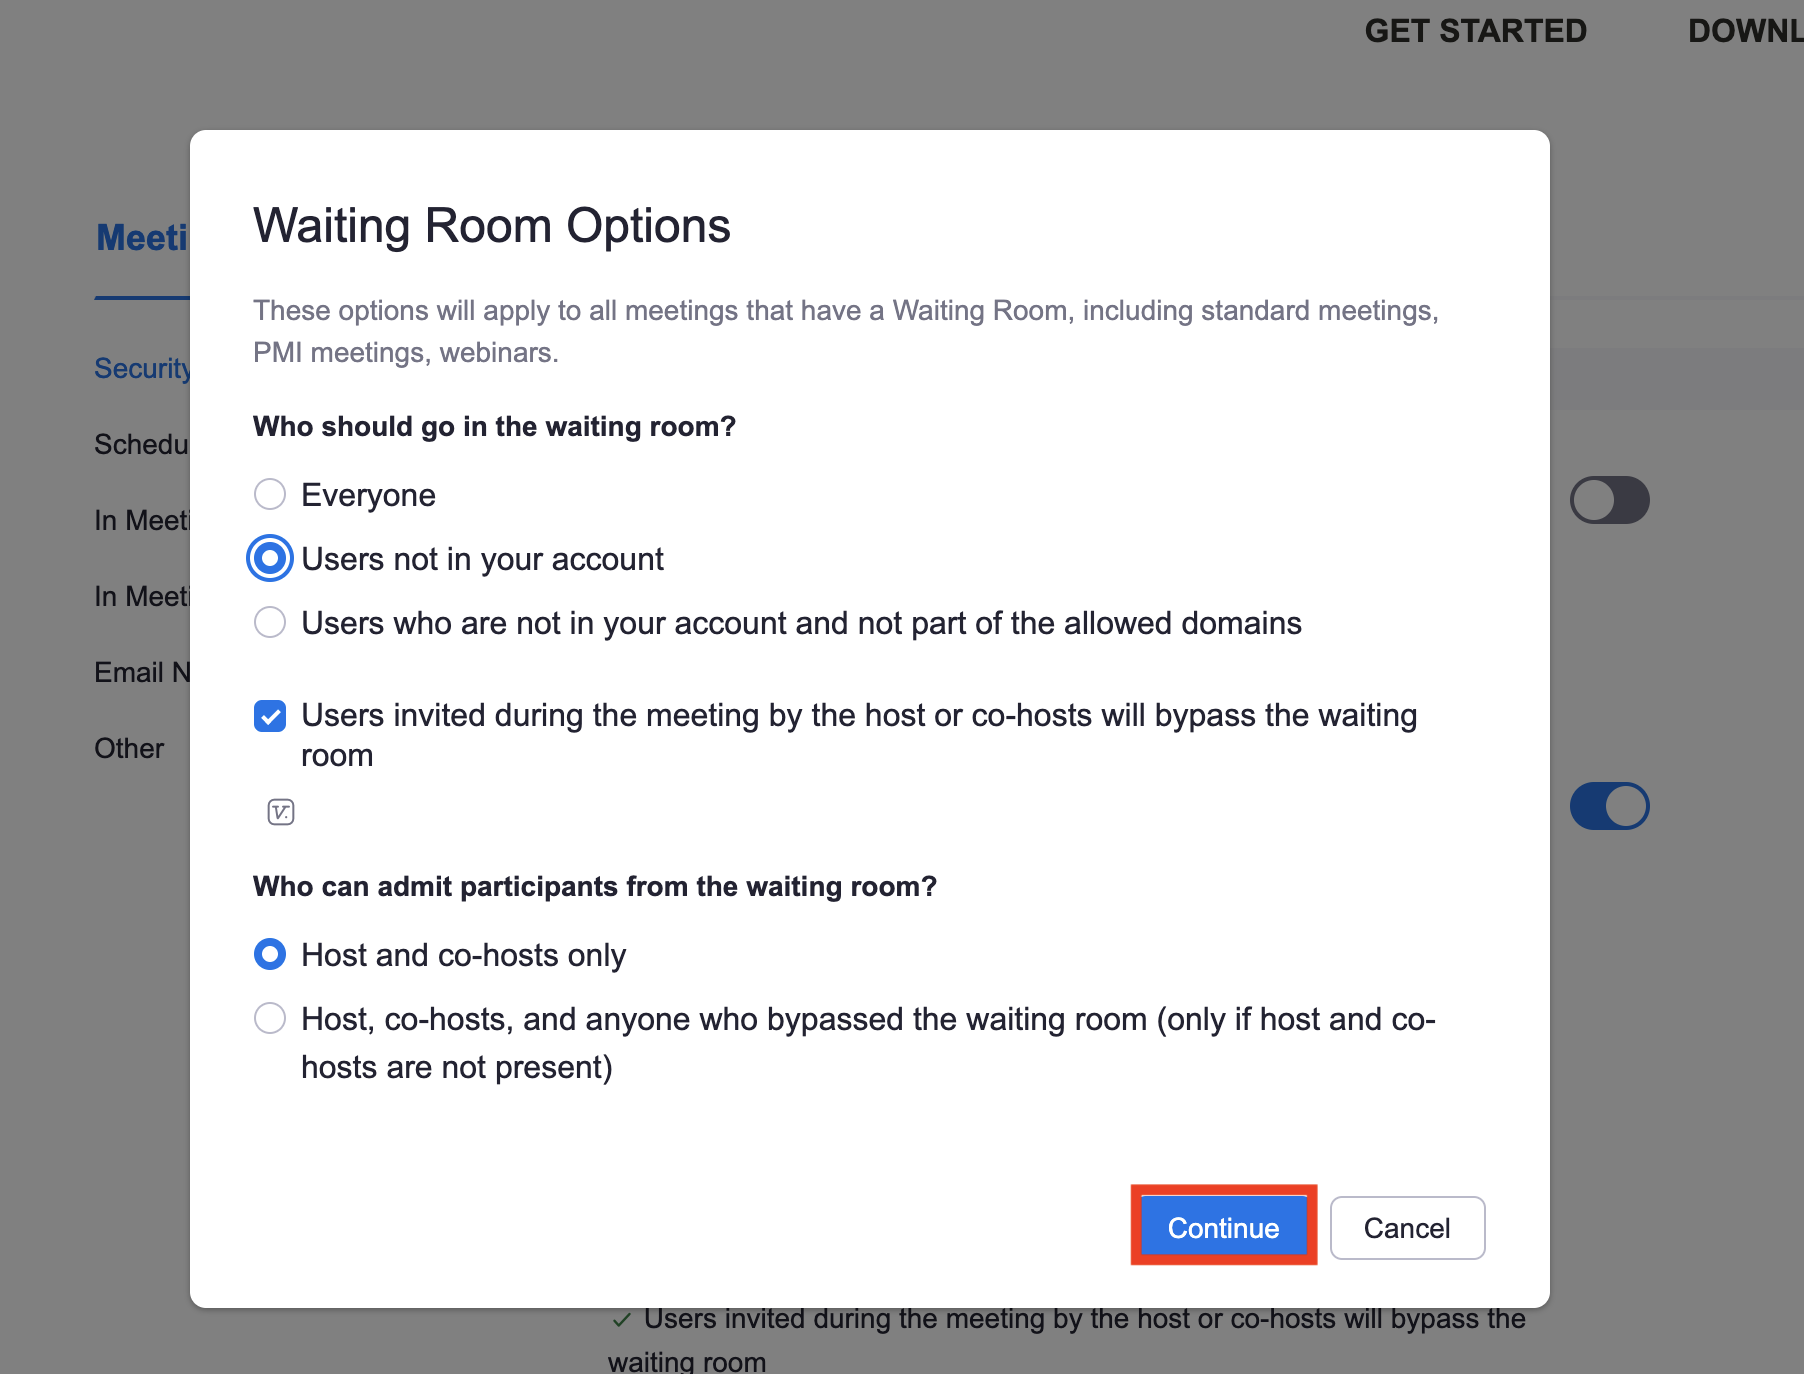
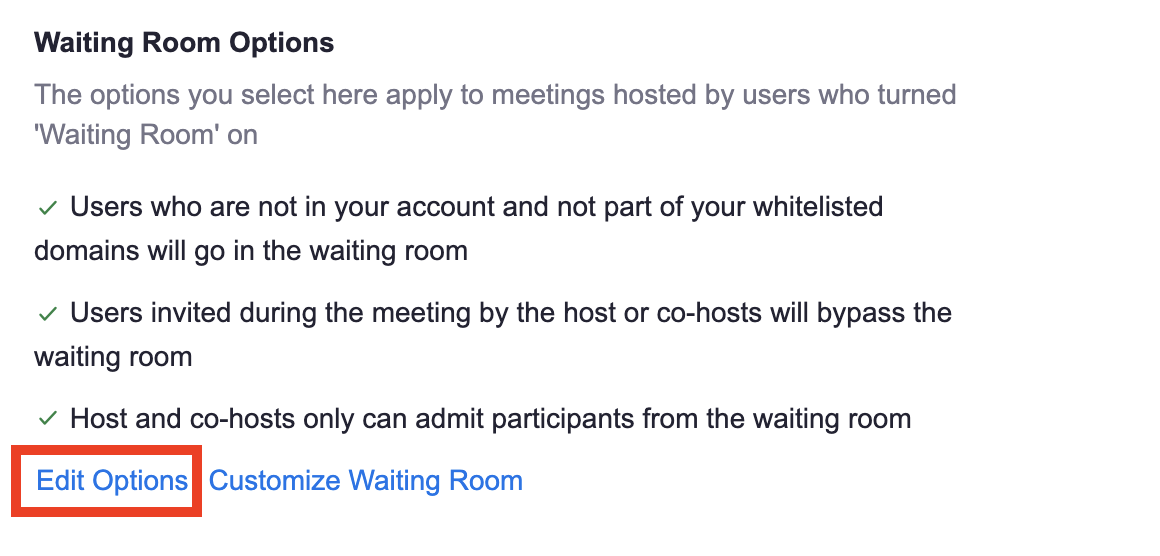
Edit 'Who should go into the waiting room?'
The option you choose will apply to all of your meetings when 'Waiting Room' is enabled. To edit 'Who will go into the waiting room?', follow these steps.
- Follow steps 1-3 in the above section 'Turn Waiting Room on by default.'
- Click the Edit Options link.
- Select the options you'd like and click Continue to save.