Zoom for Government
Zoom for Government (ZoomGov) is a specialized version of the Zoom platform that caters to the specific requirements and needs of the Federal Government. It provides a similar user experience to the commercial Zoom platform. However, its features and updates are made available through a more conservative approach. The platform uses infrastructure based in the United States and is managed by U.S. personnel. ZoomGov is primarily intended for use by Government agencies that require FedRAMP Moderate baseline controls and compliance.
Note: Due to security restrictions, some advanced Zoom features may not be available in ZoomGov.
Available ZoomGov Features Include:
- Meetings
- Whiteboard
- Team Chat
- Transcription
- SSO Security
- Cloud Recording Storage*
- Webinar*
- Conference Room Connector*
*Feature is only available with a Full ZoomGov license.
Get started
- Step 1: Create New Account and Login to ZoomGov
-
ZoomGov is an instance of Zoom designed to meet the requirements and needs of the Federal Government. It is intended to be used when Government contracts require FedRAMP Moderate baseline controls and compliance.
If requested to join a FedRAMP meeting, use the steps below to create a Basic ZoomGov account.
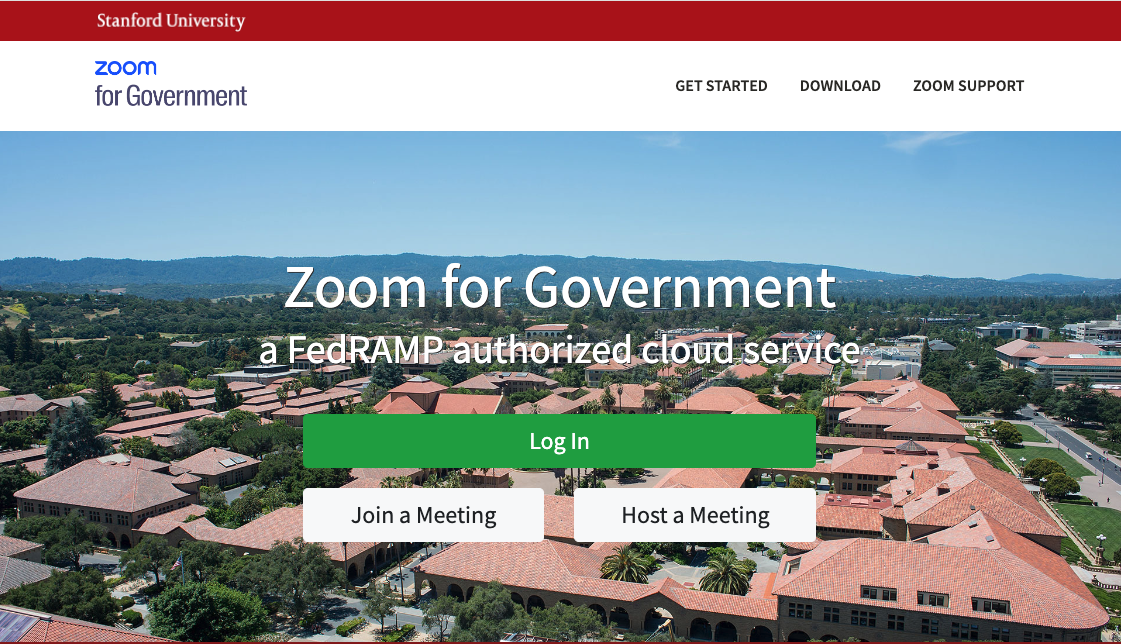
- Visit https://stanford.zoomgov.com.
- Click Log in.
- Click Yes to acknowledge the terms of service.
- Sign in through the Stanford Single Sign On (SSO) process.
- If Cardinal Key is installed, you will be prompted with the Select a certificate window. Click Ok.
- If Cardinal Key is not installed, you will be prompted to enter your SUNet ID and Password then click Login.
- Once the SSO process is complete, you will be brought to the ZoomGov homepage. You now have a Basic ZoomGov account and can configure your account and meeting settings.
Note: Meetings scheduled with a Basic ZoomGov account are limited to 40 minutes. To schedule ZoomGov meetings over 40 minutes, you must request a Full ZoomGov license.
How to obtain a Full ZoomGov License
Users who need to join and host FedRamp meetings must first create a Basic account (follow the steps above) and then submit a request for a Full ZoomGov license. - Step 2: Connect your Outlook Calendar
-
Connect your Outlook Calendar to the ZoomGov application so you can easily start and join scheduled ZoomGov meetings.
-
Launch the Zoom desktop client application.
-
From the login screen, click the Zoom dropdown menu and select .zoomgov.com as the login account. Then click SSO to sign in through the Stanford Single Sign process.

-
Make sure Your company domain is stanford.zoomgov.com then click continue.
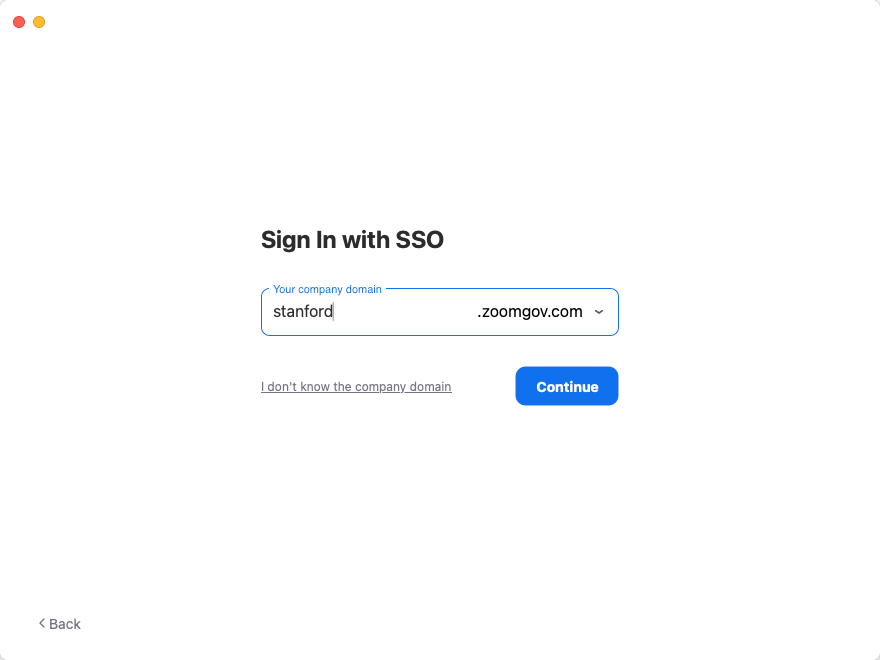
-
If Cardinal Key is installed, you may be prompted with the Select a certificate window. Click Ok.
-
If Cardinal Key is not installed, you will be prompted to enter your SUNet ID and Password then click Login.
-
-
From the Zoom client, click Add a Calendar.
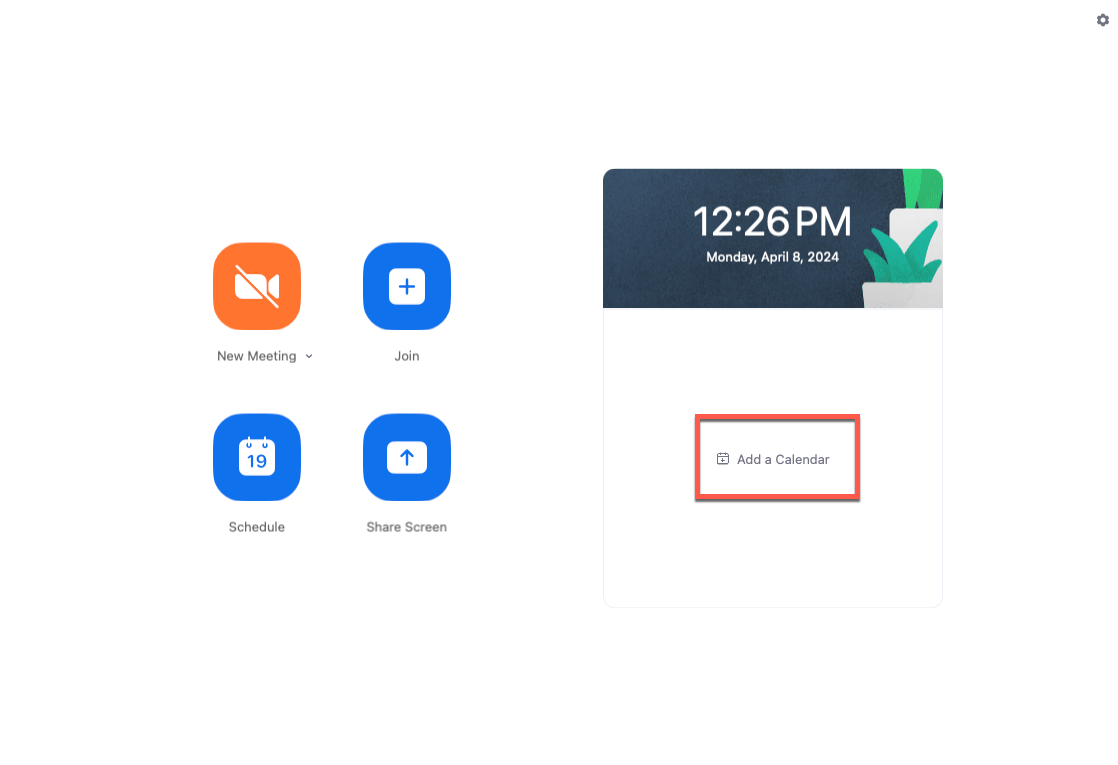
-
Select Office 365 and click Next.
-
Ensure Authorize with OAuth 2.0 is selected.
-
Click Authorize.
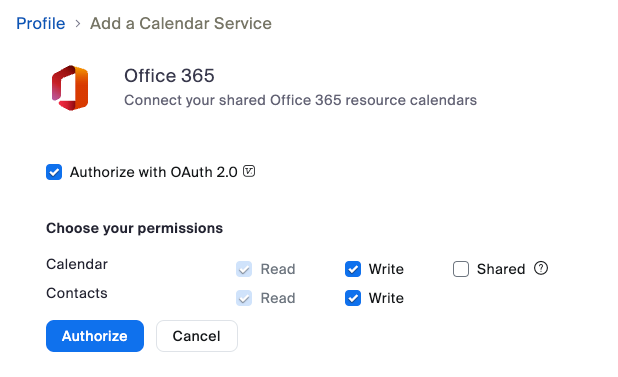
-
If successful, a "Configure calendar successfully" message will appear.
-
- Step 3a: Schedule a ZoomGov Meeting
-
After you have created your ZoomGov Basic account (Step 1) and connected your Outlook calendar (Step 2), you can schedule ZoomGov meetings in your Outlook Calendar using the steps below.
Note: Meetings scheduled with a ZoomGov Basic account are limited to 40 minutes. To schedule ZoomGov meetings over 40 minutes, you must request a Full ZoomGov license.
Follow the steps below to schedule meetings using the Outlook calendar plugin.- Open your Outlook calendar.
- In the top left, click the New Event.
- In the Event menu bar, click the Zoom dropdown and select Settings.

- If you are already signed into your Stanford Zoom account, you will need to click Sign out (bottom right) first, then sign in to your ZoomGov account.
- On the top right of the Zoom login prompt, click the Zoom.us dropdown and select the Zoomgov.com option.

- Click SSO at the bottom of the page.
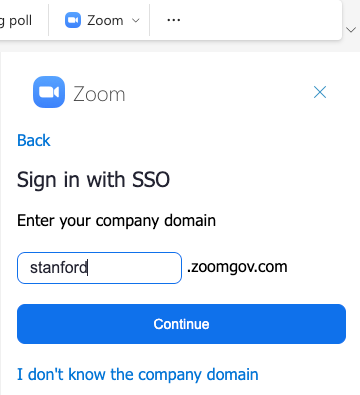
- Enter stanford for the Company Domain and click continue.
- Click Allow for the request to display a new Window; this is for the SSO process to complete.
- Adjust your Zoom meeting settings as preferred, then click Add Zoom Meeting.

- Ensure that you are using the ZoomGov account by verifying that the meeting URL you created contains https://stanford.zoomgov.com and not https://stanford.zoom.us.
- Fill in the meeting details (title, attendees, time, location, and any descriptions.)
- Step 3b: Join a ZoomGov Meeting from the Zoom Desktop Client Application
-
To join a ZoomGov meeting using the Zoom desktop client application, ensure that your active profile on the desktop client is ZoomGov. Follow the instructions below to log in to your ZoomGov account and start or join a meeting.
- From the Zoom application login screen, click the Zoom dropdown and select .zoomgov.com as the login account, then click SSO to sign in through the Stanford Single Sign process.
- Make sure Your company domain is stanford.zoomgov.com then click continue.
- If Cardinal Key is installed, you may be prompted with the Select a certificate window. Click Ok.
- If Cardinal Key is not installed, you will be prompted to enter your SUNet ID and Password then click Login.
- Select Start or Join to attend a scheduled meeting.
- From the Zoom application login screen, click the Zoom dropdown and select .zoomgov.com as the login account, then click SSO to sign in through the Stanford Single Sign process.
- Step 3c: Join a ZoomGov Meeting from a Video Conference Enabled Room
-
To join a Zoom Government meeting in a video conference room, you can press the one-button join option or dial the Meeting SIP URI.
Option 1: Add the room to the meeting invite to enable one-button join
- When scheduling your meeting, add the room calendar resource to the invite by typing the room name in the participant field.
- A few minutes before the meeting starts, the conference room device will present your meeting with a button to join on the control panel.

- Once you push the join button, you will be prompted to enter the meeting passcode.
Option 2: Dial the Meeting SIP URI
- Select the Call button on the touch panel.

- Tap on the Search or dial bar on top.
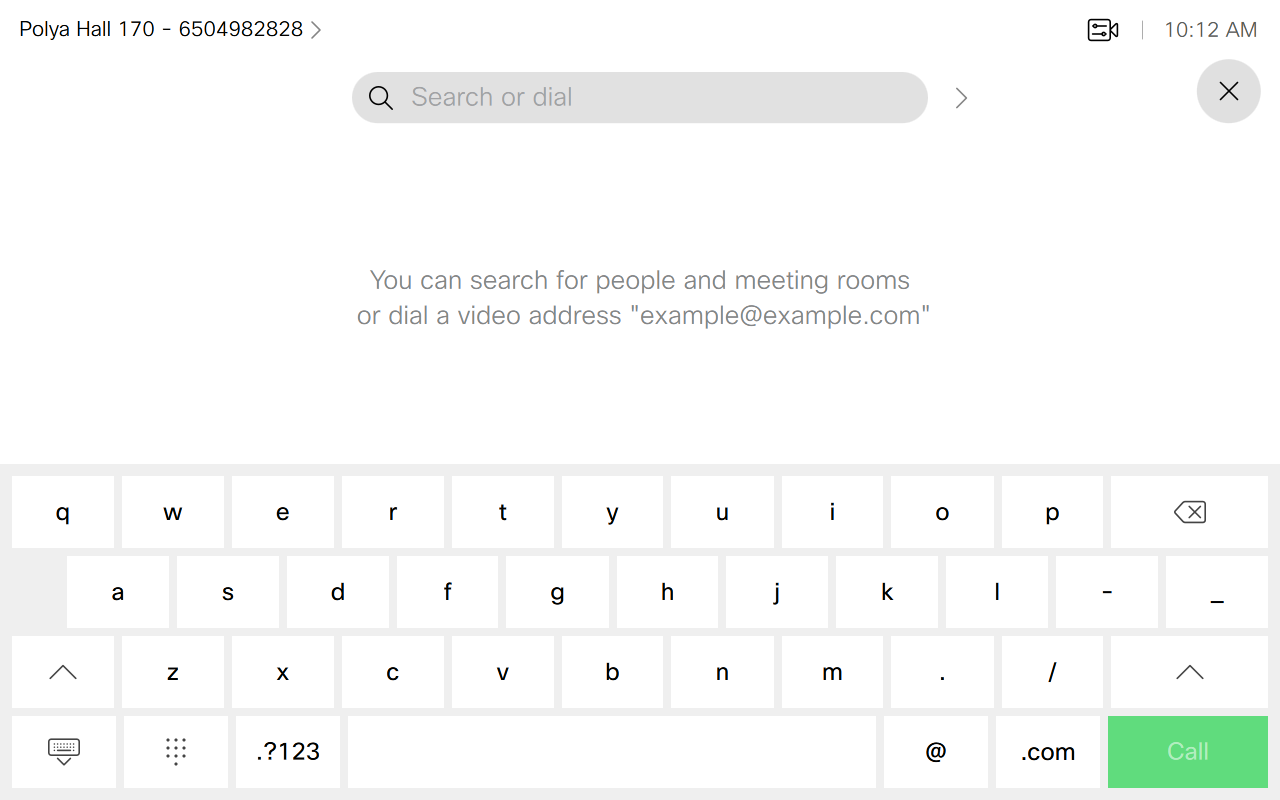
- Enter the SIP URI to join the ZoomGov meeting (found in the meeting invite).
- Format: meeting id @ sip.zoomgov.com
- Example: 987654321@sip.zoomgov.com

- Once connected, you will be prompted to enter the meeting passcode.
Get help
If you need additional assistance, submit a ZoomGov help request.