AFS File-Transfer: Mac Desktop
File transfer applications
The following secure methods for publishing, posting, and transferring files over the Stanford network are available.
- AFS mounting: OpenAFS for Stanford
Note: For macOS versions 10.12 and later, AuriStor File System is the replacement for OpenAFS. - SFTP (Secure File Transfer Protocol: Fetch
Note: Stanford does not support unsecure FTP.
Publishing using OpenAFS (Mac)
AuriStorFS for Stanford is used to mount directories in AFS to your Mac's desktop, the same way you would work with other network volumes. Anyone with a full service SUNet ID can access their own AFS space, or space in other user directories, group, and department directories, provided they have been granted the necessary permissions.
Notes:
- AuriStor FS for Mac is available for download at AFS for Stanford. The Instructions tab on this page has links to information about installing, mounting, permissions,and connecting/disconnecting with OpenAFS.
- You should be logged in to Kerberos before launching the OpenAFS. Kerberos is already built-in to Mac OS X but Kerberos Commander configures Kerberos for use with the Stanford network.
- On your hard drive, navigate to Applications > Stanford > AFS and launch the AFS Controller to display the Mount AFS Volume window.
Note: You may want to create a shortcut to the AFS Controller and put it in the dock.
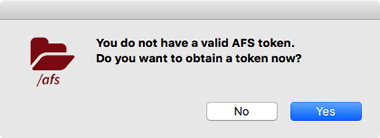
- If you are not logged in to Kerberos, an "unable to get AFS token" message displays. Click OK. A dialog box will display, asking if you want to obtain a token. Click Yes.
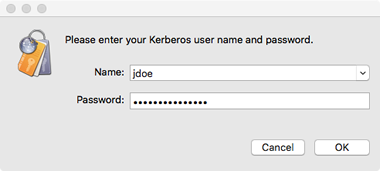
- Enter you SUNet ID and password and click OK.
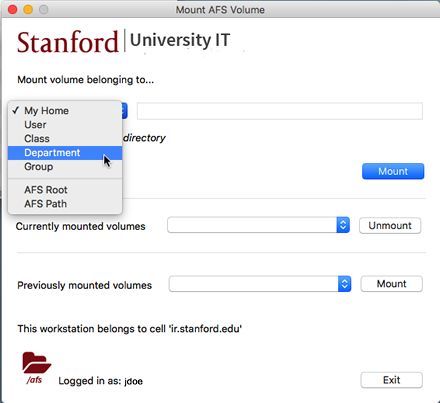
When the Mount AFS Volume window displays, select the AFS space where you wish to publish items from the Mount Volume belonging to drop-down list box.
- To publish to your personal web space, select My Home.
- To publish to someone else's personal web space, select User.
- To publish to a class web space, select Class.
- To publish to a group web space, select Group.
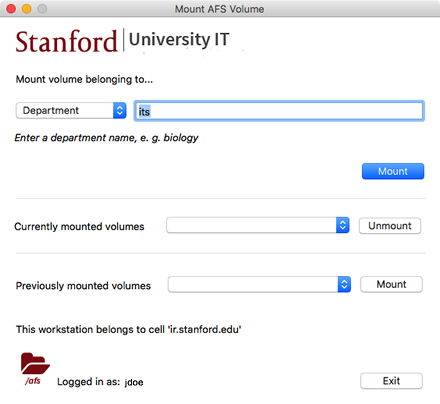
- To publish to a departmental web space, select Department.
- Enter the appropriate directory name and click the Mount button. (You do not need to enter a directory name for My Home.)
- An alias to the selected network folder will mount on your desktop. You can now drag and drop files from your computer to the network drive to publish them.
Note: Be sure to place files you wish to publish to the web inside the WWW folder to make them accessible to others.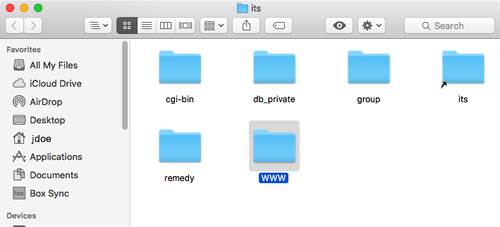
Publishing using Fetch (Mac)
Fetch is a Mac application that allows users to securely transfer files between computers using a format called SFTP (Secure File Transfer Protocol). It is used to move HTML, graphic, and other files from a personal computer to the server computers which will make them available on the web.
The Stanford community can download and use Fetch free of charge with a SUNet ID and password..
To download Fetch:
- Go to the Fetch page to download the software.
- Follow the Fetch installation instructions.
Using Fetch to publish files to a personal web folder
- Launch Fetch.
- The New Connection dialog box will appear. If it does not, choose New Connection under the File menu.
Enter the following in the New Connection dialog box:
- Hostname: enter cardinal.stanford.edu.
- Username: enter your SUNet ID.
- Connect using: select SFTP.
- Enable encryption: this is automatically checked when SFTP is selected.
- Password: enter your SUNet ID password.
- Add to keychain: unchecked.
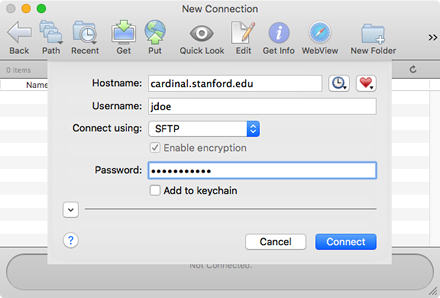
- Click Connect.
Select the WWW folder and click the Put icon in the tool bar.
Note: You can double-click the WWW folder if the directory you wish to publish to is inside of this folder.

- Locate the file to be uploaded from your computer to the server and click Put to publish the file.

Note: You can drag-and-drop to and from your desktop to the folder as an alternative to the Put and Get methods.
Using Fetch to publish files to Dept or Group web folders
- Launch Fetch
- The New Connection dialog box will appear. If it does not, under the File menu, choose New Connection.
Enter the following in the New Connection dialog box:
- Hostname: enter cardinal.stanford.edu.
- Username: enter your SUNet ID.
- Connect using: select SFTP.
- Enable encryption: this is automatically checked when SFTP is selected.
- Password: enter your SUNet ID password.
- Add to keychain: unchecked.
- Click Connect.
- In the Fetch menu bar, click Go > Go to Folder. Enter the AFS path of your group or department web folder and click OK.
Examples: /afs/ir/group/group_name/WWW (group folder); /afs/ir/dept/department_name/WWW (department folder)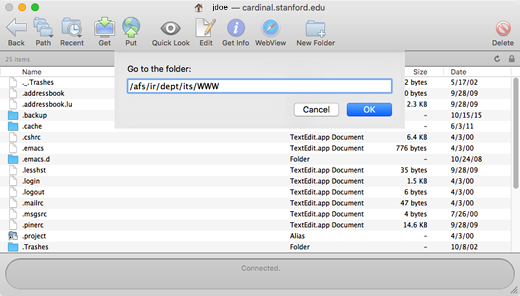
- Click the Put icon in the tool bar.
- On your computer, locate the file to be uploaded to the server and click Put to publish the file.
Notes
Note: Web directory names generally are in all lowercase and are always only one word. If two or more words are needed, they may be made into one word or separated by a dash or underscore ("newfolder," "new-folder," or "new_folder," but not "new folder"). In other words, you cannot use a space for directory names.
Deleting files and directories (folders) in Fetch:
- Select the file or directory you want to delete.
- Click the Delete icon on the Fetch tool bar. (You can also delete a file or folder by dragging it to the trash.)
- You will be prompted to confirm that you wish to delete the file/directory.
For information and help with the icons on the Fetch dialog window, in the Help menu, click Fetch Help.