Granting Access to and Sharing Files in Teams
By default, files uploaded to a team are usually available to everyone on the team. If you want to share a file or folder with one or more people without adding them to the team, you have a few options.
Find your file
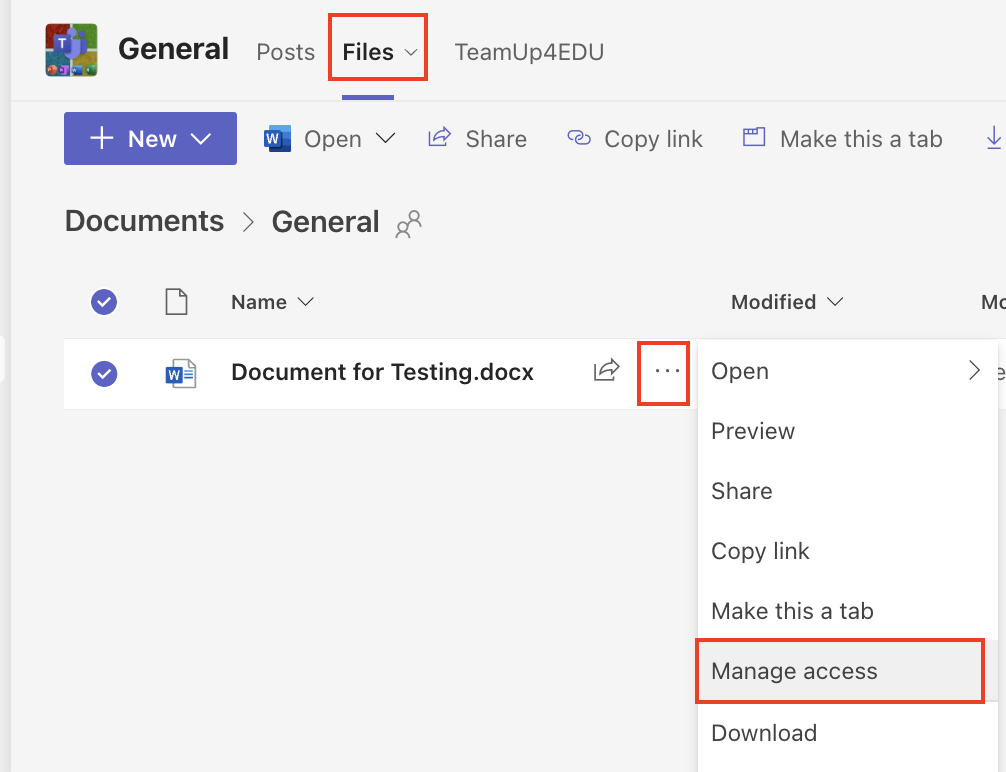
Files that you upload to a channel are stored in your team’s SharePoint folder. These files are available in the Files tab at the top of each channel.
Grant access
You can grant someone outside of the team access to edit or view a file or folder or make certain files read-only to team members.
TIP: This option ensures that only the individual you specify will be added to a list of people with direct access to the file and avoids the known issue that requires Stanford Medicine Affiliates to re-login to M365 when after clicking a shareable link for file sharing in Teams.
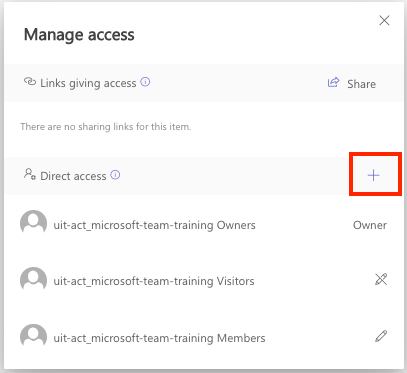
- Navigate to the team you want to work with and click the Files tab. Click More options (three dots) next to the file or folder name and select Manage access.The Manage access panel will open. This will show you who has access to this file and what their permissions are.
- Click the blue plus sign (+) to the right of the Direct access heading. The Grant access pop-up will appear.
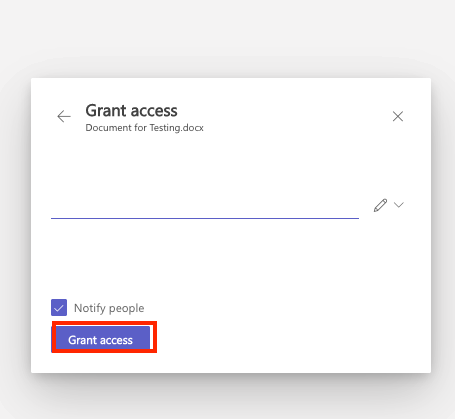
- Enter the name or email address of the person(s) you want to give permission to. Use the drop-down to set the permission level. When you are done, click Grant access.
Share links with specific people
To share files and folders via a shareable link, select the file or folder you wish to share, and then click either Share or Copy link at the top of the page. Alternatively, hover over the file or folder, and then click the arrow icon. From there enter the email addresses of the people you want to email the file link or select Copy Link to choose where you share the link.
Important: Always share with the fewest people and lowest level of access/permission as the work allows.
- Refer to the information below on types of links to understand link settings.
- When you are done, be sure to select Apply.
Types of links
Whether you generate a link through the copy link or share option, you’ll get the same choices of links you can generate. Review the options to select the best one for your sharing needs.
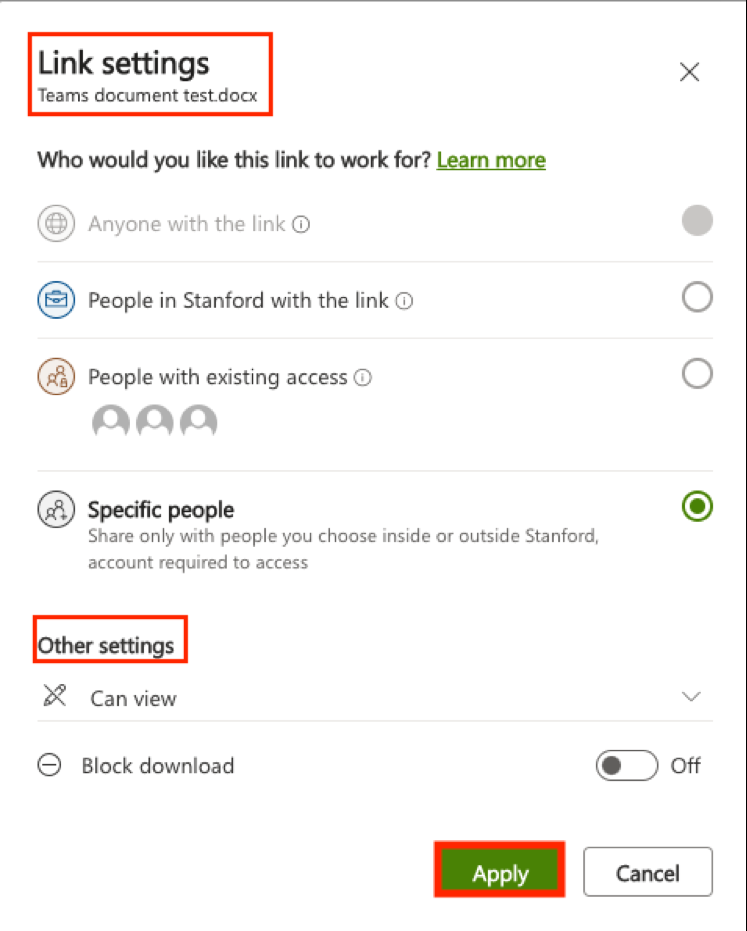
Link settings
Review the table below to become familiar with the types of settings and who the different links will work for.
| Who would you like this link to work for? | More about this link | Important to know |
|---|---|---|
| Anyone | This option is the least secure. | This link setting is grayed out and unavailable at Stanford University. |
| People in Stanford | This link gives anyone in Stanford University who has the link access to the file, whether they receive it directly from you or forwarded from someone else. |
|
| People with existing access | This is a more secure link. It doesn't change any permissions, and it doesn't share the link |
Use this if you want to send a link to someone who already has access. |
| Specific people | This link will only work for the people you choose. |
If you choose this setting:
|
- When file-sharing documents, remember that files can be forwarded outside of the intended recipients if settings are not configured correctly.
- Always share with the fewest people and the lowest level of access/permission the work allows.
Other settings
- Select one of the following options to determine the permission level:
- Can edit,
- Can review,
- Can review.
- Optional: Use the toggle to block the recipient from downloading the file.