University IT
How to Delegate Access to Your Microsoft 365 Email
These instructions explain how to grant someone else “delegate access” to your email inbox in Microsoft 365. You may allow them to view the messages in your inbox, send messages on your behalf, or even move and delete messages, depending on the permissions you grant them. You may also remove or modify their access.
Please note that this process is for individual mailboxes only, not mailboxes shared by a team or department. For example, an executive might delegate access to their administrative assistant to screen and manage the executive’s emails.
For an overview of this service, see the Microsoft 365 page.
Prerequisites
A full-service SUNet ID that was activated more than 24 hours ago.
Before you begin
This page explains how to delegate access to your email inbox via webmail, Outlook for macOS, classic Outlook for Windows, and new Outlook for Windows. Learn what version of Outlook you have.
To understand how to set permission levels when delegating access to your email, visit Microsoft 365 Email and Calendar Delegate Permission Levels Explained (KB00021153).
Instructions
Grant delegate access: Outlook on the web
- Log in to webmail.stanford.edu.
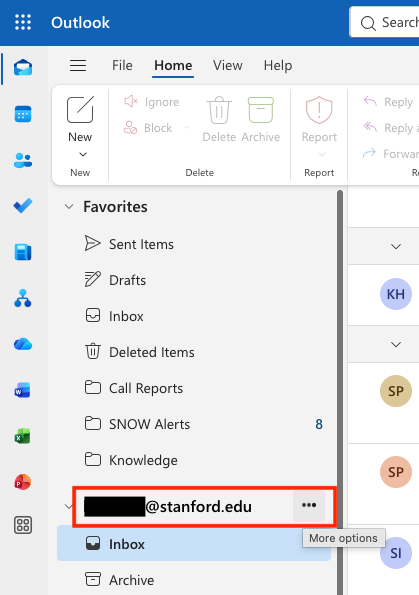
Select the three dots that appear next to your email address when you hover over it.
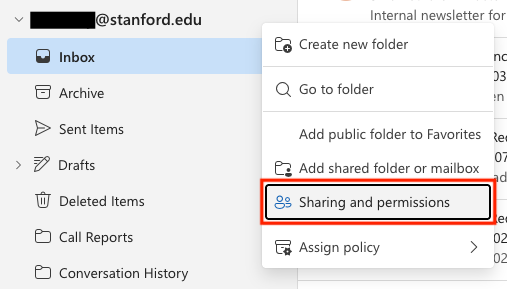
Select Sharing and permissions.
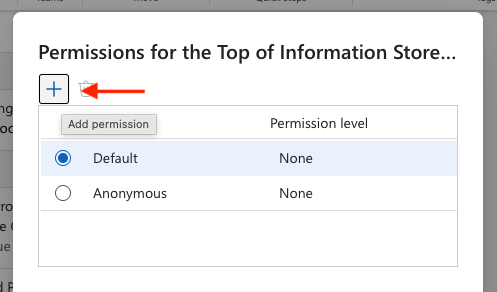
Select the plus sign (+).
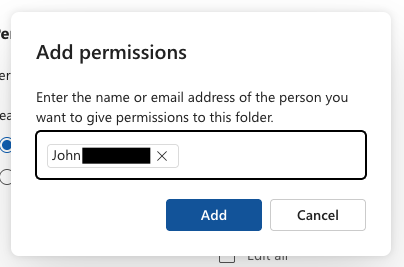
Search for and select the person to whom you want to grant delegate access, then select Add.
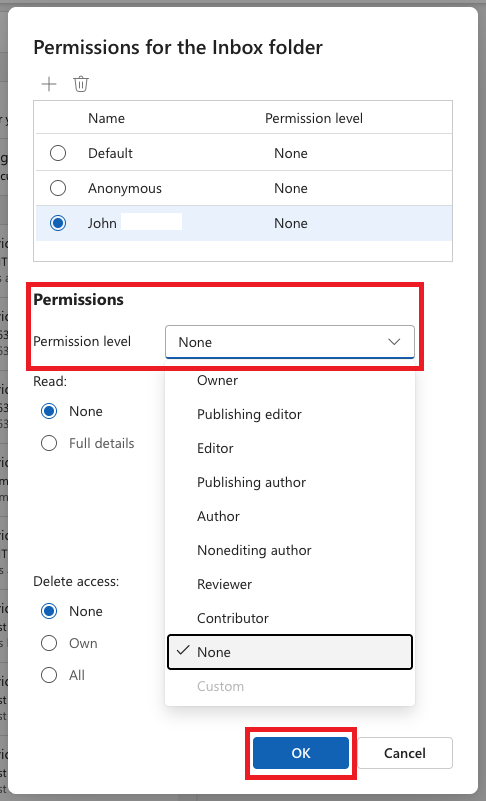
Choose the permissions you want to grant to the delegate, then select OK.
- Select OK to exit.
Grant delegate access: Outlook for Windows (Classic)
- Select the File tab in the top-left corner.
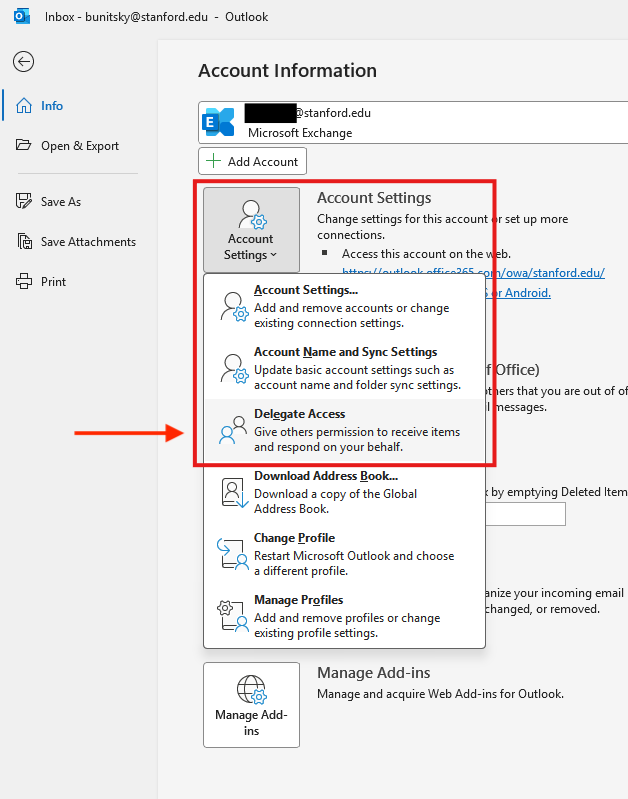
Select the Account Settings button, then select Delegate Access.
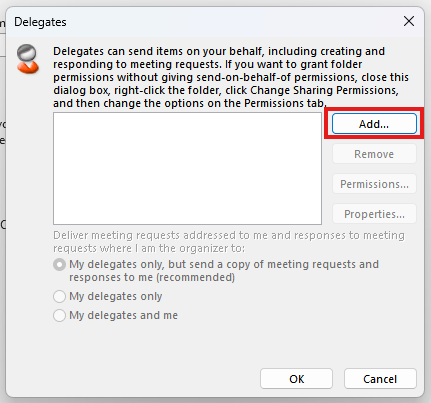
Select Add.
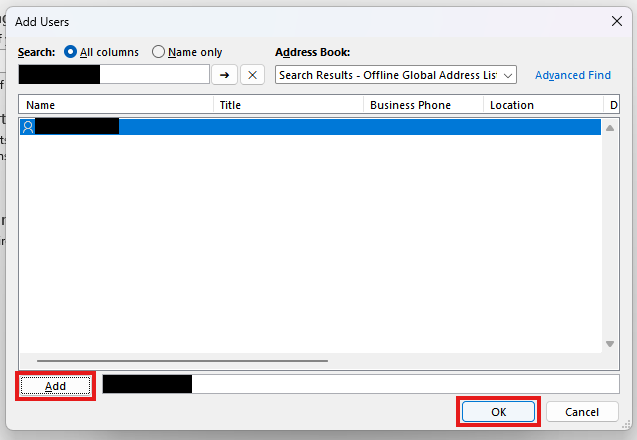
Search for and select the person to whom you want to grant delegate access, select Add, and then select OK.
Choose the permissions you want to grant to the delegate and then select OK.
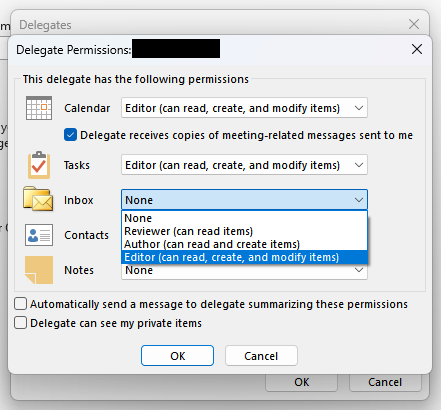
- Select OK to exit.
Grant delegate access: Outlook for Windows (New)
Follow the steps for Outlook on the web above, starting at step 2.
Grant delegate access: Outlook for Mac
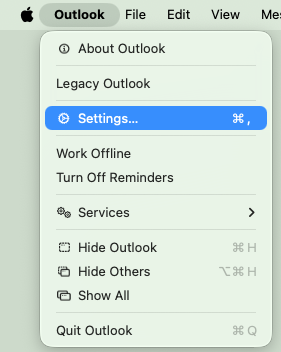
Select Outlook in the top left of your screen (next to the Apple icon), then select Settings.
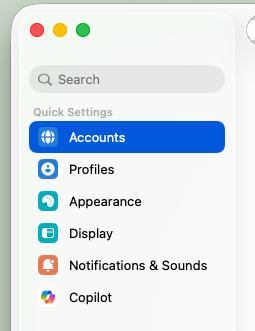
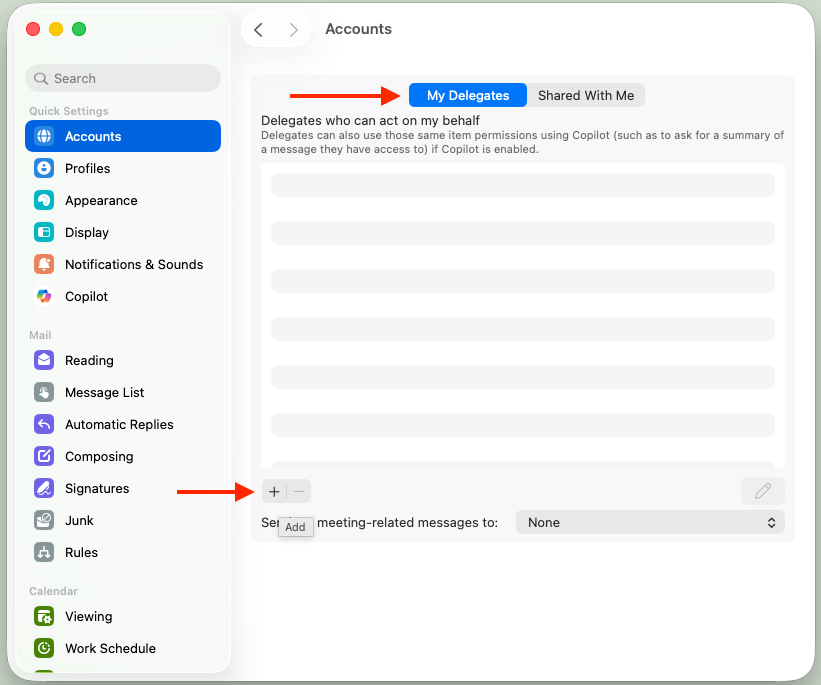
In the Quick Settings section, select Accounts.
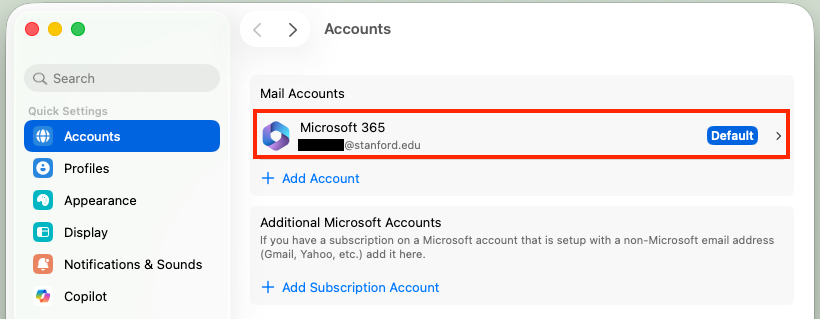
Select your Microsoft 365 account.
Select the My Delegates tab and then click the plus sign (+).
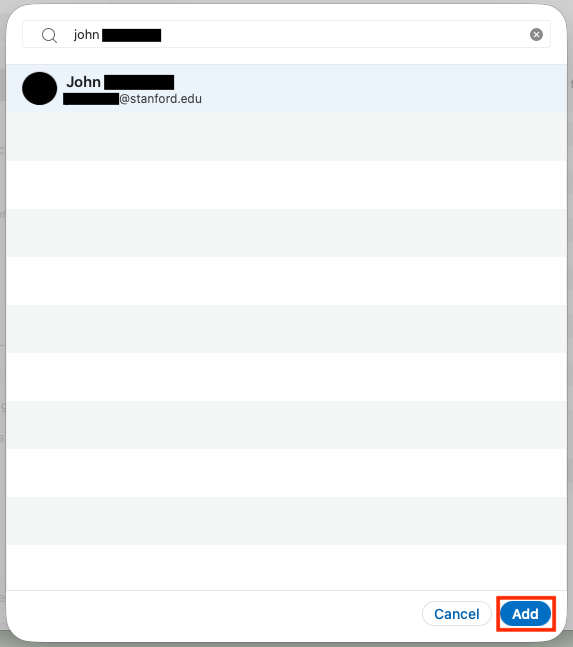
Search for and select the person to whom you want to grant delegate access and select Add.
Choose the permissions you want to grant to the delegate and select OK.
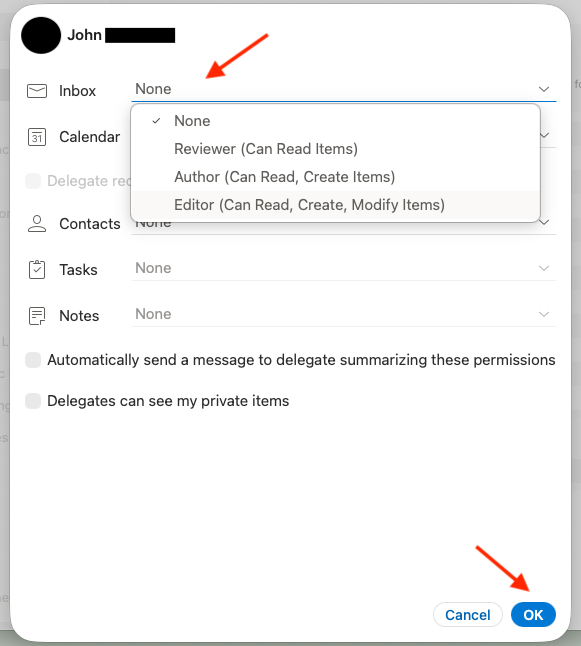
- Select OK to exit.
How to access a mailbox as a delegate
To access an individual mailbox as a delegate, use the same process to add the mailbox to your preferred email client that you would use for a shared mailbox. Follow these instructions:
- Set Up Shared Email Using Webmail
- Set Up Shared Email Using Outlook for Windows (Classic)
- Set Up Shared Email Using Outlook for Windows (New) (KB00021127)
- Set Up Shared Email Using Outlook for Mac
- Set Up Shared Email Using IMAP
How to remove or modify a delegate’s access
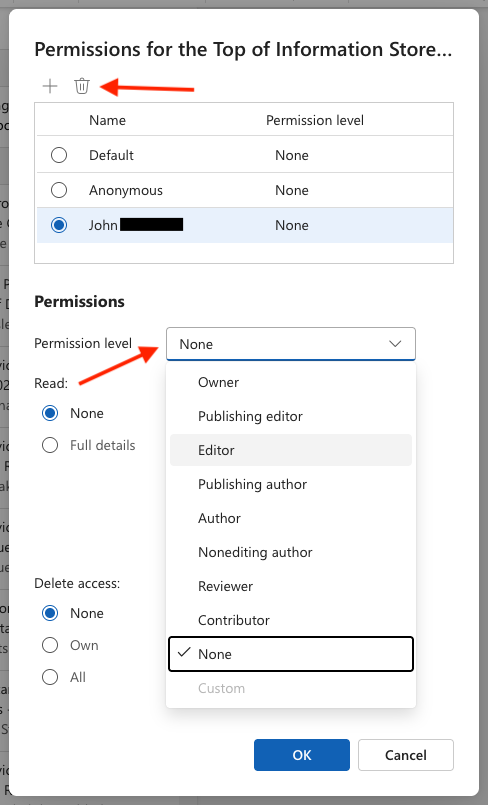
To remove or modify a delegate’s access to your email, navigate to the delegate settings window in webmail (as described in Outlook on the web above), select the delegate's name, and follow these steps:
- To remove a delegate: Click the trash can icon at the top of the window to remove their access.
- To change a delegate’s permission level: In the Permissions section, use the Permission level drop-down menu to change their permission level, then select OK.
Troubleshooting and help
It can take up to 24 hours for an individual to be granted access to your mailbox after you make them a delegate. If they cannot access your mailbox after 24 hours, please ask them to contact the UIT Service Desk at 650-725-4357 or submit a Help ticket.