Cisco Secure Client Start Before Logon
Available only for Windows platforms, the Cisco Secure Client Start Before Logon (SBL) establishes the VPN connection before logging onto Windows. This is especially helpful while the computer is off campus or when logging onto a new computer remotely.
Download
Use the latest version of VPN to access the Start Before Logon feature.
Using the Start Before Logon feature
Connect to the VPN prior to logging in to take advantage of startup items and mapped network drives.
- With the latest version of VPN, you will see an icon denoted in the bottom right corner for the Cisco Secure Client Start Before Logon feature. Please click on the icon.

- You will see the Cisco Secure Client dialogue box. Click Connect and sign in as you normally would.
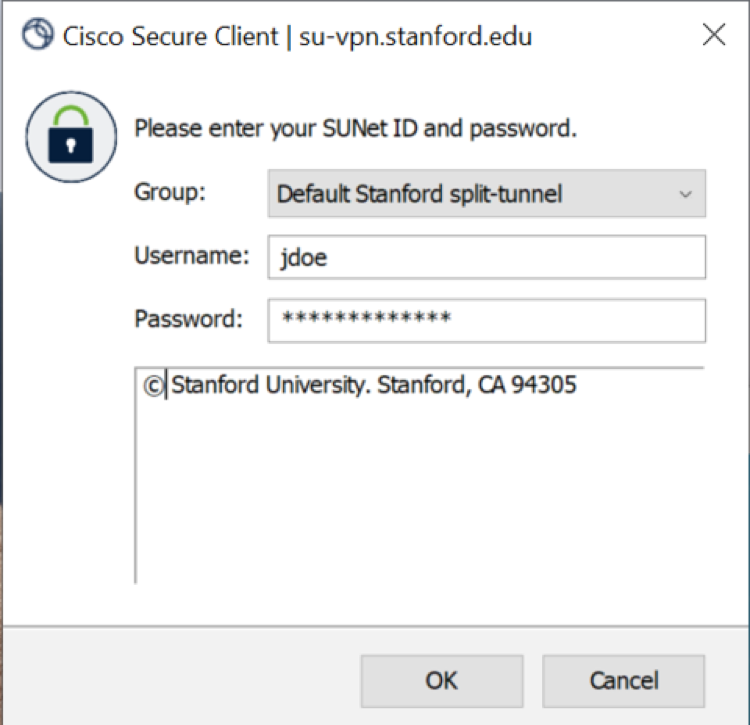
- You will need to use Default Stanford split-tunnel. Enter your SUNet ID and password and two-factor authentication when prompted.

-
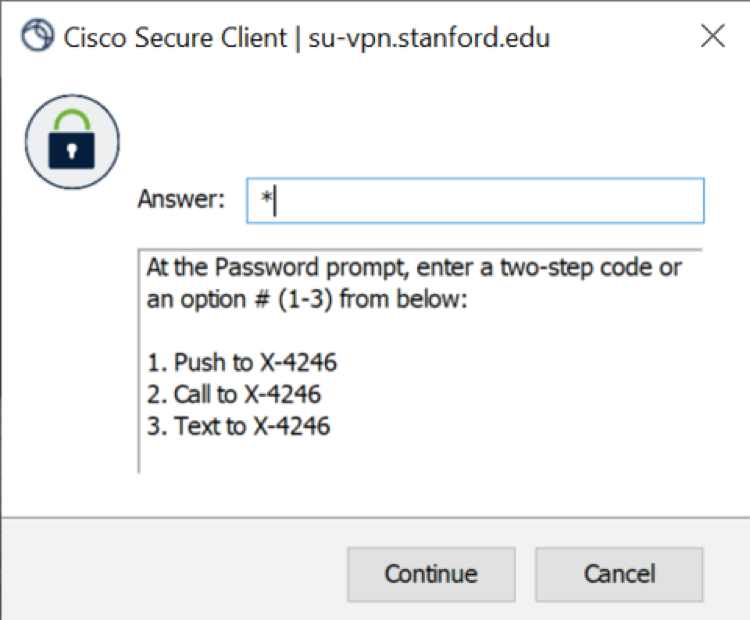
Next, the prompt for two-step authentication displays. Enter a passcode or enter the number that corresponds to another option (In this example, enter 1 to authenticate using Duo Push to an iPad). Then click Continue.a. You may have to scroll down the list to see all of your options.b. If your only registered authentication method is printed list, hardware token, or Google Authenticator, the menu does not display. Enter a passcode in the Answer field and click Continue..

- You will return to the login screen. Sign in as you normally would.

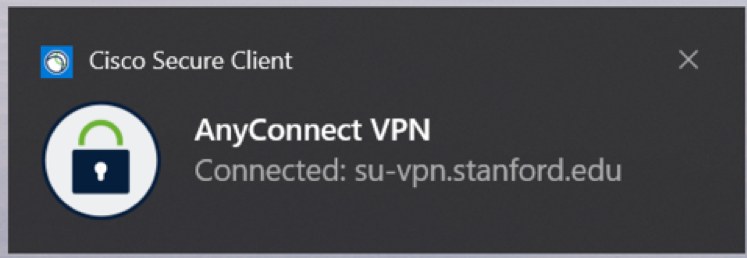
- When Windows completes the sign-in, you will eventually see the following dialogue box indicating that the VPN has already been connected. Any mapped network drives should now be working.

*If you did not click the Start Before Logon, you may connect to the Stanford VPN now to access network resources.
Last modified
