How to Designate Who Can Schedule a Resource
The best practice for reserving a meeting room or resource, such as a car, is to invite the resource to a meeting via the attendee list. Most resources at Stanford are open so that anyone within Stanford can reserve (invite) the resource. Some resources restrict who has the ability to invite and view availability of the resource.
If the resource is restricted to a list of users, the list is stored in the resource's calendar options. The options are only accessible by the resource owner or admin, and is only available from Outlook on the web.
Note: The rights to see details of a calendar or to be able to directly edit the calendar are granted by setting the permissions on the calendar by right-clicking the calendar. These permissions are separate from restrictions placed on inviting the resource, which is discussed below.
Before your begin, check the setting in the upper-right, just beneath the banner, to make sure you are not using the new Outlook. You will not be able to access the resource calendar settings in the new Outlook.
Open a resource calendar
- Log in to webmail.stanford.edu.
- Click your name or picture in the top-right corner and then click Open another mailbox.
- Enter name or email address of the resource and click Open. This opens the resource account in a new tab.
Limit who can schedule a resource
- Click the gear icon to open the Settings menu and then click Calendar.
- In the Options panel on the left side of the window, navigate to Calendar > Resource scheduling.
- In the Scheduling permissions section, locate the These people can schedule automatically if the resource is available setting. If Specific people and groups is selected, this calendar only accepts invites from the people in the list.
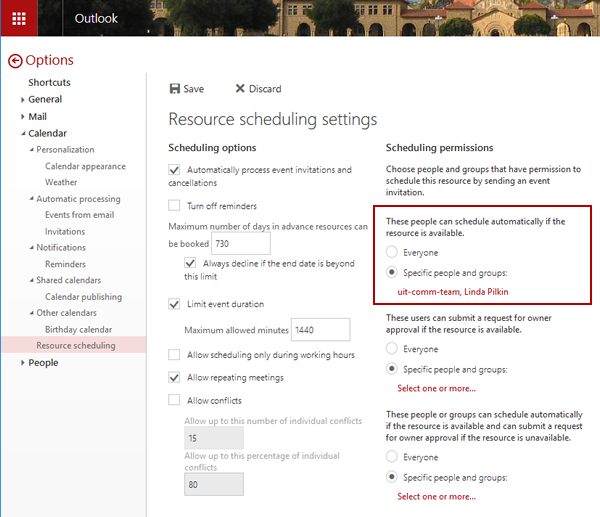
- Click the list to add or remove users.
- Click Save.
- Click <-Options to close the Resource scheduling settings window.
Limit who can see the resource availability
To avoid potential confusion for users who can't book the resource it is best practice to limit who can see the calendar's availability by adjusting the permissions described below.
- In the tab displaying the resource calendar, switch to the Calendar application.
- In the menu bar just below the banner, click Share.
- Change the permissions for My Organization to Not shared.
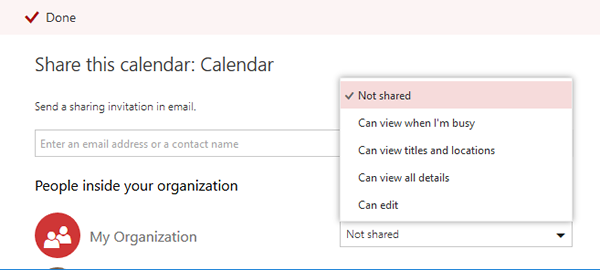
- Add a new permission entry for each person who has access to schedule the resource. They should have least Can view when I'm busy permissions.
- Click Done to save your changes.