How to Migrate your MySQL Database
Before you begin
To access the cloud MySQL Database Hosting service via the new phpMyAdmin, you must request a new account from the new MySQL Database Application (even if you already have an account in the legacy MySQL database hosting service). If your database will be used with a web.stanford.edu (AFS-based) website running Wordpress, Drupal or MediaWiki, please note that in the comments of the application to expedite processing. NOTE: Provisioning for new accounts may take up to one business day.
Migrate Your Database from Legacy phpMyAdmin to New phpMyAdmin
This guide will show you how to manually migrate the databases of your choice into the new cloud phpMyAdmin. The process consists of an export phase and an import phase.
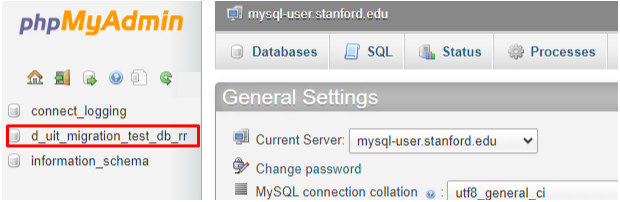
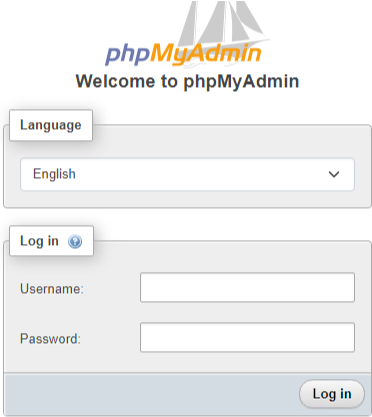
- Log in to your phpMyAdmin account.

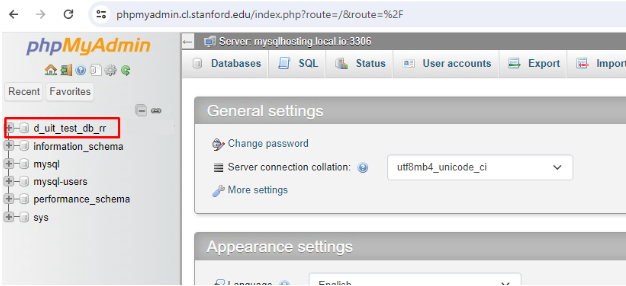
- Begin the export phase by selecting the database you want to migrate to our new server. Make this selection on the current phpMyAdmin server. In this example, ‘d_uit_migration_test_db_rr’ is selected.
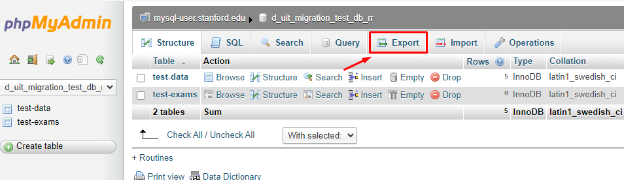
Once you have selected your database, click on the Export option on the upper tabs.
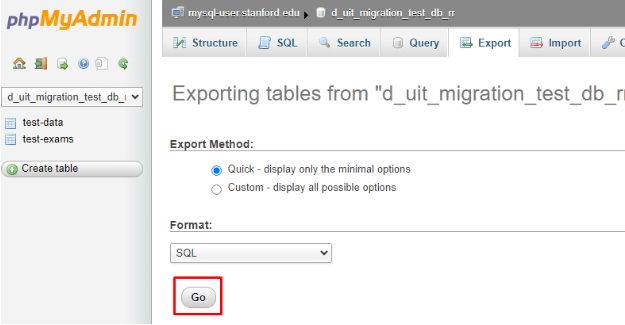
The Export tab will open the following menu, where you can select the Quick option. Keep the format in SQL. Click Go at the end of the prompt to continue.
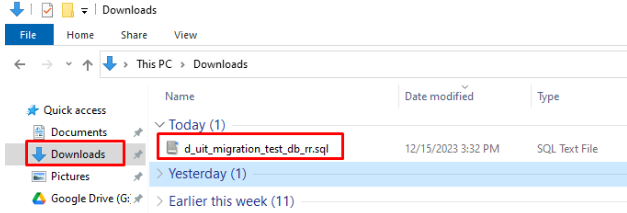
The Export button will start the download of an sql file. This download can be found in your file explorer. The file will have the name of your database with a .sql extension at the end, like in our example below. (Example file name: d_uit_migration_test_db_rr.sql)
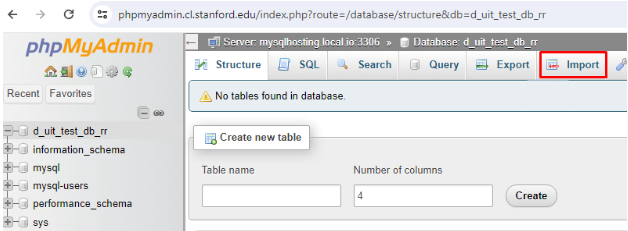
Now that the file has been created, we may begin the import phase. Log in to the new phpMyAdmin server.
Select the database that matches the one you exported from the previous server.
Click Import.
Click Choose File and file explorer will be opened. Select Downloads on the left-hand side of the file explorer. Select the .sql file that was downloaded earlier during the export phase. Be sure to click Open at the bottom of the file explorer after selecting your .sql file.
Note: In the case that you are doing this process several times, you can keep track of the .sql files by paying attention to their names. The name will correspond to the appropriate database.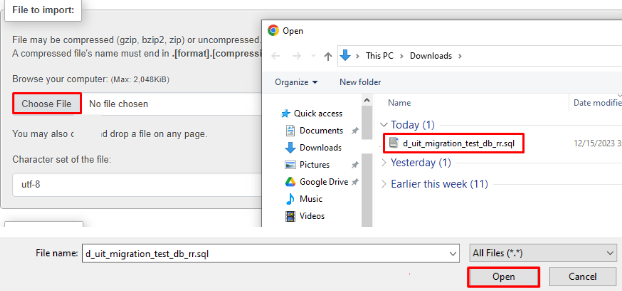
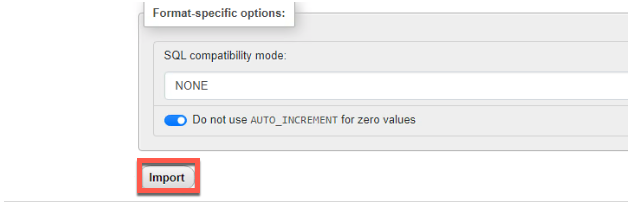
Scroll to the end of the import page and click Import.
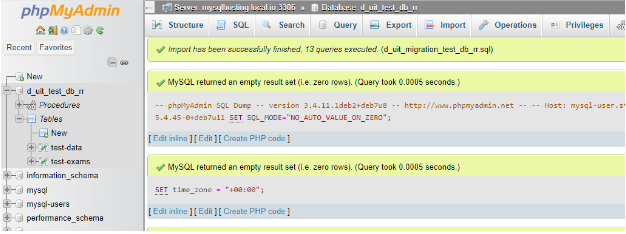
You will get the following screen if the migration process is successful:
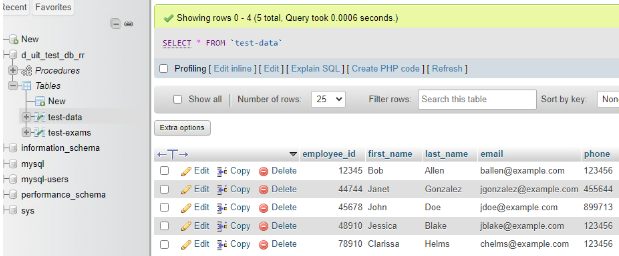
You may now view the contents of your database.
Note: If your new phpMyAdmin username is different from the old phpMyAdmin username and you are using stored procedures/routines, the import operation will fail. You must edit the .sql file manually using something like Notepad to reflect your new username. See the image below for reference.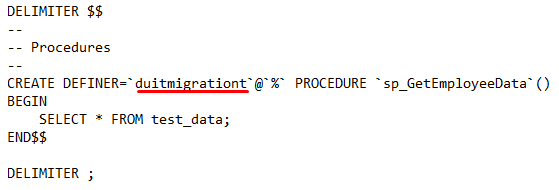
Here, we have the .sql file opened on Notepad. Locate the “Procedures” section of the file. Remove the old username from here and replace it with your current username. Save your file with the new username and repeat the import phase with the updated file.
Ex: CREATE DEFINER=`your_new_username`@`%` PROCEDURE `sp_GetEmployeeData`()
Migrate Tables (MyIASM to InnoDB) using PHPMyAdmin
Export Table Definitions from the source database
- Import Table Structures to the destination database
- Alter table Definitions in the destination database to use InnoDB storage engine and utf8mb4 characters set [1]
- Assign primary key to the tables those do not have one [2] [3]
- Export Table Data from the source database
- Import Table Data to the destination database
[1] SELECT CONCAT('ALTER TABLE ',TABLE_NAME,'
ENGINE=InnoDB DEFAULT CHARSET=utf8mb4;')
FROM INFORMATION_SCHEMA.TABLES
WHERE ENGINE='MyISAM' AND table_schema = 'database_name';
(Capture the output in the file ALTER_TABLE_DEFS.SQL)
SOURCE @ALTER_TABLE_DEFS.SQL
Example : alter table tbl1 engine=innodb default charset=utf8mb4;
[2] SELECT t.TABLE_NAME FROM INFORMATION_SCHEMA.TABLES AS t
LEFT JOIN INFORMATION_SCHEMA.KEY_COLUMN_USAGE AS k
ON (t.TABLE_NAME = k.TABLE_NAME
AND k.CONSTRAINT_SCHEMA = t.TABLE_SCHEMA
AND k.constraint_name = 'PRIMARY')
WHERE t.TABLE_SCHEMA NOT IN
('information_schema', 'performance_schema', 'mysql', 'sys')
AND t.TABLE_SCHEMA = '<database name>'
AND k.constraint_name IS NULL;
[3] ALTER TABLE ‘table_name’ ADD PRIMARY KEY ‘column_name’;
Recommended Readings :
- https://dev.mysql.com/doc/refman/8.0/en/mysqldump-definition-data-dumps.html
- https://dev.mysql.com/doc/refman/8.0/en/converting-tables-to-innodb.html