How do I create a well-done meeting request in Outlook?
A well-constructed calendar request sets the foundation for a productive meeting. Here are a few tips to help you efficiently create a meeting request in Outlook that ensures your attendees will be well-prepared.
Turn an email conversation into a meeting request
You can turn an email exchange into a meeting request with a single click. Here’s how:
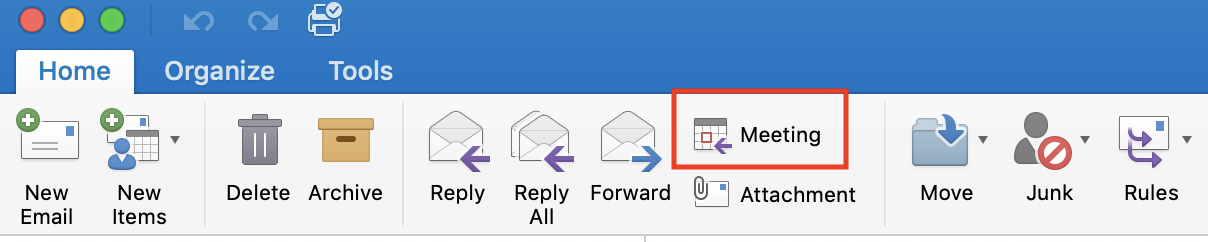
- If you’re using Outlook desktop, open the email you want to reply to. From the Home tab, click Meeting on the right-hand side of the ribbon.
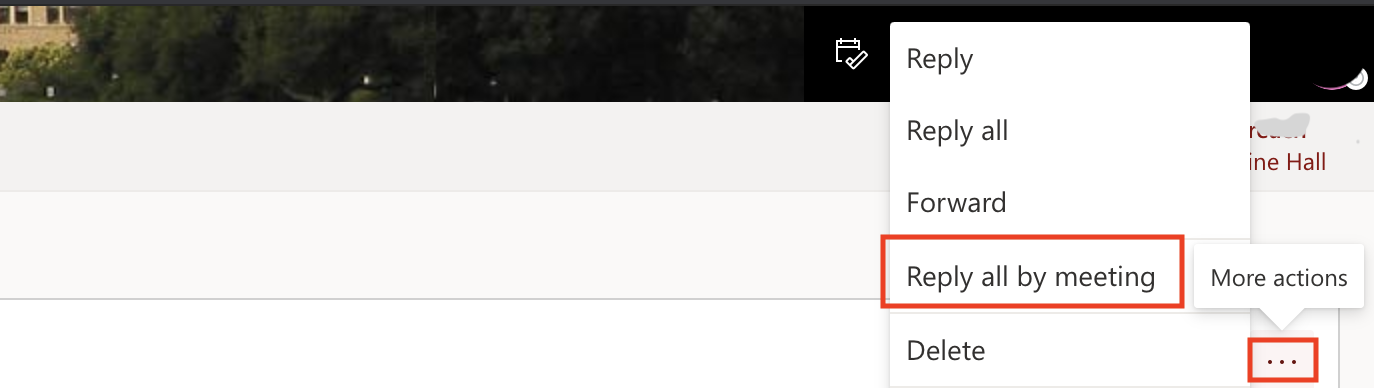
- If you’re using Outlook for the web, open the email you want to reply to. Click the ellipse (More actions menu) and select Reply all by meeting.
Everyone included in the “TO” line of the original email message will be invited as a “Required Attendee” and those in the “CC” line will be invited as “Optional Attendees.” You can also add or remove attendees from the invite as needed.
Use the Schedule tab
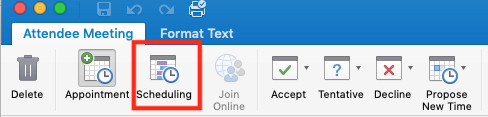
Once you’ve entered your recipients’ names and the meeting date and time, use Scheduling or Scheduling Assistant to see when people are free to meet. That way, you’ll avoid double-booking your attendees.
- In Outlook desktop, from the Meeting tab select Scheduling on the right-hand side of the ribbon.
- In Outlook on the web, select Scheduling Assistant.

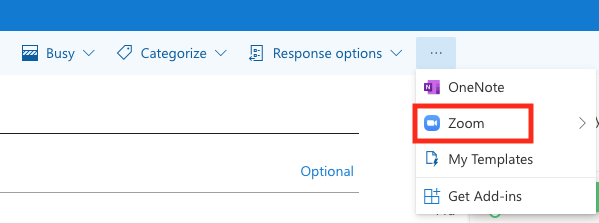
Add a Zoom option
Even if you expect everyone to attend in person, it’s a good practice to add a Zoom link. Taking that extra step when you create the meeting request prevents a last-minute scramble if someone is running late or needs to work from another location.
- In Outlook desktop, from the Meeting tab select Zoom on the right-hand side of the ribbon.

- In Outlook on the web, click the ellipse located on the top menu of the meeting window and then select Zoom.
Have a clear subject line
Put some thought into your subject line. Keep it succinct, but make sure it has enough information for attendees to understand the reason for the meeting at a glance.
Add some context
Add a few lines in the message field to help others get a better understanding of the purpose of the meeting. If you need people to prepare, provide instructions and remember to attach the material you’d like them to review beforehand.
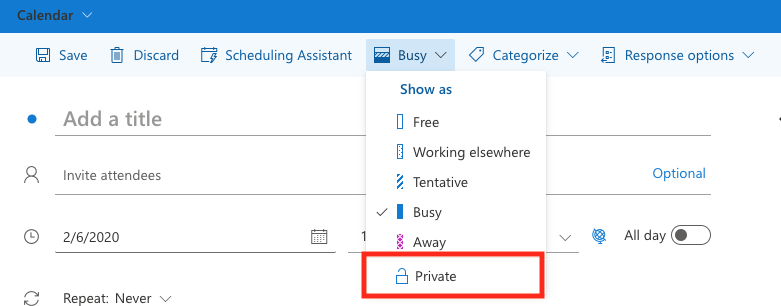
Don’t put sensitive or private information in the body of a meeting request or attach documents with sensitive information. Depending on your calendar sharing settings, the content may be accessible to more people than you may have intended. To prevent others who have permission to view your calendar but are not meeting attendees from seeing the meeting details, create a private meeting.
- In Outlook desktop, from the Meeting tab select Private (padlock icon) on the right-hand side of the ribbon.

- In Outlook on the web, select the Busy drop-down located on the top menu of the meeting window and then select Private.
Keep in mind, if you’ve given a colleague viewing rights on your calendar, they’ll be able to access the contents of meetings that are tagged Private.
Have an agenda
You can type the agenda in the calendar invite or attach it as a Word doc or a PDF. You can also create your agenda in a Google Doc and share it with your attendees. Be sure to indicate if you want attendees to have “view only” permission or if you’d like them to be able to edit or comment. There are advantages to using a Google doc, such as being able to:
- share the agenda with last-minute attendees, without having to forward the meeting request
- update the agenda leading up to the meeting, so attendees can access the latest information in real-time
Learn more
What to read next:

Navigation Updates for Zoom Web Portal Coming Soon