Service Description and Activities
The Stanford Device Registration (SDR) app is now available to simplify device compliance at Stanford. SWDE and SNRT are have been retired and Device Enrollment will be retired in the coming weeks.
Planning activities
Prospective clients of the SNSR service should submit a HelpSU request to have the SNSR service enabled on their wired network. You will need to provide: the wired networks you would like to enable this service on, and the organizational codes or groups that reside on these networks. You should also review the template options for your network and organizational templates to verify that you can configure it to your needs.
An engineer will contact you to further discuss your request and start the planning process. Where appropriate, the Department Network Engineer (DNE) assigned to your request may ask you to provide any or all of the following information:
- How many networks are to be set up?
- Network Name or IP Address Range for each template to be created
- Does an admin team exist or need to be created?
- Default Building
- Default Department
Once all details and requirements have been confirmed, your wired network will be SNSR enabled.
Building and testing activities
Once your HelpSU request is submitted, your HelpSU request will route to the Departmental Network Engineering Group.
The DNE will modify your Network Record in NetDB so that the DHCP options are set appropriately, and confirm that the routing is correct.
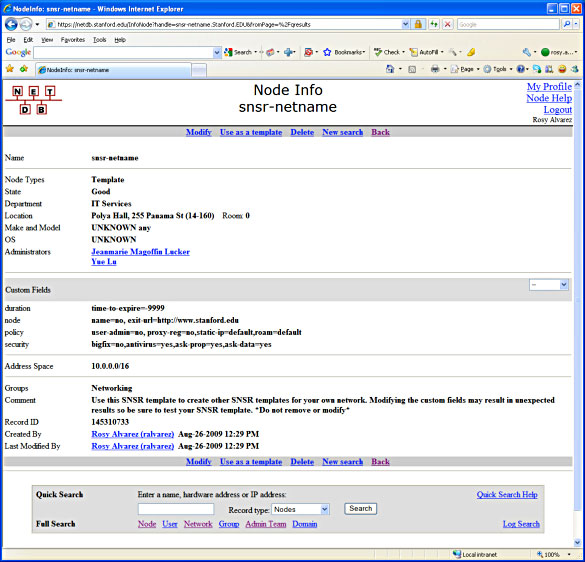
The DNE will create a SNSR Network Template in NetDB.
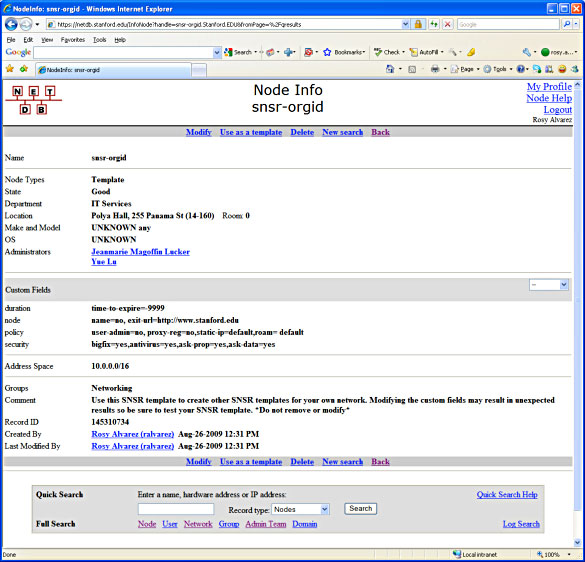
The DNE will create one or more SNSR Organizational Templates in NetDB (as needed). For more information regarding your Organizational Code, please go to: Organization Code Hierarchy View
IP address policy
If the user is registering via wired access,
| Interface | Assigned IP | DHCP | Roam |
|---|---|---|---|
| 1 | Yes | Yes | No |
| 2 | No | Yes | Yes |
| ..n | No | Yes | Yes |
(interface 1 is the wired nic)
If the user is registering via the wireless access:
| Interface | Assigned IP | DHCP | Roam |
|---|---|---|---|
| 1 | No | Yes | Yes |
| 2 | No | Yes | Yes |
| ..n | No | Yes | Yes |
Modifying custom fields
When creating the template, the DNE will set the Custom Fields to appropriate default values. If you leave the Custom Fields blank, they will maintain their default values — but you are welcome to make changes at any time after the template is built. Over time, you may determine a need to make adjustments, especially to the Department, Admin/Admin Team, and Groups fields.
An example of the Custom Fields entry table is shown below with no values displayed.
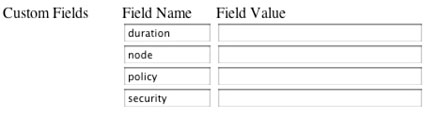
You need not make changes to the default values: self-registration will work if you leave them as-is. If you choose to make modifications, option values are listed and defined in the table below.
If you modify the default settings, be sure to enter correctly-formatted values.
The following table describes the four custom fields along with the string values allowed. Modifying these values will override hostreg service default values. Multiple values should be comma separated. Typos in the custom fields will invalidate the custom field. An LNA may choose to leave all custom fields empty, in which case the column labeled "Default" is implemented.
| Key | Default | Possible Values | Definition |
|---|---|---|---|
| duration | (No expiration set) | time-to-expire=N | Set expiration field to date + N months |
| -9999means no expiration | |||
| node | (Name field not editable) | name=<yes | no> | Allow users to set their computer name |
| exit-url=<http://…> | Once registration is complete, send users to this url. | ||
| policy | user-admin=no | user-admin=<yes | no> | Allow user to be designated as admin |
| proxy-reg=no | proxy-reg=<yes | no> | Allow users to proxy register for other users (not implemented) | |
| static-ip=(as described IP table above) | static-ip=<all |none| default> | Use this option to override the default IP Policy. "None" means no static IP address are assigned. | |
| roam=all | roam=<all |none| default> | Use this option to override the default Roaming Policy. "None" means no roaming options. | |
| security | bigfix=no | bigfix=<yes | no> | Require users to download BigFix |
| antivirus=yes | antivirus=<yes | no> | Require users to download antivirus software | |
| enroll=yes | enroll=<yes | no> | The computer must be enrolled before it can access the Stanford network. | |
| encrypt=no | encrypt=<yes | no> | The computer must be encrypted before it can access the Stanford network. |
Group settings
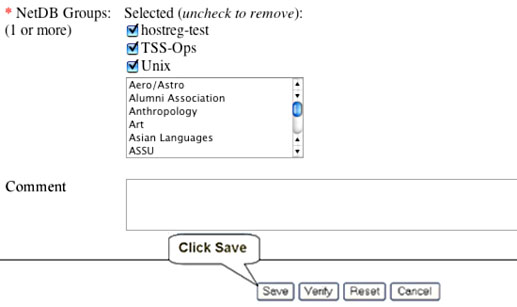
As with the Custom Fields discussed above, the DNE will determine the initial group settings. However, you may opt to change the initial settings and choose the NetDb group yourself. If you make changes, be sure to scroll to the bottom of the screen and click the Save button.
The screen capture below, of the Group Settings entry screen, is an example only.
Ongoing support and maintenance activities
The University IT Networking team will:
- Respond to monitoring alerts and client-reported problems. During non-business hours, support will be provided when the service is unavailable or the ability to use the resource is severely degraded across the campus.
- Troubleshoot and resolve system-related problems.
- Work with the Unix team when server resources require operating system patches or upgrades so that the impact to client is minimal.
- Monitor vendor resources for any required hardware upgrades.
- Troubleshoot and resolve SNSR infrastructure-related issues.
- Maintain documentation.
- Clients should submit a HelpSU request to enable SNSR on their networks.
SNSR uses the Stanford Network Registration Tool to verify that computers that are on the Stanford Network are following best practices by keeping their software updated and having anti-virus software on their systems. See the Stanford Network Registration Tool (SNRT) page for more information.
Security activities
The SNSR architecture and operational processes have been reviewed and approved by the Information Security Office. Security policy is put forth by the University. The systems administration team will adhere to all security policies documented in the Stanford Administrative Guide.
Monitoring activities
Basic operational health of the SNSR servers is monitored via HOWIS and ping scripts. Frequencies and thresholds of monitoring checks are set according to industry best practices.
Based on the standard configuration setup, clients will not receive system-level alerts. System-level alerts are routed directly to systems administrators so that appropriate action can be taken. Based on the type and severity of the alert, time of day, and the potential impact to end-users, the client-designated technical contact may be called.
Documentation activities
The NetDB template options that are configured for each network are noted within the NetDB network and organizational templates for the corresponding network and begin with "snsr."
In September 2009, SNSR is being deployed on wireless networks across campus. For a list of clients who have this service enabled on their wired networks, see the Networks Enabled for Self-Registration column on the SUNet Reports-NetDB Registration Statistics page.
Responsibility matrix
The responsibility matrix indicates whether University IT or the client is ultimately responsible for performing the listed task. In instances where there are check marks (✓) in both columns, both the client and University IT must coordinate their efforts to ensure the successful completion of the task. It is not the intent of any responsibility matrix to absolutely define every process, function, or task performed as a contracted function.
Ongoing SNSR operations
| SUNAC | Client | IT Services |
|---|---|---|
| Keep client contact information current | ✓ | ✓ |
| Request SNSR be enabled on network range | ✓ | |
| Confirm that the template is configured with the options that best suit the clients needs | ✓ | |
| Create SNSR network template in NetDB | ✓ | |
| Determine date to enable SNSR on the requested network range | ✓ | ✓ |
| Troubleshooting of emergency connectivity or functional issues | ✓ | |
| Install new OS releases, upgrades and patches in the production environment | ✓ | |
| Provide outage notification of failed hardware and software | ✓ | |
| Troubleshoot and solve problems with SNSR hardware and OS | ✓ | |
| Resolve HelpSU tickets from client | ✓ | |
| Adhere to problem management escalation procedures | ✓ | ✓ |
| Participate in problem analysis if needed | ✓ | |
| Receive feedback and implement problem analysis recommendations as appropriate for respective areas of service responsibility | ✓ | ✓ |