SDS for macOS User Guide
All eligible devices will display the initial setup screens. However, only IT staff and the users they explicitly opt in will see the complete workflow, which includes the additional steps detailed below.
Requirements
- A network connection.
- A Stanford-issued device in Apple School Manager (ASM).
- The latest major release of macOS.
Get Started
- After powering on your computer and following the initial setup screens, the Device Management screen will pop up. Click Enroll.
- Click Continue on the Welcome screen.
- Sign in using your SUNet ID and complete two-step authentication.
- Device Management screen will begin device setup. This may take several minutes.
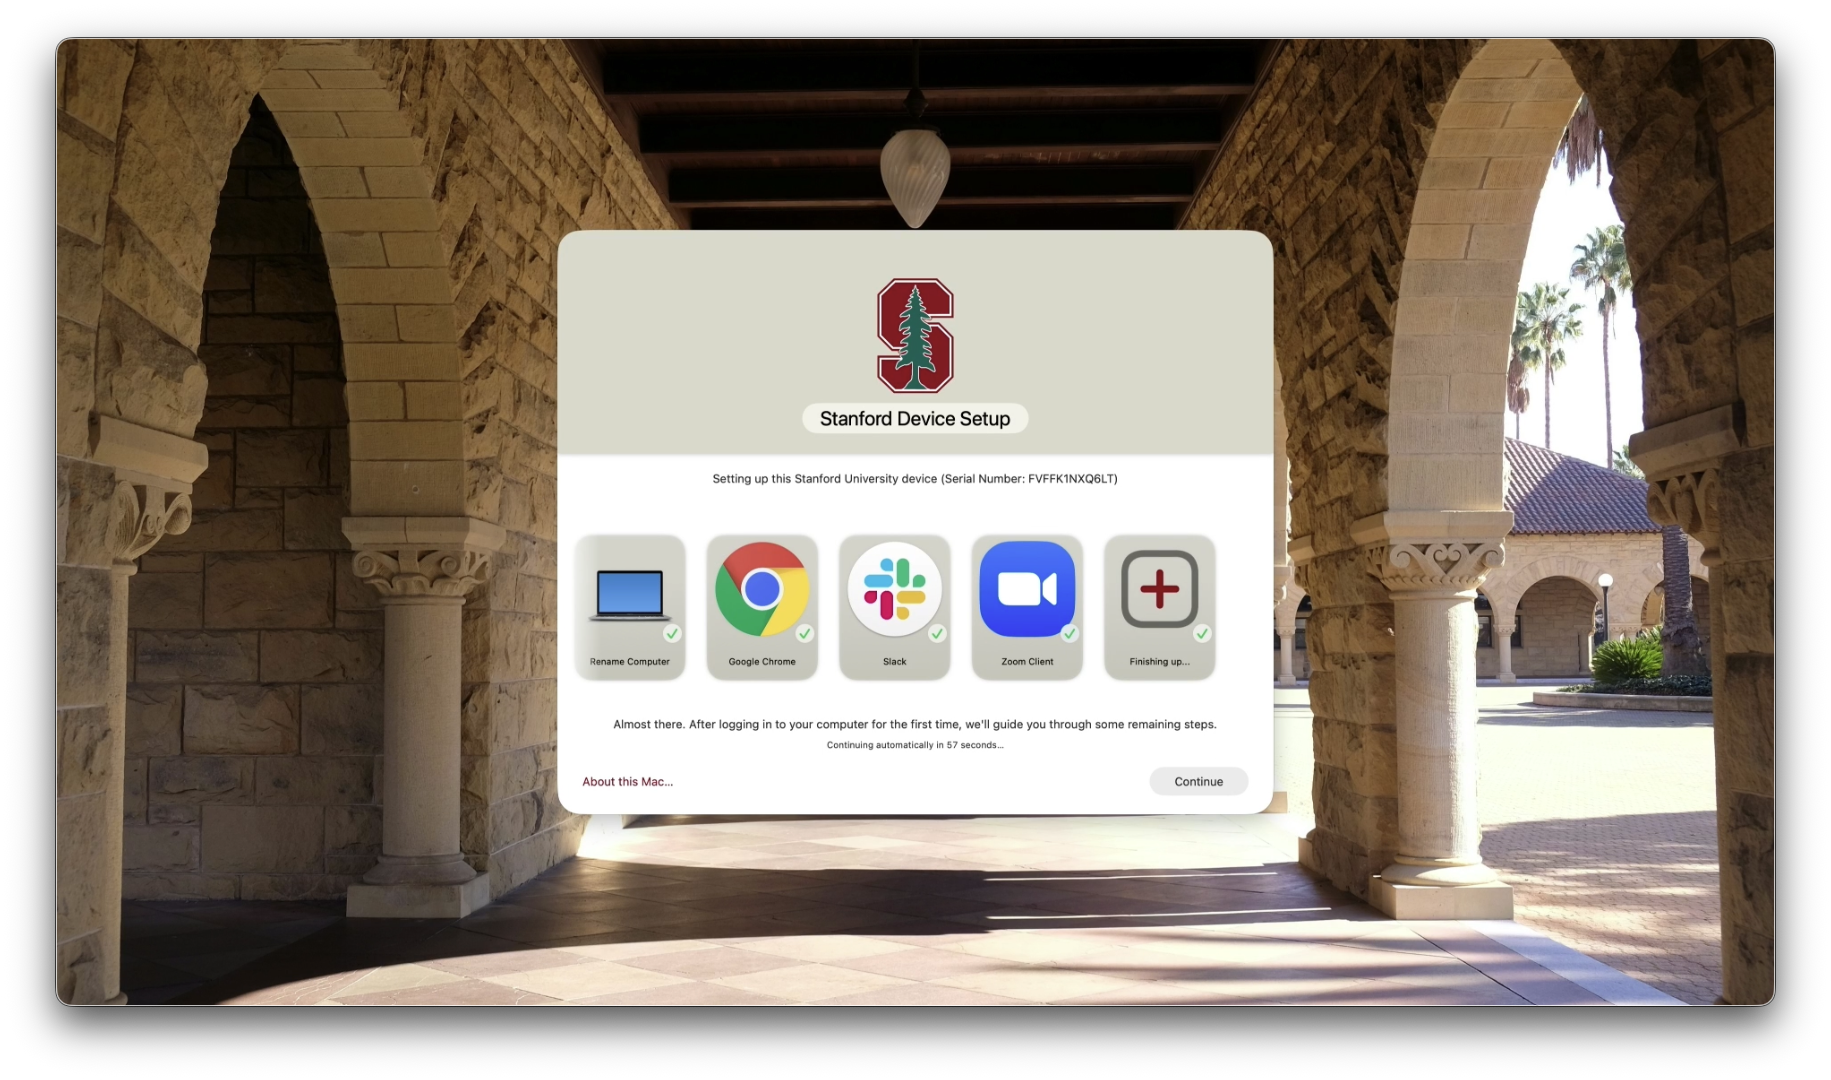
The Stanford Device Setup (SDS) screen will begin to install commonly used apps. When done, click Continue. It may continue on its own.
- Create your Mac Account, then Continue.
- Read and Agree the Terms and Conditions screen. Click Agree again.
Follow the prompts and Continue until the desktop appears and SDS starts.
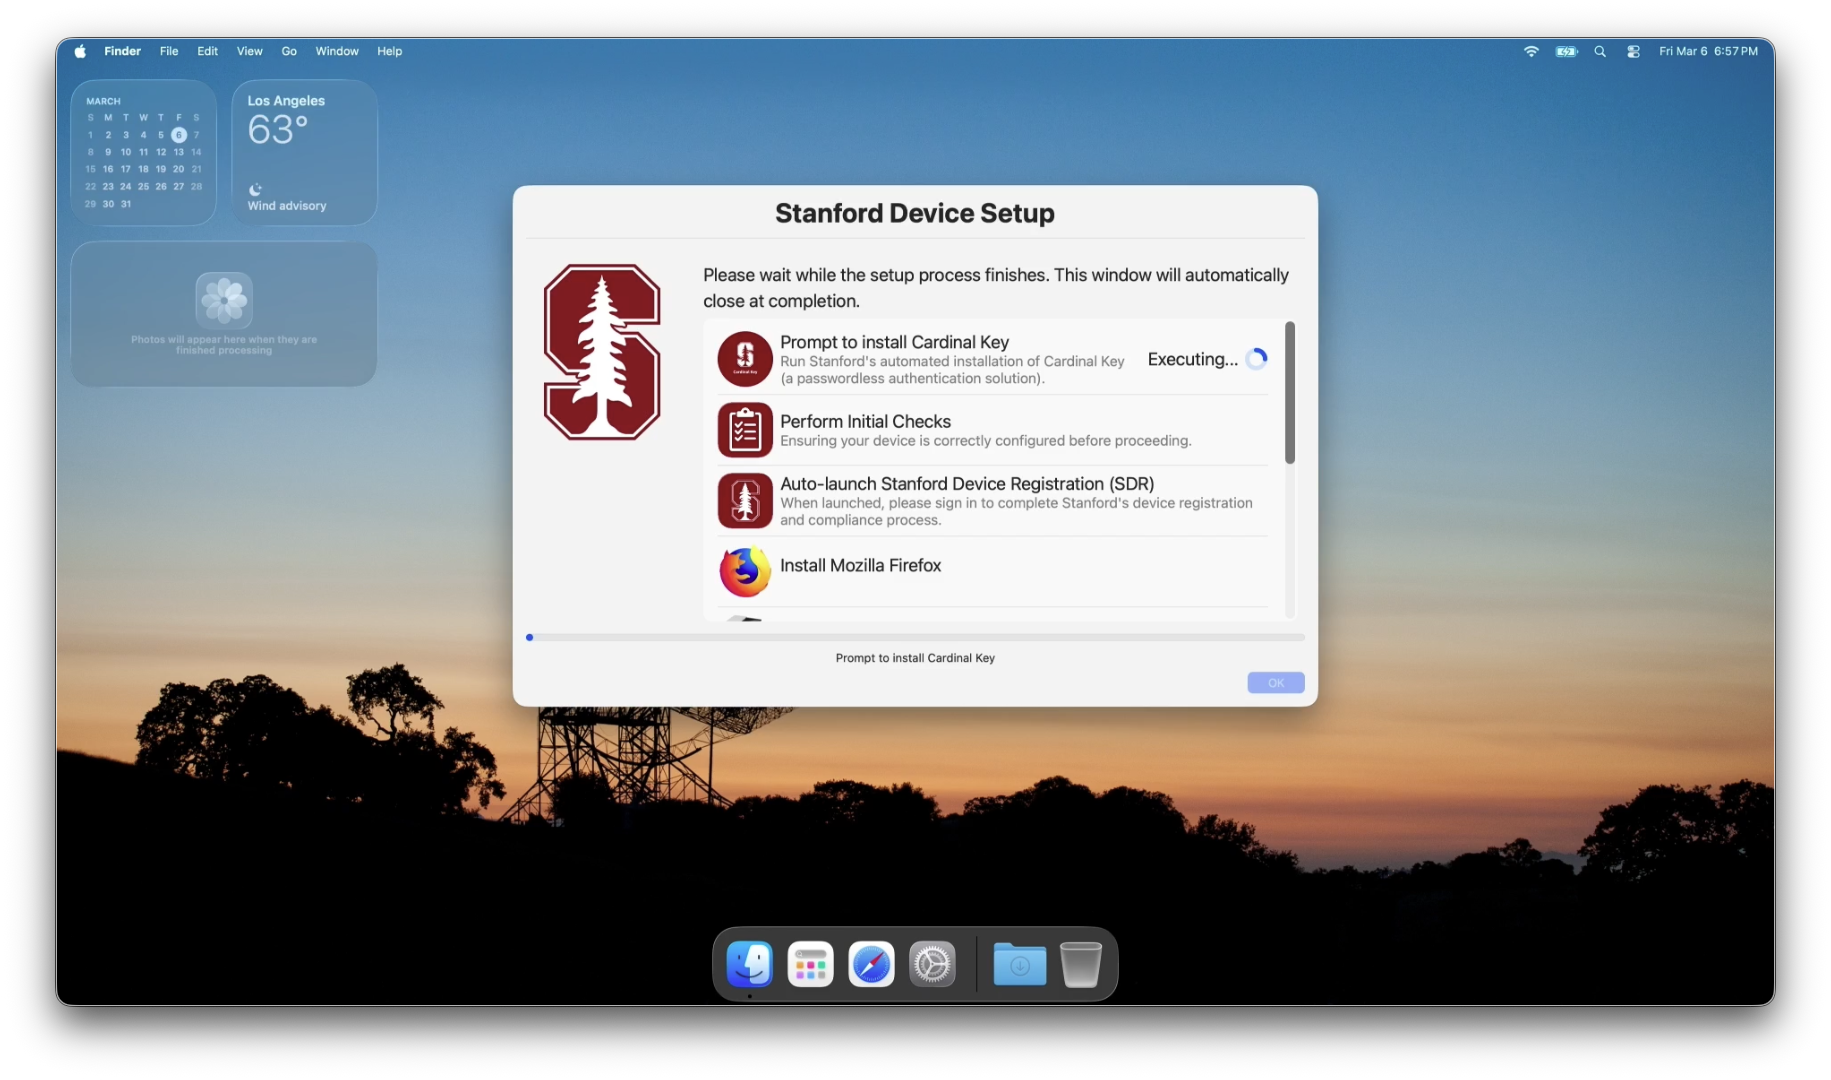
- When the SDS Cardinal Key window pops up, click Install Cardinal Key.
Follow the prompts through the Cardinal Key Installer.
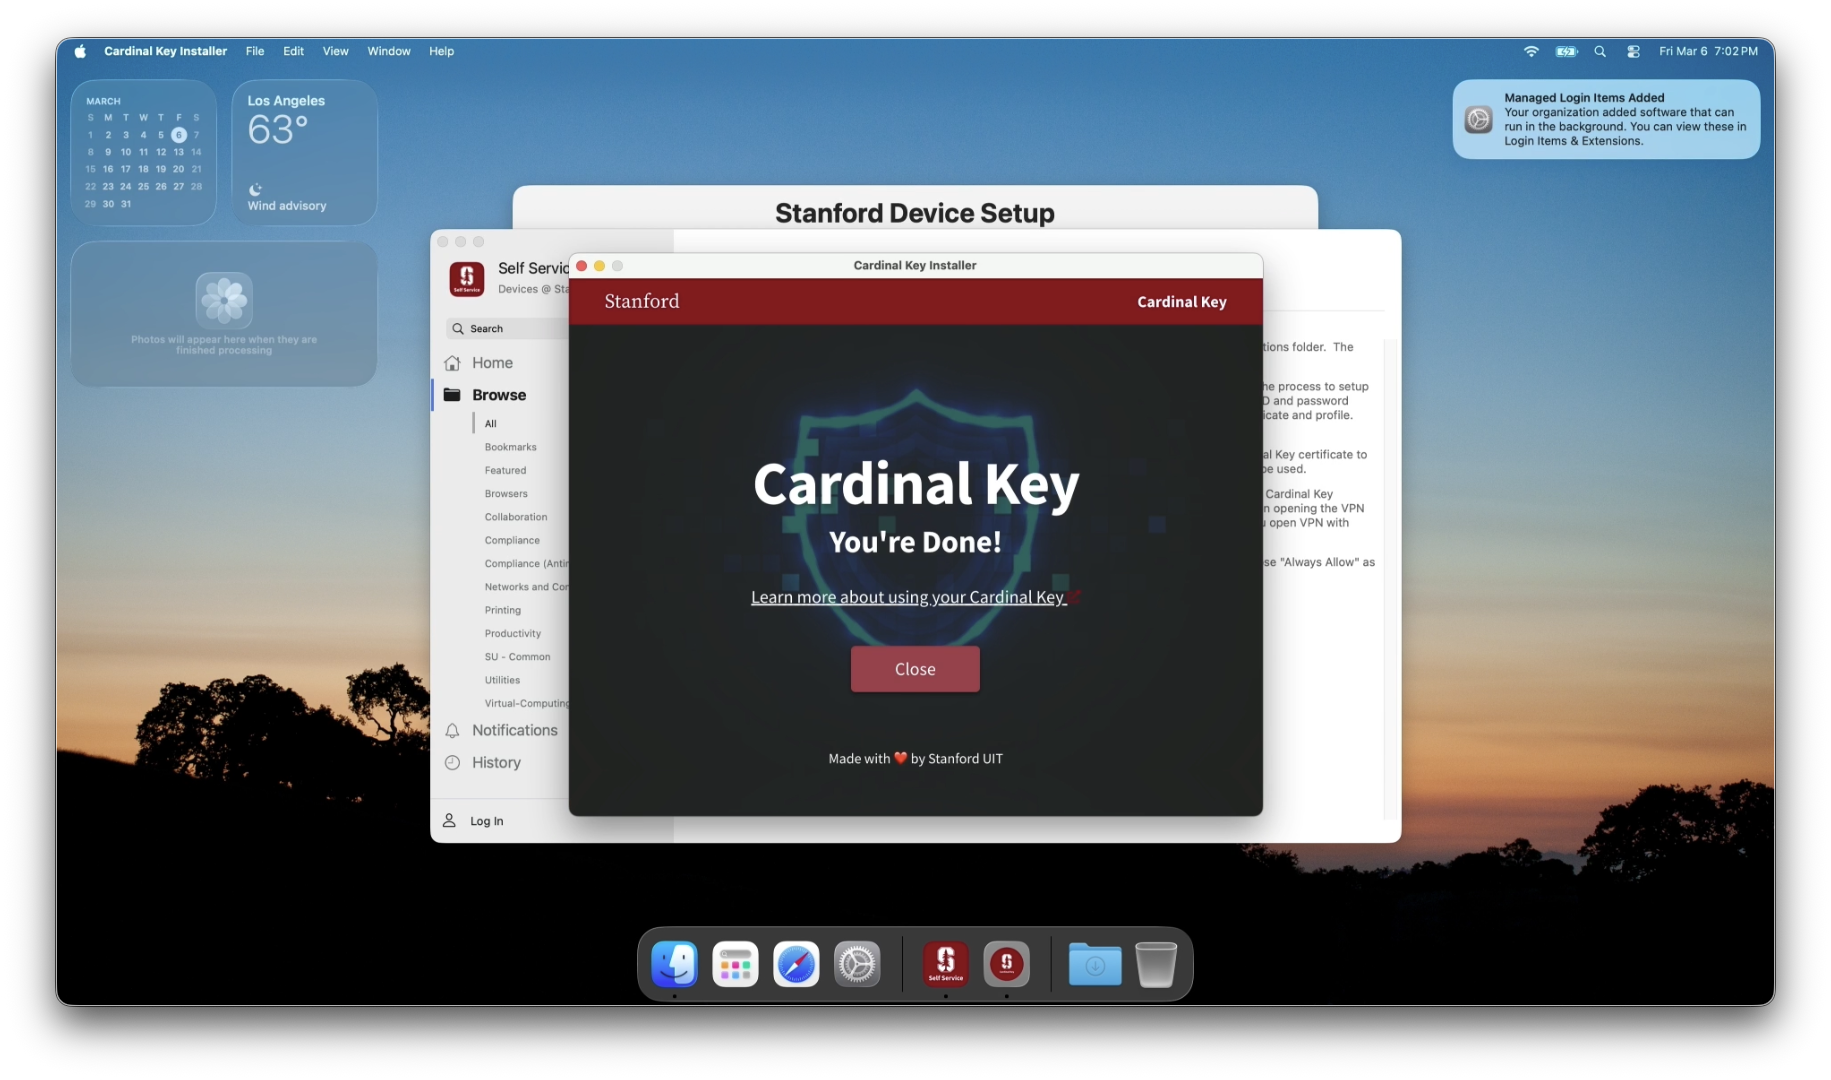
- When done with installing Cardinal Key, close out the Self Service window. SDS will continue setting up.
Stanford Device Registration (SDR) will automatically open next. Follow the prompts through SDR.
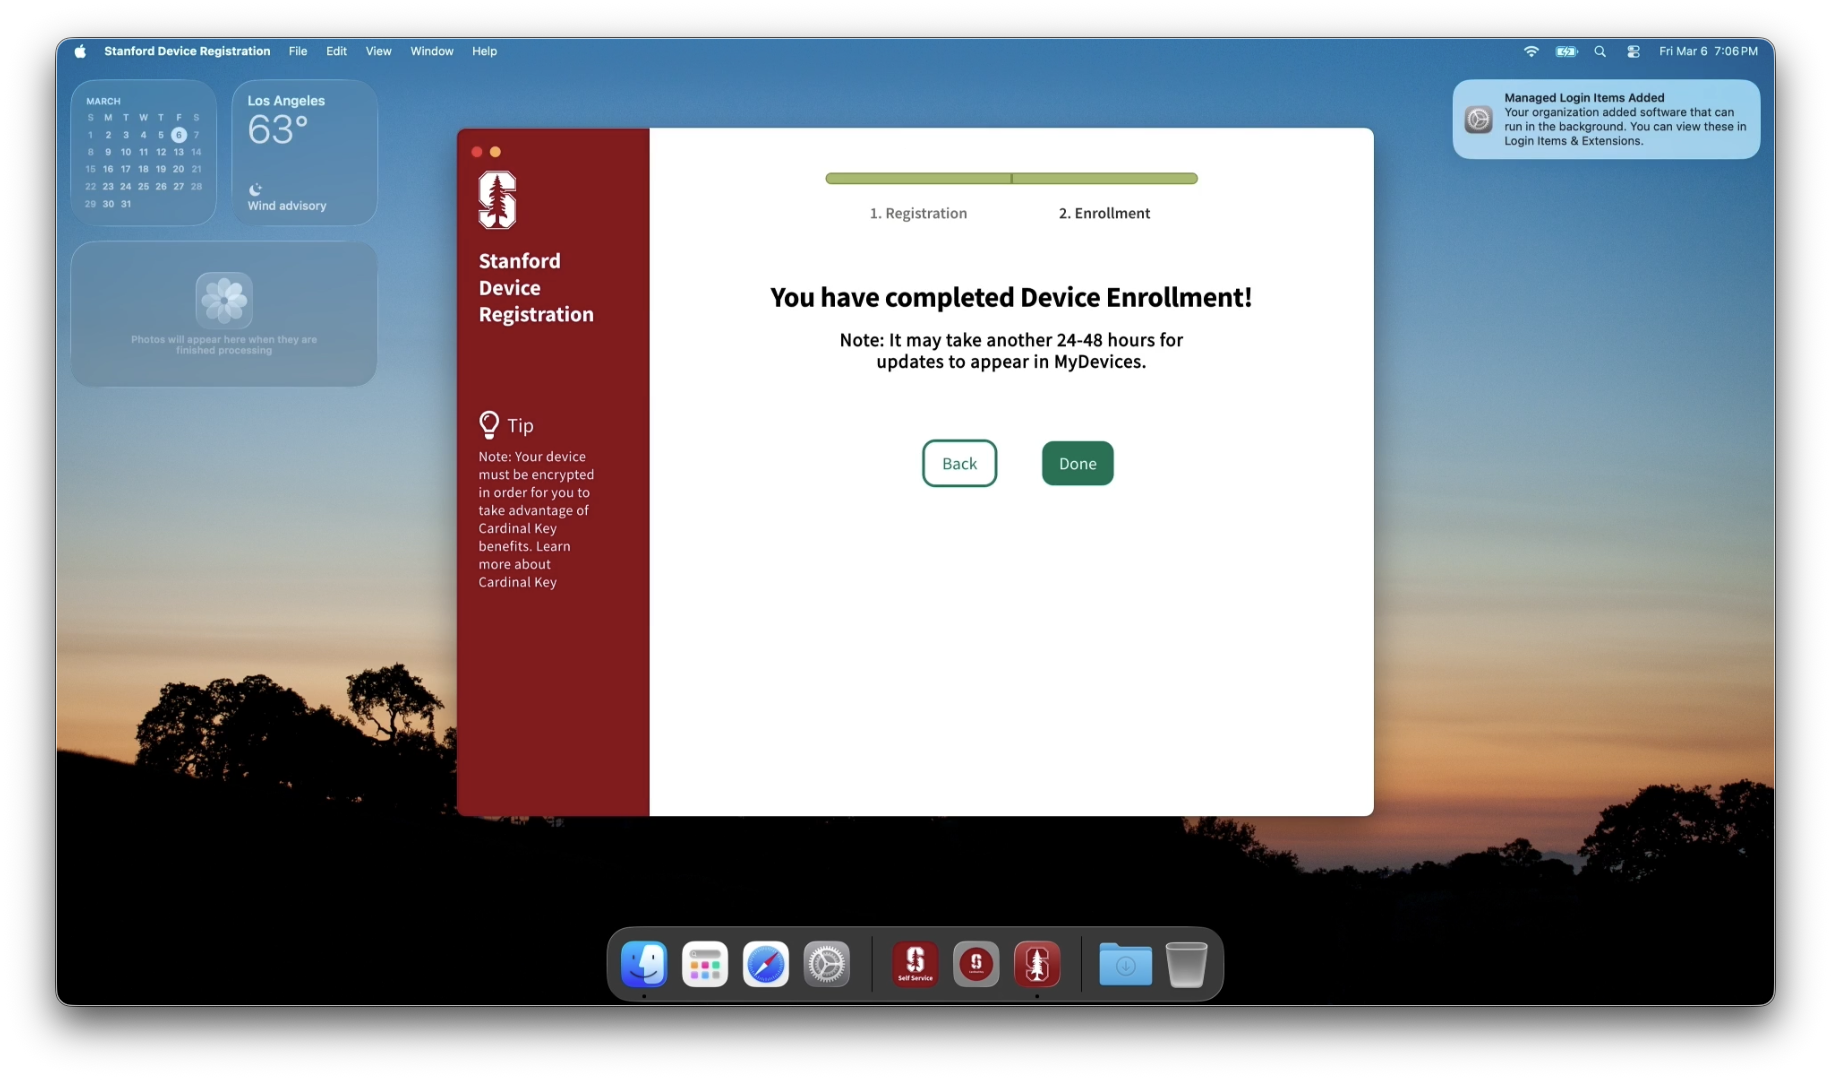
- Once done with SDR, SDS will continue installing commonly used apps. This may take up to 30 min.
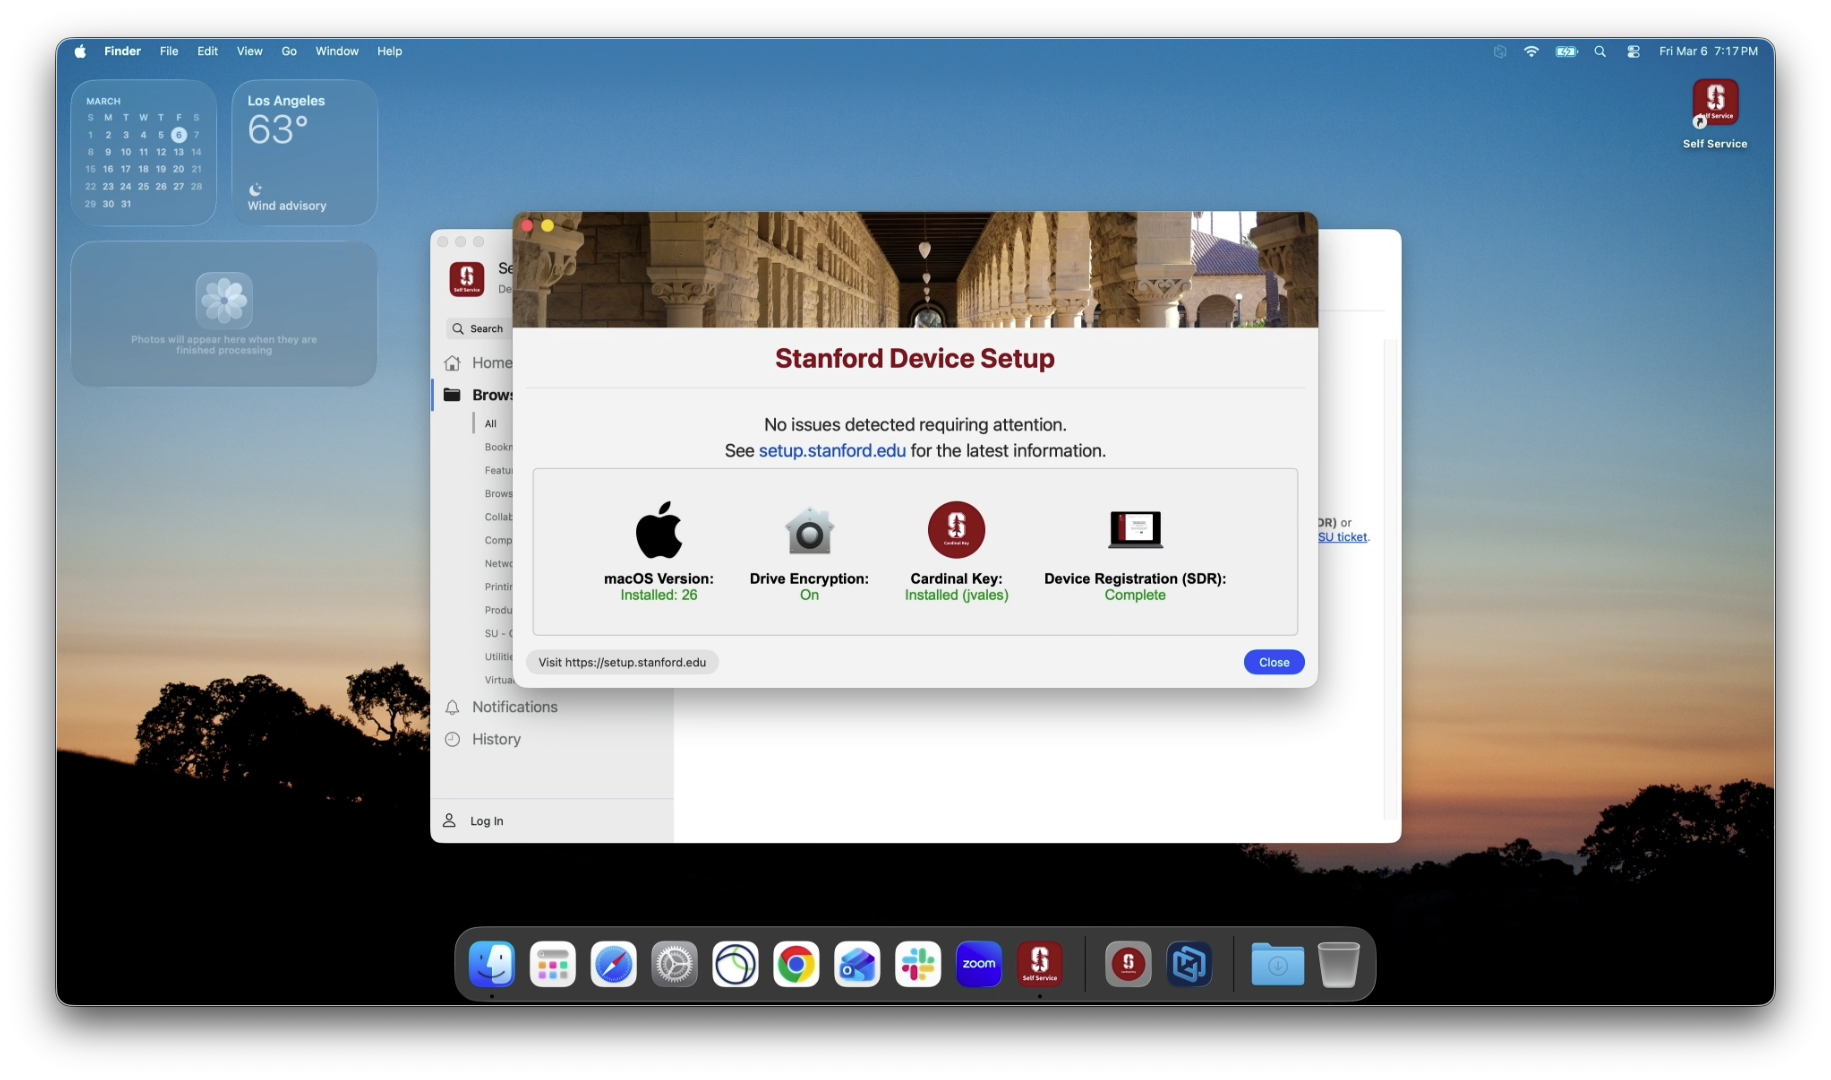
SDS will check that the device software is up to date. Click Close.
- Now the device is set up. To download more apps, visit the Self Service app.
Last modified