Outlook Configuration for Microsoft 365 on Windows
NOTE: The instructions for editing the hosts file do not account for User Account Control preventing users from saving their hosts file. These users (majority of Win 7/8/8.1 users) will have this problem following the notes at the very bottom if the auto-discover function fails when trying to save the hosts file.
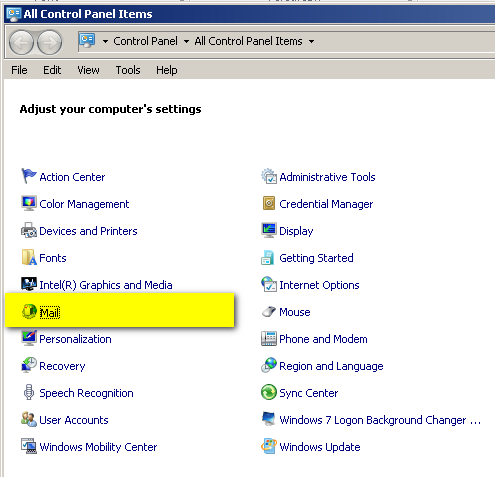
1. From the Windows Start menu, select Control Panel, then double-click the Mail icon.
2. In the Mail Setup window, click Show Profiles.

3. Click Add and enter a profile name for your Microsoft 365 account (for example, Microsoft 365). Then click OK.

4. The Auto Account Setup wizard will open. Continue through the Auto Account Setup wizard prompts to verify your account information.

If you get prompted with the permission request below, check the box for “Don’t ask me about this website again” and then click Allow.

5. Once the setup process is complete**, click Finish to close the window.

6. Open Outlook and your inbox will start to populate.
**Important Note: If the Auto Discover function fails, then you will need to modify your host file with the manual entry described below.
- Navigate to your ‘C’ Drive
- Using Alt + T to display the Tools Menu, go to the View tab and uncheck “hide folder and files” then click OK to close the window. This will enable you to see the hidden directory of system32.
- Navigate to folder System32\drivers\etc
- Double-click the hosts file, and open the file with Notepad. Append the entry to include the following:
132.245.58.104 autodiscover.stanford.edu
(Make sure there is a space between the last number and autodiscover.)
- Click Save, and exit Notepad.
- Retry the account setup process again. The Auto Discover function should now work.