Configure Outlook for use with G Suite (formerly Google Apps)
Create a Google account password
If you have not yet created a Google account password, do so by going to tools.stanford.edu/cgi-bin/google-pass. You can use the same password for this connection and for your mobile device.
Enabling IMAP access
- You'll need to turn on IMAP. See Google's support documentation to learn how to check that IMAP is turned on.
- After enabling IMAP, go to www.google.com/settings/security/lesssecureapps. Select the option to Turn on access for less secure apps.
Configure Outlook
- Start Microsoft Outlook.
- If you are upgrading from a previous version of Outlook on the same computer, your settings carry over automatically.
- If you already have an Outlook account set up and want to add another, click the File tab and then click Add Account.
- If this is the first time you are adding an account, the Welcome window displays. Click Next to display the the Add an Email Account window. Select Yes to set up Outlook and then click Next.
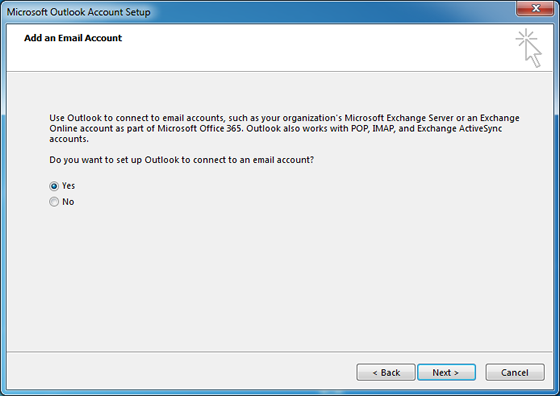
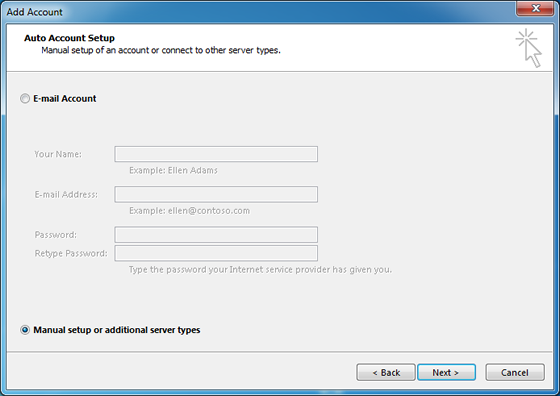
- Click Manual setup or additional server types and then click Next.
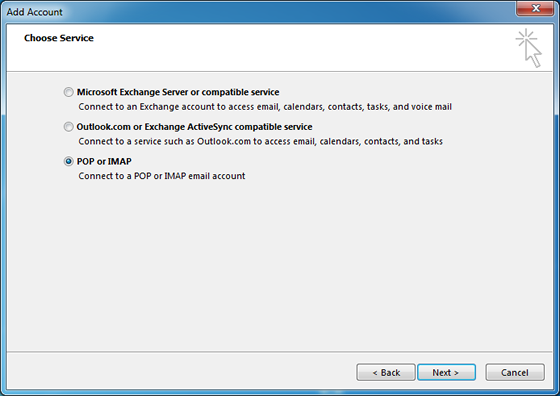
- Click POP or IMAP as your service and then click Next.
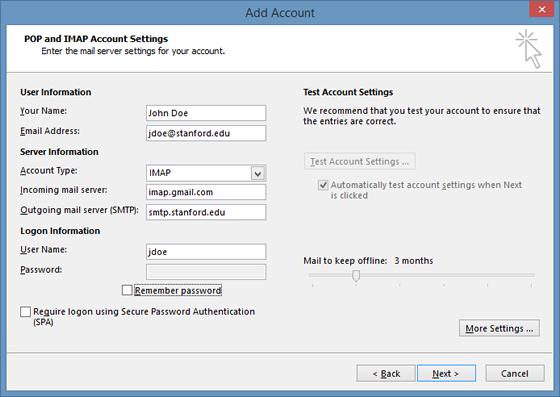
- Enter the following account settings:
- Your Name: your name
- E-mail Address: your @stanford.edu email address
- Account Type: IMAP
- Incoming mail server: imap.gmail.com
- Outgoing mail server (SMTP): smtp.stanford.edu
- User Name: your SUNet ID
- Password: leave blank
- Remember password: unchecked
- Require logon using Secure Password Authentication (SPA): unchecked
- Click the More Settings button.
- With the General tab selected, enter a name for your mail account, such as Stanford Email, if you wish. Otherwise, the mail account name defaults to your email address.

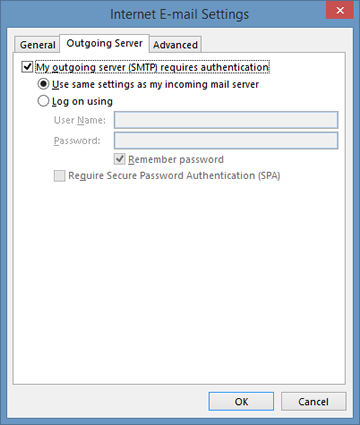
- Click the Outgoing Server tab and enter the following information:
- My outgoing server (SMTP) requires authentication: checked
- Use same settings as my incoming mail server: selected
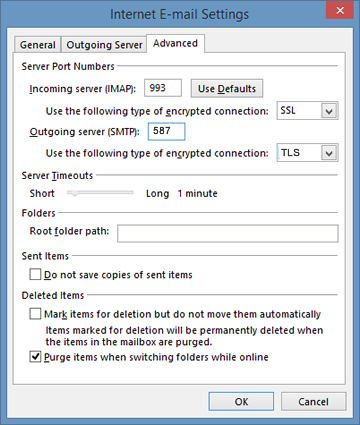
- Click the Advanced tab and enter the following information:
- Incoming server (IMAP): 993
- Use the following type of encrypted connection: SSL
- Outgoing server (SMTP): 587
- Use the following type of encrypted connection: TLS
(Make sure this doesn't change your outgoing server setting, above.) - Purge items when switching folders while online: checked
- Click OK to close the Internet E-mail Settings dialog box.
- In the Add Account window, click Next.
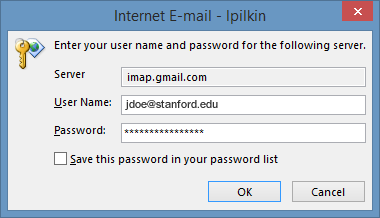
- You will be prompted for your password twice:
- For imap.gmail.com server: enter your sunetid@stanford.edu and your Google account password
- For smtp.stanford.edu server: enter your SUNetID and your SUNet ID password
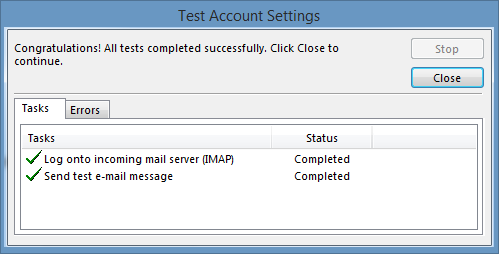
- Microsoft Outlook will send you a test message to verify that your account can send and receive email. If the Test Account Settings dialog box shows that the tests completed successfully, click Close. If the tests fail, recheck your configuration settings.
- You may be prompted to log in again with your SUNet ID and SUNet ID password.
- Click Finish to complete the setup of your email account.

